security
Installing VMware Workstation Pro 26H1
Here are the steps I took to install VMware Workstation Pro 26H1.
Meet the requirements
The number one issue why Workstation doesn’t install is failure to read the requirements. Ensure your hardware and your BIOS settings meet the requirements prior to installation.
Download Workstation
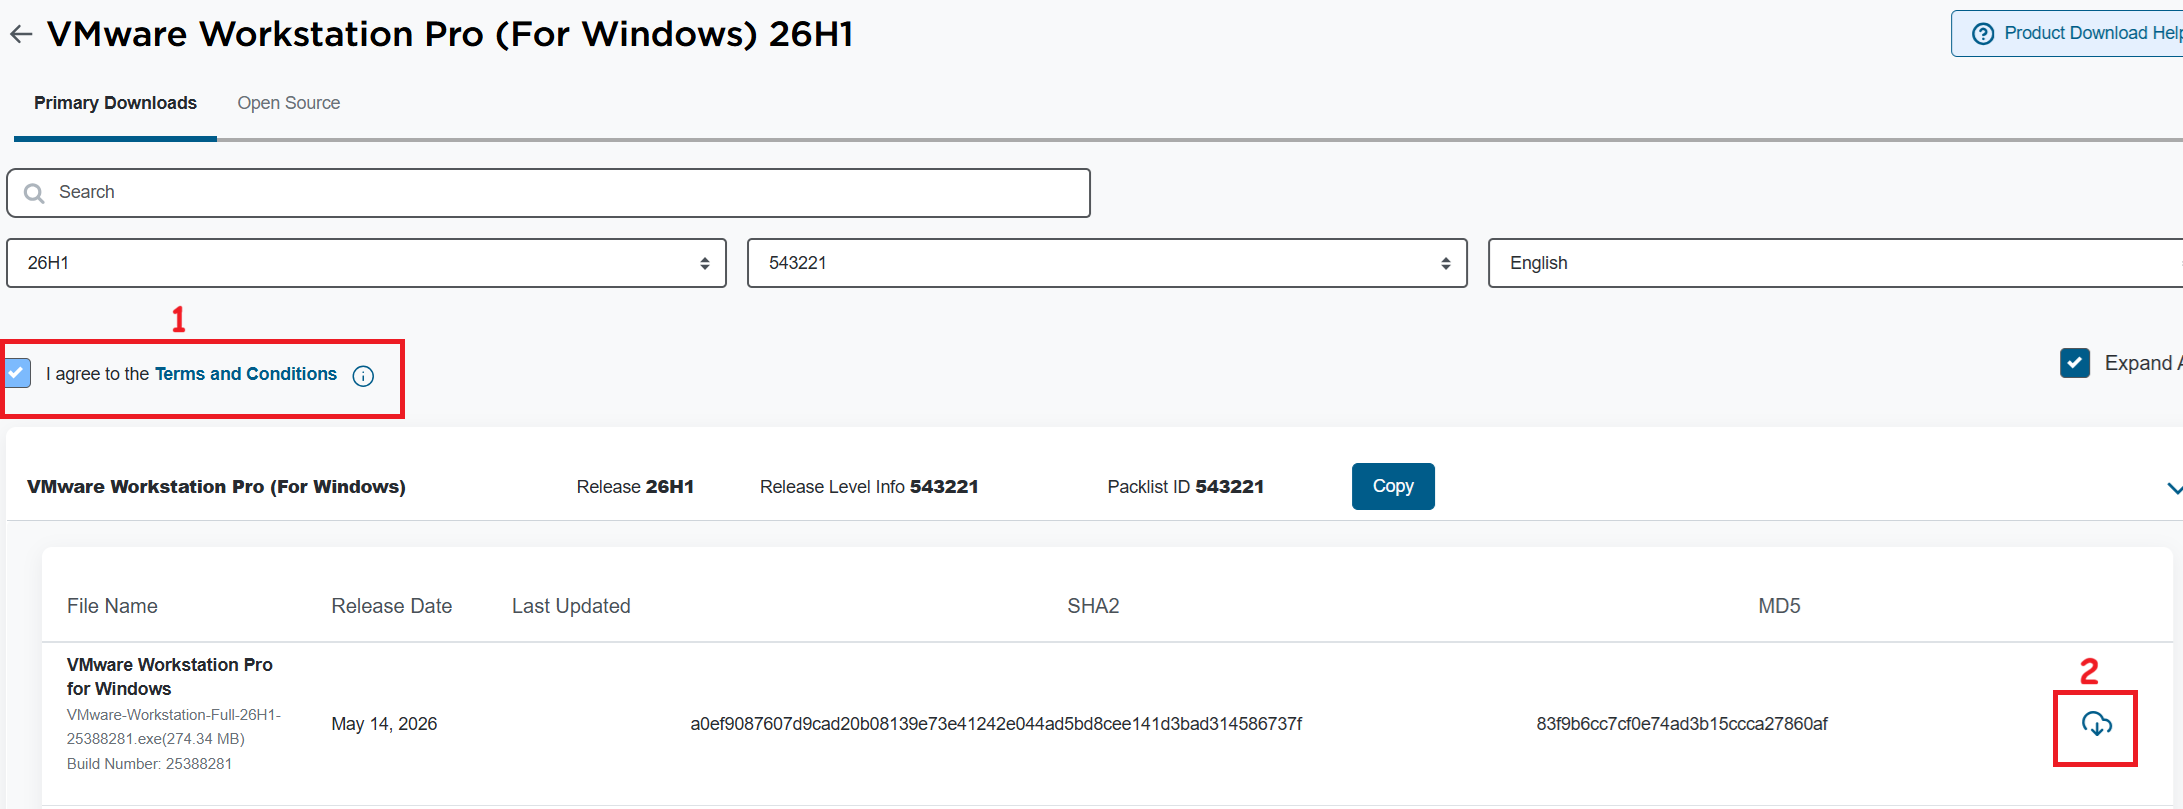
I’ll need to download VMware Workstation Pro 26H1. The good news is, it’s free and users can download it at the Broadcom support portal. Once you log in, you can find it under the downloads section under FREE Downloads. Need more guidance on the portal, see this KB.
Note: Make sure you click on the ‘Terms and Conditions’ plus the check box (1) before you click on the download icon (2).
Windows Settings
Disable Windows Virtualization Settings
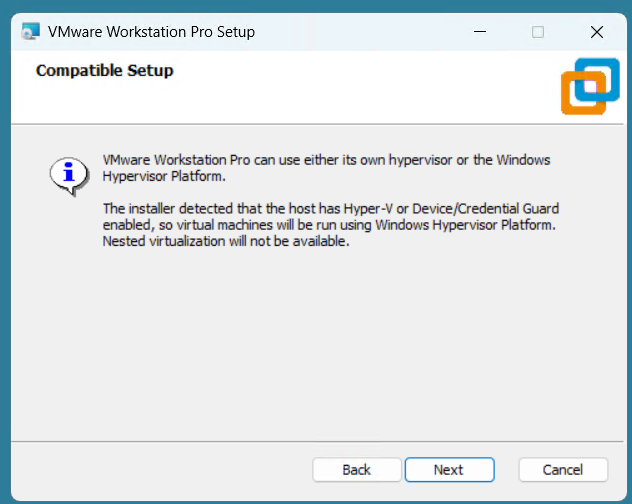
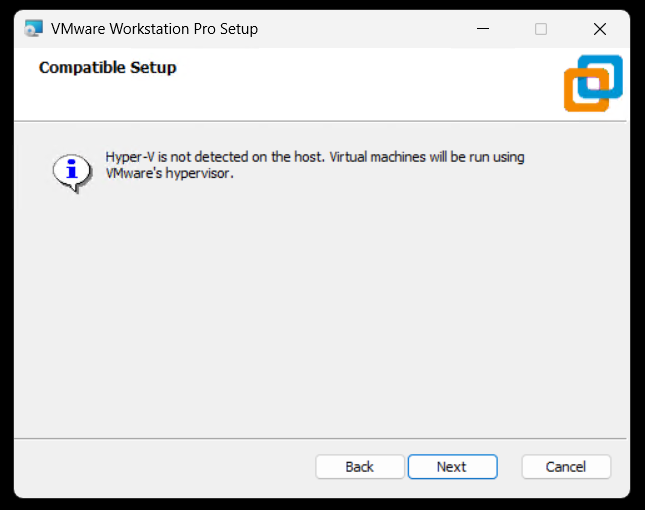
If you are deploying Workstation on to Windows the disablement of Hyper-V and Device Guard conflicts are important. Basically, Workstation needs these to be disabled to achieve optimal performance plus support nesting. If they are not disabled the following error will appear during the installation of Workstation.
Note: Before starting, I create a current Windows restore point prior to making the following changes.
To resolve this, I used the Microsoft Device Guard and Credential Guard Hardware Readiness Tool.
- Download the Device Guard and Credential Guard hardware readiness tool from Microsoft.
- Extract the downloaded ZIP file.
- Use the tool to disable Device Guard and Credential Guard:
- Open PowerShell window as an administrator.
- Navigate to the folder where you extracted the tool.
- First run this command to get Execution Policy:
- Set-ExecutionPolicy Unrestricted -Scope Process
- Now run the script with the -Disable parameter to disable Device and Credential Guard
- DG_Readiness_Tool_v3.6.ps1 -Disable
- Reboot your computer.
- During the boot process, Windows will ask you to confirm the changes. Follow the on-screen instructions to proceed (Just press F3).
- When complete your computer will reboot.
Workstation Installation
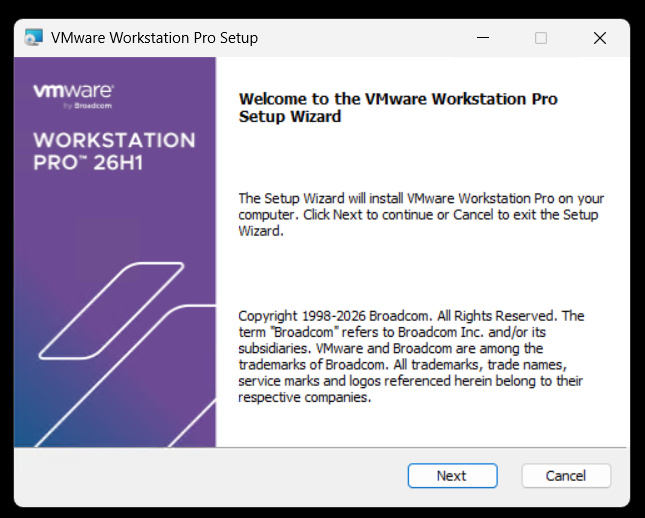
Launch the Workstation program and when prompted click Next.
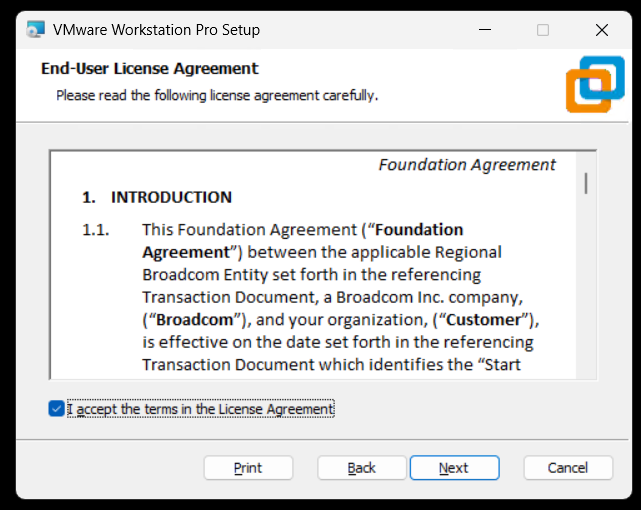
Check Accept and Click Next.
Ensure VMs are running on VMware Hypervisor.
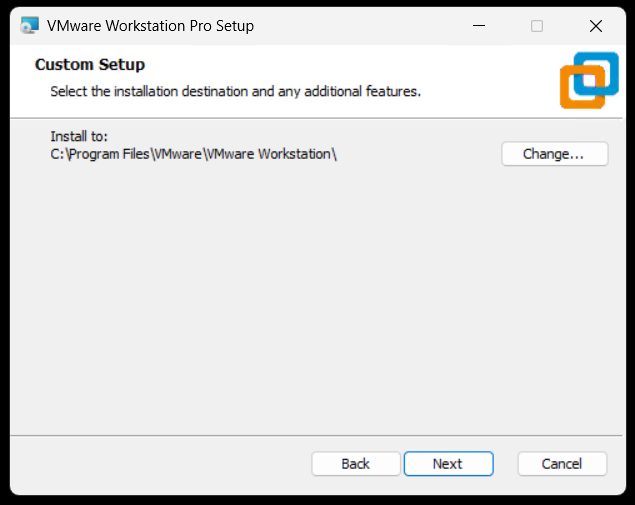
Ensure directory is correct and click next.
Click next to accept auto updates and joining the CEIP program.

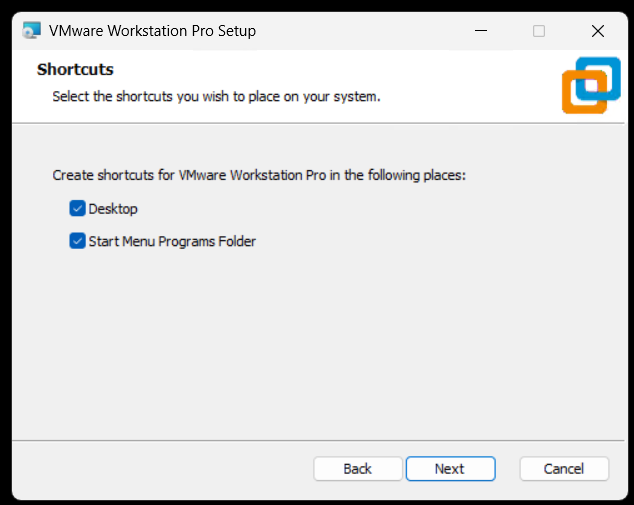
Click next to create shortcuts.
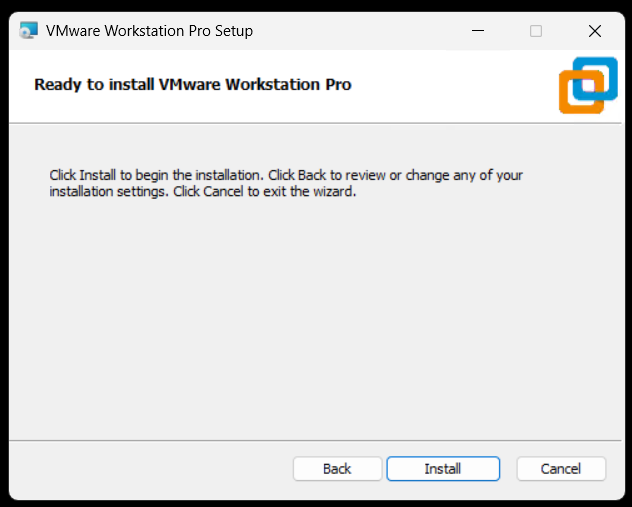
Click Install to install Workstation.
Allow the installer to complete and click Finish to finalize.
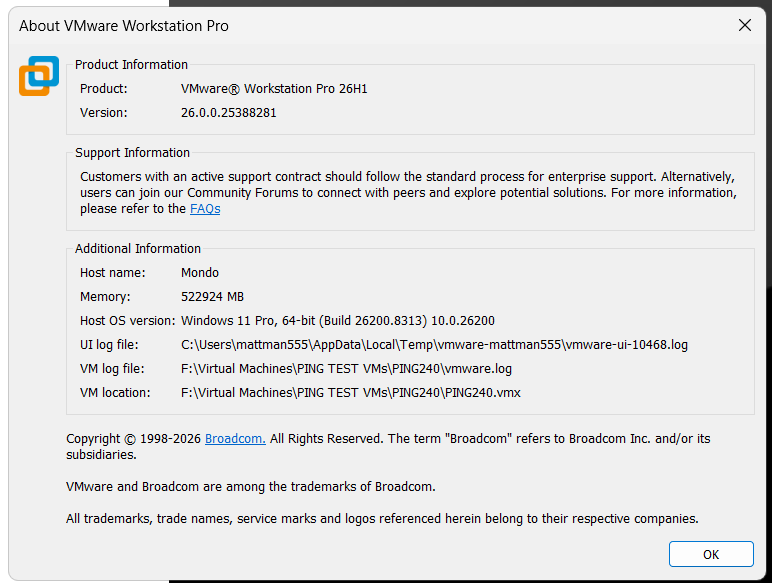
Open Workstation > Help > about to to validate install.
VMware Workstation Pro 26H1 is here and, its got a 64-Bit upgrade!!
The latest update to VMware Workstation Pro, version 26H1, has officially arrived! Whether you are a developer, a sysadmin, or a tech enthusiast, this release brings a host of updates designed to streamline your virtualization workflow and expand compatibility with the latest operating systems.
Personally, I’m excited to try out is new added support for 64-Bit applications/binaries.
What’s New
- VMware Workstation Pro 26H1 contains security and bug fixes.
- Added support for 64-Bit VMware Workstation Pro for Windows: VMware Workstation Pro for Windows is now available as a 64-bit application and all binaries, libraries, installer components, and related services are delivered and executed as 64-bit processes.
- Recording and reporting time stamps: You can easily identify virtual machines virtual machines by creation and last powered-on time stamp.
- Added support for remote connections to ARM-based ESX hosts, enabling basic virtual machine operations.
- Displaying virtual machine notes in folder tabs.
- Updated the saved credential format: You can easily identify encrypted virtual machines and remote server in the credential manager of the host platform.
- Added support for guest operating systems.
- Guest operating systems
- Ubuntu 26.04 LTS
- Fedora 43
- Fedora 44
- SUSE Linux Enterprise 16
- openSUSE 16.0
- FreeBSD 15.0
- Guest operating systems
- Added support for Host operating systems
- Ubuntu 26.04 LTS
- Fedora 43
- Fedora 44
- SUSE Linux Enterprise 16 GA
- openSUSE 16.0
Reminder: Workstation Pro is Now Free!
In case you missed the recent shift, VMware Workstation Pro is now free for personal, commercial, and educational use. You no longer need a license key to unlock the full power of the industry-standard desktop hypervisor. Just download, install, and start building.
Final Thoughts
The 26H1 release is a solid step forward, focusing on the “latest and greatest” in the OS world while giving power users better tools for customization. If you haven’t updated yet, now is the time to head over to the Broadcom Support Portal and grab the latest build.
Ready to upgrade? Check out the full technical details and resolved issues list in the official release notes.
Windows 11 Workstation VM asking for encryption password that you did not explicitly set
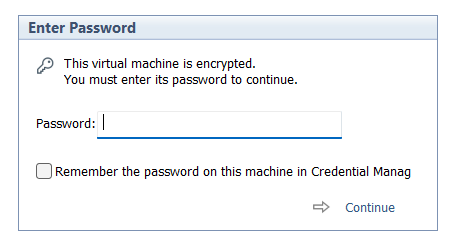
I had created a Windows 11 VM on Workstation 25H2 and then moved it to a new deployment of Workstation. Upon powerup it the VM stated I must supply a password (fig-1) as the VM was encrypted. In this post I’ll cover why this happened and how I got around it.
Note: Disabling TPM/Secure Boot is not recommended for any system. Additionally, bypassing security leaves systems open for attack. If you are curious around VMware system Hardening check out this great video by Bob Plankers.
(Fig-1)
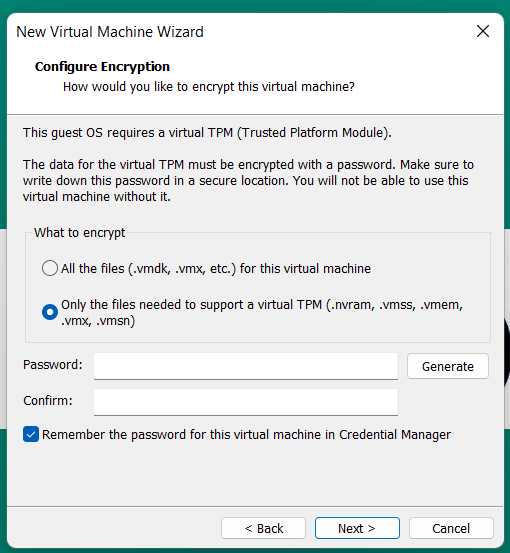
Why did this happen? As of VMware Workstation 17 encryption is required with a TPM 2.0 device, which is a requirement for Windows 11. When you create a new Windows 11×64 VM, the New VM Wizard (fig-2) asks you to set an encryption password or auto-generated one. This enables the VM to support Windows 11 requirements for TPM/Secure boot.
(Fig-2)
I didn’t set a password, where is the auto-generated password kept? If you allowed VMware to “auto-generate” the password, it is likely stored in your host machine’s credential manager. For Windows, open the Windows Credential Manager (search for “Credential Manager” in the Start Menu). Look for an entry related to VMware, specifically something like “VMware Workstation”.
I don’t have access to the PC where the auto-generated password was kept, how did I get around this? All I did was edit the VMs VMX configuration file commenting out the following. Then added the VM back into Workstation. Note: this will remove the vTPM device from the virtual hardware, not recommended.
# vmx.encryptionType
# encryptedVM.guid
# vtpm.ekCSR
# vtpm.ekCRT
# vtpm.present
# encryption.keySafe
# encryption.data
How could I avoid this going forward? 2 Options
Option 1 – When creating the VM, set and record the password.
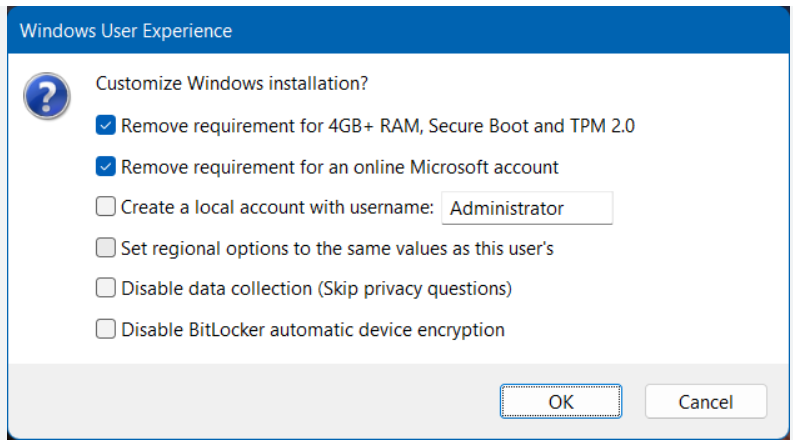
Option 2 – To avoid this all together, use Rufus to create a new VM without TPM/Secure boot enabled.
- Use Rufus to create a bootable USB drive with Windows 11. When prompted choose the options to disable Secure Boot and TPM 2.0.
- Once the USB is created create a new Windows 11×64 VM in Workstation.
- For creation options choose Typical > choose I will install the OS later > choose Win11x64 for the OS > chose a name/location > note the encryption password > Finish
- When the VM is completed, edit its settings > remove the Trusted Platform Module > then go to Options > Access Control > Remove Encryption > put in the password to remove it > OK
- Now attach the Rufus USB to the VM and boot to it.
- From there install Windows 11.
Wrapping this up — Bypassing security allowed me to access my VM again. However, it leaves the VM more vulnerable to attack. In the end, I enabled security on this vm and properly recorded its password.
VMware Workstation Gen 9: Part 3 Windows Core Services and Routing
A big part of my nested VCF 9 environment relies on core services. Core services are AD, NTP, DHCP, and RAS. Core services are supplied by my Windows Server (aka AD230.nested.local). Of those services, RAS will enable routing between the LAN Segments and allow for Internet access. Additionally, I have a VM named DomainTools. DomainTools is used for testing network connectivity, SSH, WinSCP, and other tools. In this blog I’ll create both of these VMs and adapt them to work in my new VCF 9 environment.
Create the Window Server and establish core services
A few years back I published a Workstation 17 YouTube multipart series on how to create a nested vSphere 8 with vSAN ESA. Part of that series was creating a Windows Server with core services. For my VCF 9 environment I’ll need to create a new Windows server with the same core services. To create a similar Windows Server I used my past 2 videos: VMware Workstation 17 Nested Home Lab Part 4A and 4B.
Windows Server updates the VCF 9 environment
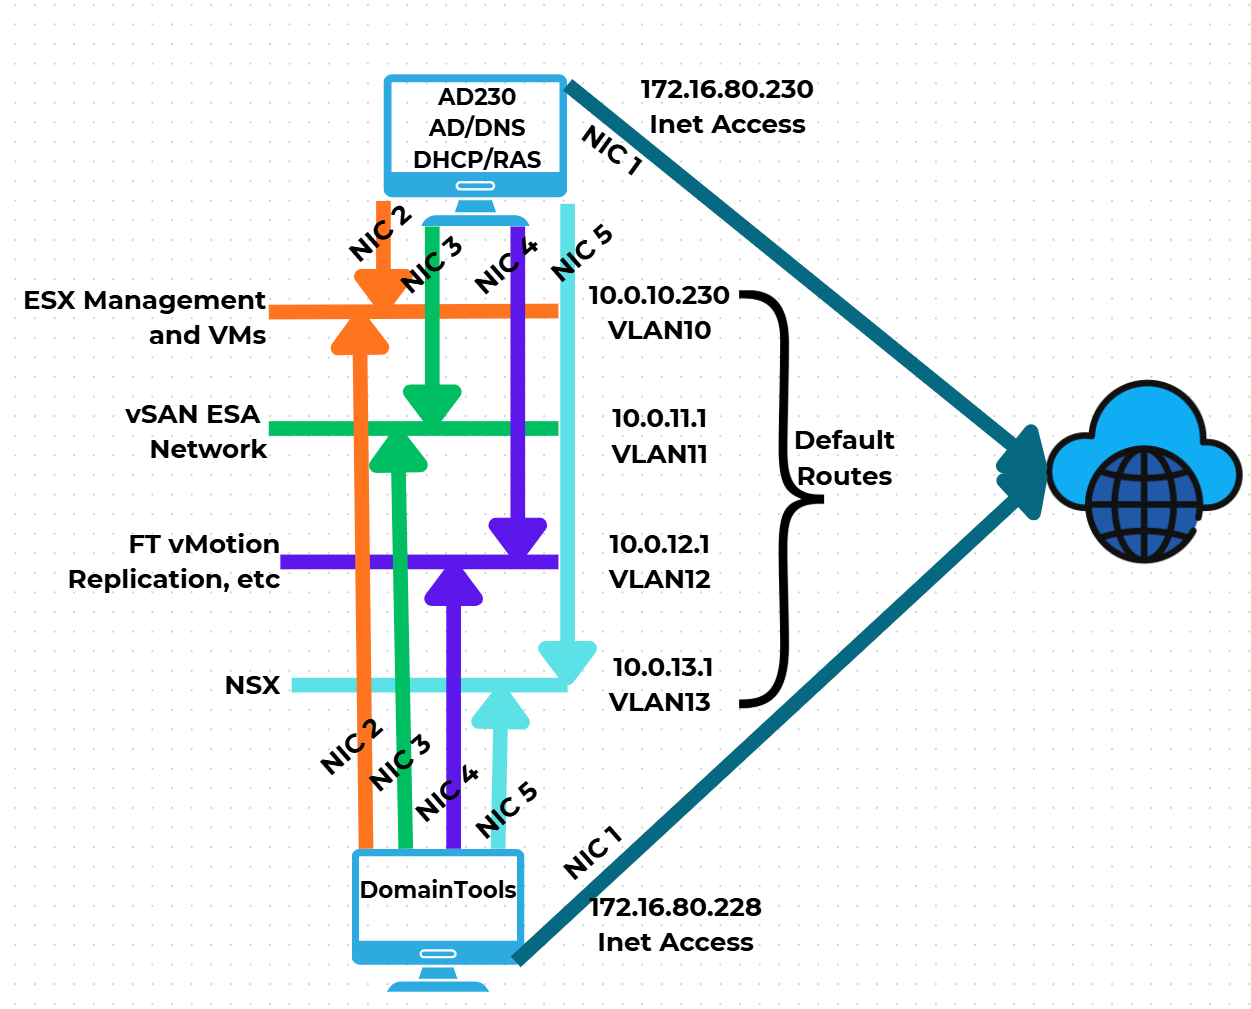
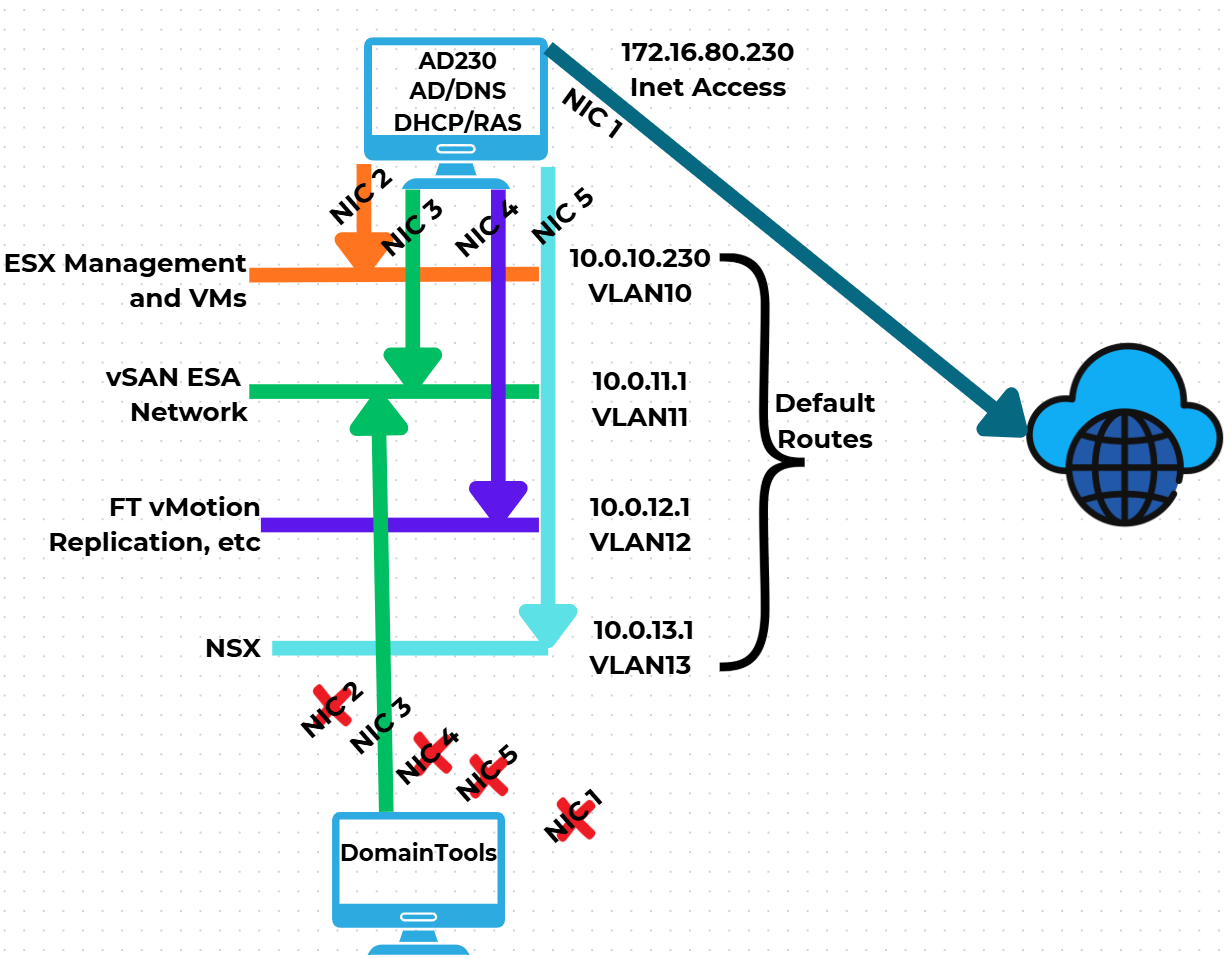
Now that I have established AD230 I need to update it to match the VCF 9 networks. I’ll be adding additional vNICs, attaching them to networks, and then ensuring traffic can route via the RAS service. Additionally, I created a new Windows 11 VM named DomainTools. I’ll use DomainTools for network connectivity testing and other functions. Fig-1 shows the NIC to network layout that I will be following.
(Fig-1)
Adjustments to AD230 and DomainTools
I power off AD230 and DomainTools. On both I add the appropriate vNICs and align them to the LAN segments. Next, I edit their VMware VM configuration file changing the vNICs from “e1000e” to “vmxnet3”.

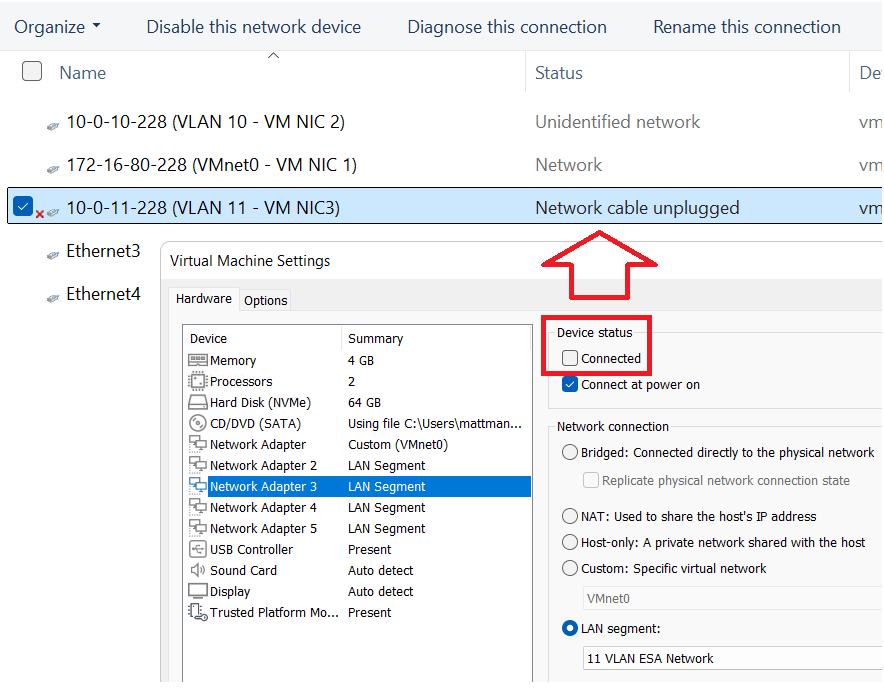
Starting with DomainTools for each NIC, I power it on, input the IPv4 information (IP Address, Subnet, VLAN ID), and optionally disable IPv6. The only NIC to get a Default Gateway is NIC1. TIP – To ID the NICs, I disconnect the NIC in the VM settings and watch for it to show unplugged in Windows Networking. This way I know which NIC is assigned to which LAN Segment. Additionally, in Windows Networking I add a verbose name to the NIC to help ID it.
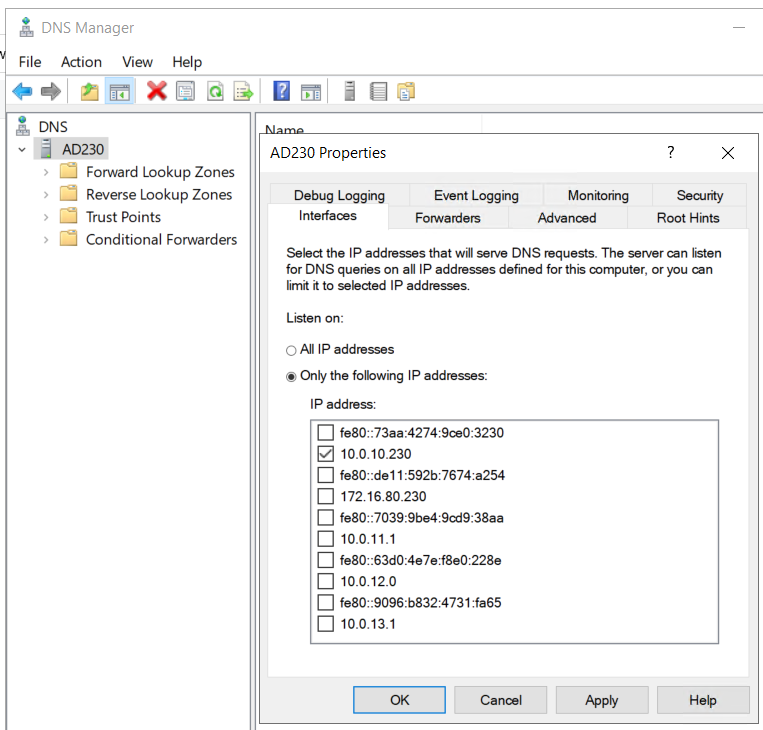
I make the same network adjustments to AD230 and I update its DNS service to only supply DNS from the 10.0.10.230 network adapter.
Once completed I do a ping test between all the networks for AD230 and DomainTools to validate IP Connectivity works. TIP – Use ipconfig at the CLI to check your adapter IP settings. If ping is not working there may be firewall enabled.
Setting up RAS on AD230
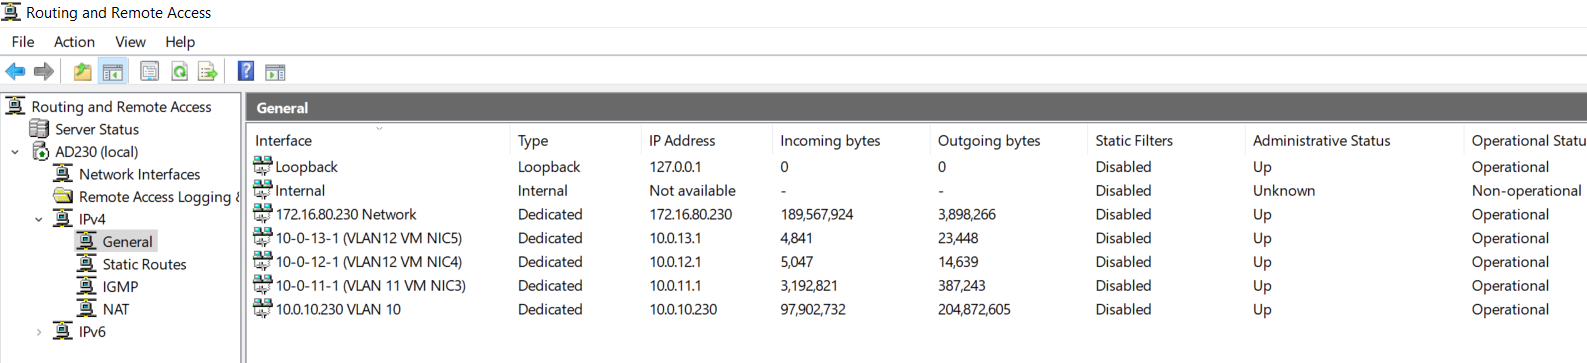
Once you have your network setup correctly validate that RAS has accepted your new adapters and their information. On AD230 I go in to RAS > IPv4 > General
I validate that my network adapters are present.
Looking ahead — RAS seemed to work right out of the box with no config needed. In all my testing below it worked fine, this may change as I advance my lab. If so, I’ll be sure to update my blog.
Next I need to validate routing between the different LAN Segments. To do this I’ll use the DomainTools VM to ensure routing is working correctly. You may notice in some of my testing results that VCF Appliances are present. I added this testing part after I had completed my VCF deployment.
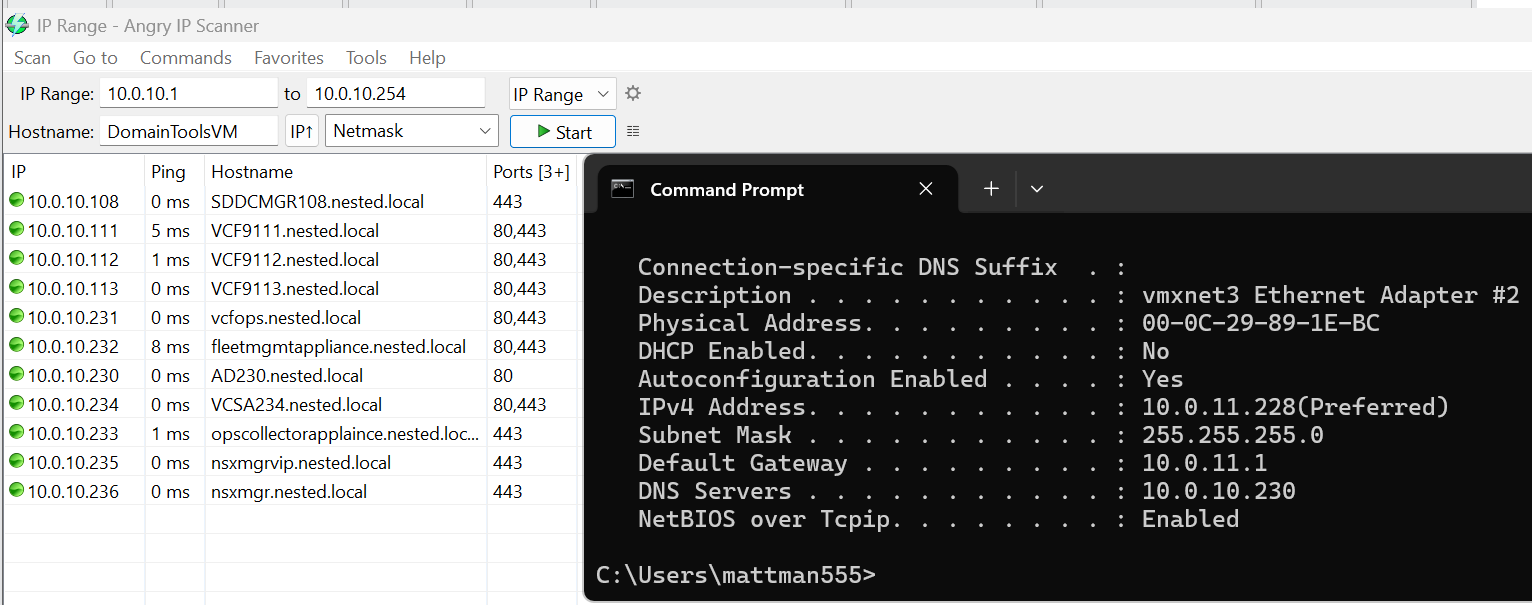
I need to test all of the VLAN networks. On the DomainTools VM, I disable each network adapter except for the one I want to test. In this case I disabled every adapter except for 10-0-11-228 (VLAN 11 – VM NIC3). I then add the gateway IP of 10.0.11.1 (this is the IP address assigned to my AD230 RAS server).
Next I do an ipconfig to validate the IP address, and use Angry IP Scanner to locate devices on the 10.0.10.x network. Several devices responded, plus resolving their DNS name, proving that DomainTools is successfully routing from the 11 network into the 10 network. I’ll repeat this process, plus do an internet check, on all the remaining networks.
Now that we have a stable network and core Window services established we are ready to move on to ESX Host Deployment and initial configuration.
