vcf9
VMware Workstation Performance enhancements
There can be a multitude of factors that could impact performance of your Workstation VMs. Running a VCF 9 stack on VMware Workstation demands every ounce of performance your Windows 11 host can provide. To ensure a smooth lab experience, certain optimizations are essential. In this post, I’ll walk through the key adjustments to maximize efficiency and responsiveness.
Note: There are a LOT of settings I did to improve performance. I take a structured approach by trying things slowly vs. applying all. The items listed below are what worked for my system and it’s recommend for that use case only. Unless otherwise stated, the VM’s and Workstation were powered down during these adjustments.
Items recently covered in my VMware Workstation Gen 9: BOM1 deployment.
- Host BIOS/UFEI Settings
- Check out my blog under the ‘BIOS settings’ for more information.
- Hardware Design:
- Fast Storage: NVMe, SSD, and U.2 all contribute to VM performance
- Placement of VM files: We placed and isolated our ESX VMs on specific disks which helps to ensure better performance
- PCIe Placement: Using the system block diagram I placed the devices in their optimal locations
- Ample RAM: Include more than enough RAM to support the VCF 9 VMs
- CPU cores: Design enough CPU cores to support the VCF 9 VMs
- Video Card: Using a power efficient GPU can help boost VM performance
- VM Design
- Disk Choices: Matched the VM disk type to the physical drive type they are running on. Example – NVMe physical to a VMs NVMe disk
- CPU Settings: Match physical CPU Socket(s) to VM CPU settings.
- vHardware Choices: When creating a VM, Workstation should auto-populate hardware settings. Best vNIC to use is the vmxnet3. You can use the Guest OS Guide to validate which virtual hardware devices are compatible.
- Fresh Installs
- There’s nothing like a fresh install of the base OS to be a reliable foundation for performance improvments.
- When Workstation is installed it adapts to the base OS. There can be performance gains due to this adaption.
- However, if you upgrade the OS (Win10 to Win11) with Workstation already installed, you should always fully uninstall and reinstall Workstation post upgrade for optimal performance.
- Additionally, when installing Workstation I ensure that Hyper-V is disabled as it can impact Workstation performance.
- Disable Side-Channel Mitigations (Core Isolation)
- Disabling these can boost performance, especially on older processors, but may reduce security.
New Items to help with performance
Exclude Virtual Machine Directories From Antivirus Tools
NOTE — AV exceptions exclude certain files, folders, and processes from being scanned. By adding these you can improve Workstation performance but there are security risks in enabling AV Exceptions. Users should do what’s best for their environment. Below is how I set up my environment.
- Script:
- Use a script to create AV Exceptions. For an example check out my blog – Using PowerShell to setup AV exceptions for Workstation 25H2u1 and Windows 11.
- Manual Steps:
- Open Virus and Threat Protection
- Virus & threat protection settings > Manage Settings
- Under ‘Exclusion’ choose ‘Add or remove exclusions’
- Click on ‘+ Add an exclusion’
- Choose your type (File, Folder, File Type, Process)
- File Type: Exclude these specific VMware file types from being scanned:
- .vmdk: Virtual machine disk files (the largest and most I/O intensive).
- .vmem: Virtual machine paging/memory files.
- .vmsn: Virtual machine snapshot files.
- .vmsd: Metadata for snapshots.
- .vmss: Suspended state files.
- .lck: Disk consistency lock files.
- .nvram: Virtual BIOS/firmware settings.
- Folder: Exclude the following directories to prevent your antivirus from interfering with VM operations
- VMware Installation folder
- VM Storage Folders: Exclude the main directory where you store your virtual machines
- Installation Folder: Exclude the VMware Workstation installation path (default:
C:\Program Files (x86)\VMware\VMware Workstation\). - VMware Tools: If you have the VMware Tools installation files extracted locally, exclude that folder as well.
- Process: Adding these executable processes to your antivirus exclusion list can prevent lag caused by the AV monitoring VMware’s internal actions:
- vmware.exe: The main Workstation interface.
- vmware-vmx.exe: The core process that actually runs each virtual machine.
- vmnat.exe: Handles virtual networking (NAT).
- vmnetdhcp.exe: Handles DHCP for virtual networks.
Power Plan
Typically by default Windows 11 has the “Balanced” Power plan enabled. Though these settings are good for normal use cases, using your system as a dedicated VMware Workstation requires a better plan.
Below I show 2 ways to adjust a power plan. 1) Using a script to create a custom plan or 2) manually make similar adjustments.
- 1) Script: I created a script that creates a custom power plan named “VMware Workstation Performance Plan” and makes all the needed changes for my system. You can find my blog here.
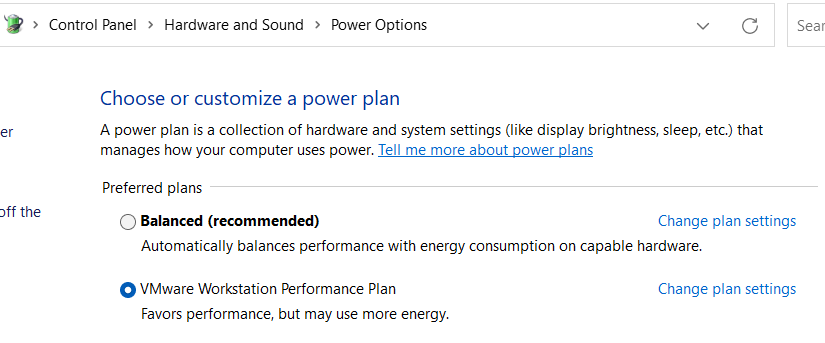
- 2) Manual Adjustments:
- Open the power plan. Control Panel > Hardware and Sound > Power Options > Change settings that are currently unavailable
- You might see on every page “Change settings that are currently unavailable”, just click on it before making changes.
- Set Power Plan:
- Click on ‘Hide Additional Plans’.
- Choose either “Ultimate Performance” or “High Performance” plan and then click on “Change plan settings”
- Hard Disk > 0 Minutes
- Wireless Adapter Settings > Max Performance
- USB > Hub Selective Suspend Time out > 0
- PCI Express > Link State Power Management > off
- Processor power management > Both to 100%
- Display > Turn off Display > Never
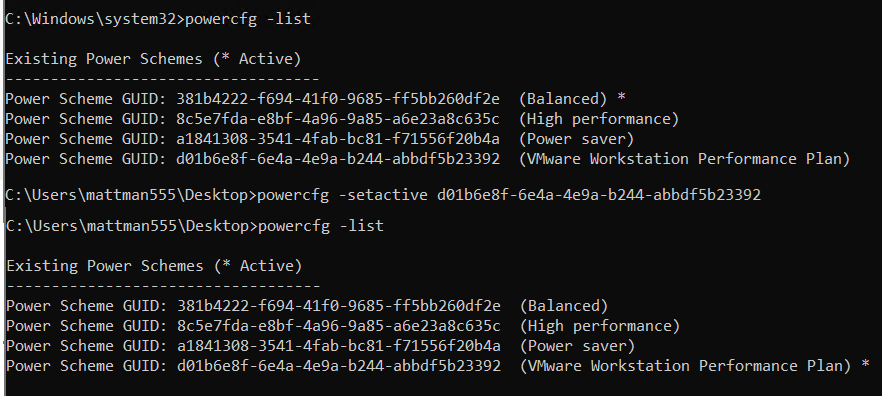
Lastly, make sure the correct power plan is active. I used the commands ‘powercfg -list’ to show the active plan and then ‘powercfg -setactive GUID’, replacing GUID with the plan I wanted.
Power Throttling (Not very common)
Power throttling in Windows 11 is an intelligent, user-aware feature that automatically limits CPU resources for background tasks to conserve energy and extend battery life. By identifying non-essential, background-running applications, it reduces power consumption without slowing down active, foreground apps.
To determine if it is active go in to System > Power and look for Power Mode
If you are using a high performance power plan usually this feature is disabled.
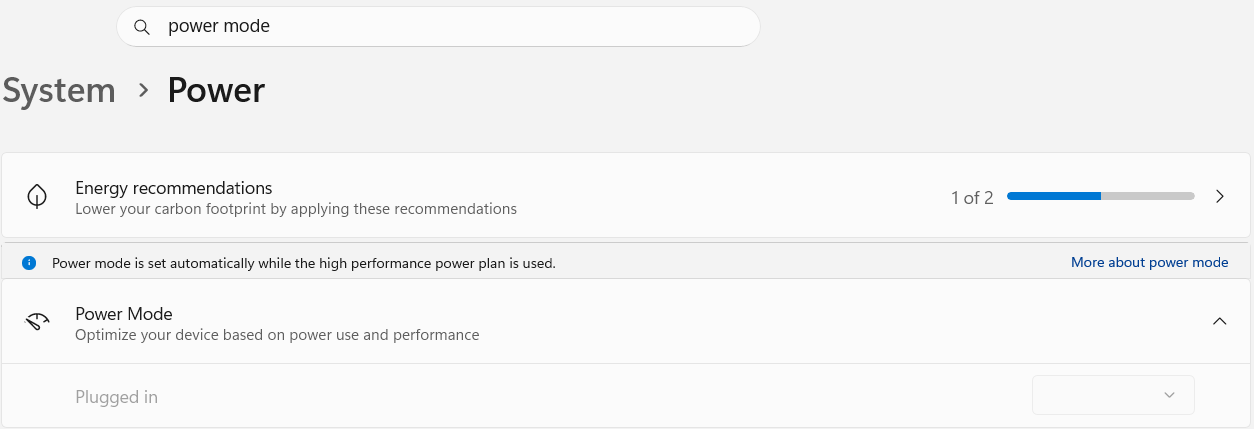
If you are running a power plan where this is enabled, and you don’t want to disable it, then you can maximize your performance by disabling power throttling for the Workstation executable.
powercfg /powerthrottling disable /path “C:\Program Files (x86)\VMware\VMware Workstation\x64\vmware-vmx.exe”
Sleep States
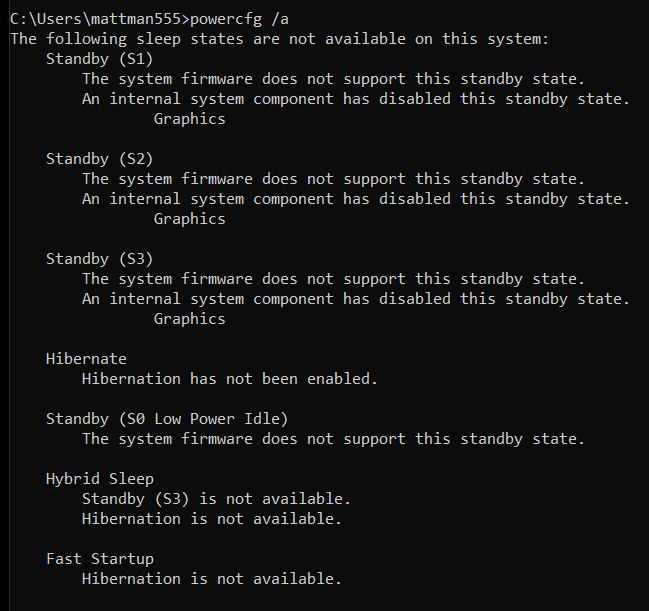
Depending on your hardware you may or may not have different Sleep states enabled. Ultimately, for my deployment I don’t want any enabled.
To check if any are from a command prompt type in ‘powercfg /a’ and adjust as needed.
Workstation Memory Page files
In my design I don’t plan to overcommit physical RAM (640GB ram) for my nested VM’s. To maximize the performance and ensure VMware Workstation uses the physical memory exclusively, I follow these steps: Configure global memory preferences, Disable Memory Trimming for each VM, Force RAM-Only Operation, and adjust the Windows Page Files.
Configure Global Memory Preferences
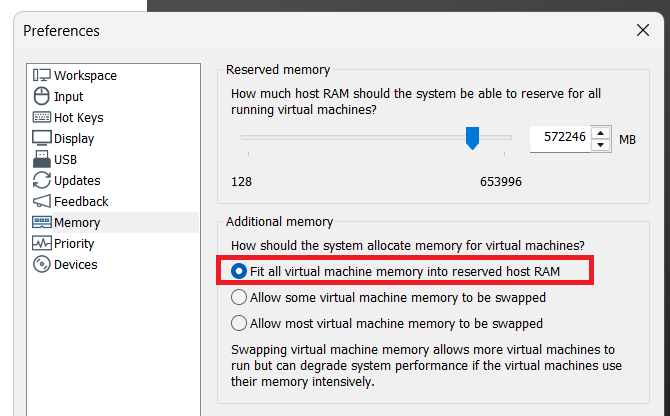
- This setting tells VMware how to prioritize physical RAM for all virtual machines running on the host.
- Open Workstation > Edit > Preferences > Memory
- In the Additional memory section, select the radio button for “Fit all virtual machine memory into reserved host RAM”.
Disable Memory Trimming for each VM:
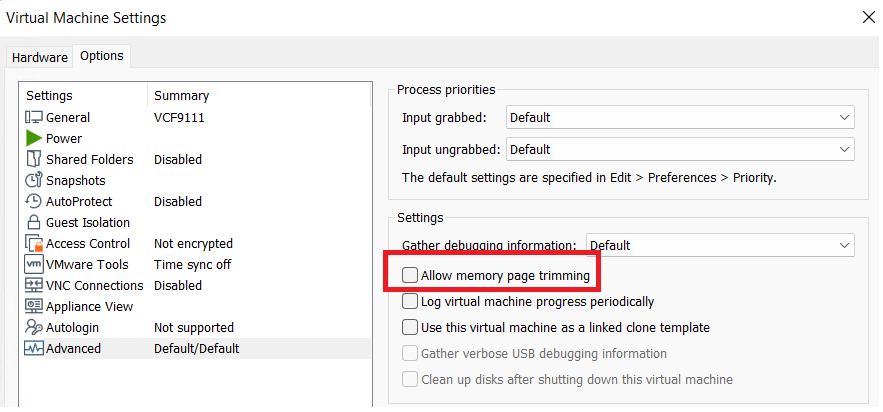
- Windows and VMware use “trimming” to reclaim unused VM memory for the host. Since RAM will not be overallocated, I disable this to prevent VMs from ever swapping to disk.
- Right-click your VM and select Settings
- Go to the Options tab and select the Advanced category.
- Un-Check the box to disable memory page trimming.
- Click OK and restart the VM
Force RAM-Only Operation (config.ini):
- This is an advanced step that prevents VMware from creating
.vmemswap files, forcing it to use physical RAM or the Windows Page File instead. - Close VMware Workstation completely.
- Navigate to C:\ProgramData\VMware\VMware Workstation\ in File Explorer (Note: ProgramData is a hidden folder).
- Open the file named config.ini with Notepad (you may need to run Notepad as Administrator).
- Add the following lines to the end of the file:
- mainMem.useNamedFile = “FALSE”
- prefvmx.minVmMemPct = “100”
- Save the file and restart your computer
Windows Page Files
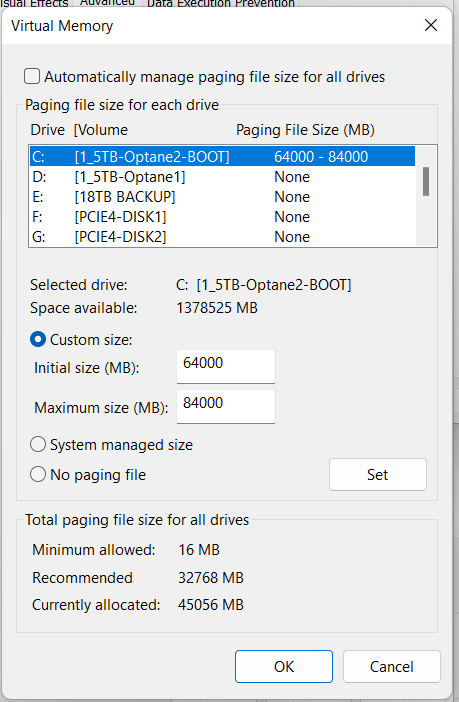
- With 640GB of RAM Windows 11 makes a huge memory page file. Though I don’t need one this large I still need one for crash dumps, core functionality, and memory management. According to Microsoft, for a high-memory workstation or server, a fixed page file of 16GB to 32GB is the “sweet spot.” I’m going a bit larger.
- Go to System > About > Advanced system Settings
- System Properties window appears, under Performance choose ‘Settings’
- Performance Options appears > Advanced > under Virtual memory choose ‘change’
- Uncheck ‘Automatically manage paging…’
- Choose Custom size, MIN 64000 and MAX 84000
- Click ‘Set’ > OK
- Restart the computer
Windows Visual Effects Performance
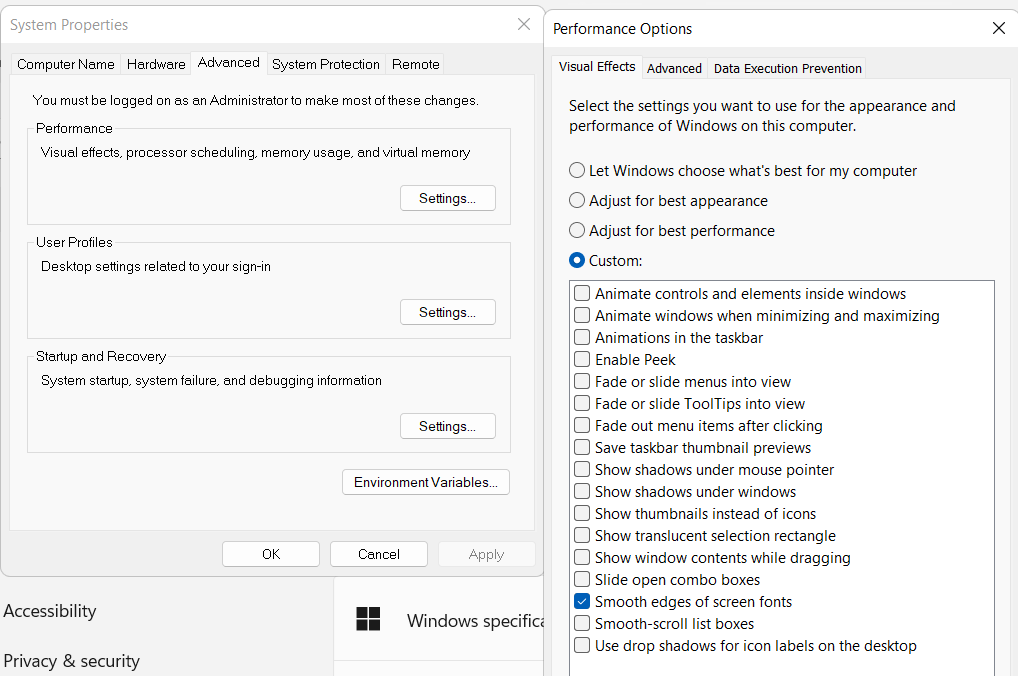
The visual effects in Windows 11 can be very helpful but they can also minimally slow down your performance. I prefer to create a custom profile and only enable ‘Smooth edges of screen fonts’
- Go to System > About > Advanced system Settings
- System Properties window appears,
- On the Advanced Tab, under Performance choose ‘Settings’
- On the Visual Effect tab choose ‘Custom’ and I chose ‘Smooth edges of screen fonts’
Disable BitLocker
Windows 11 (especially version 24H2 and later) may automatically re-enable encryption during a fresh install or major update. By default to install Windows 11 it requires TPM 1.2 or higher chip (TPM 2.0 recommended/standard for Win11), and UEFI firmware with Secure Boot enabled. BitLocker uses these features to “do its work”. To disable I do the following.
- Registry Edit (Post-Installation – may already be set):
- Press Win + R, type regedit, and press Enter
- Navigate to: HKEY_LOCAL_MACHINE\SYSTEM\CurrentControlSet\Control\BitLocker
- Right-click in the right pane, select New > DWORD (32-bit) Value
- Name it PreventDeviceEncryption and set its value to 1
- Disable the Service:
- Press Win + R, type services.msc, and press Enter.
- Find BitLocker Drive Encryption Service.
- Right-click it, select Properties, set the “Startup type” to Disabled, and click Apply.
Clean out unused Devices:
Windows leaves behind all types of unused devices that are hidden from your view in device manager. Though these are usually pretty harmless its a best practice to clean them up from time to time.
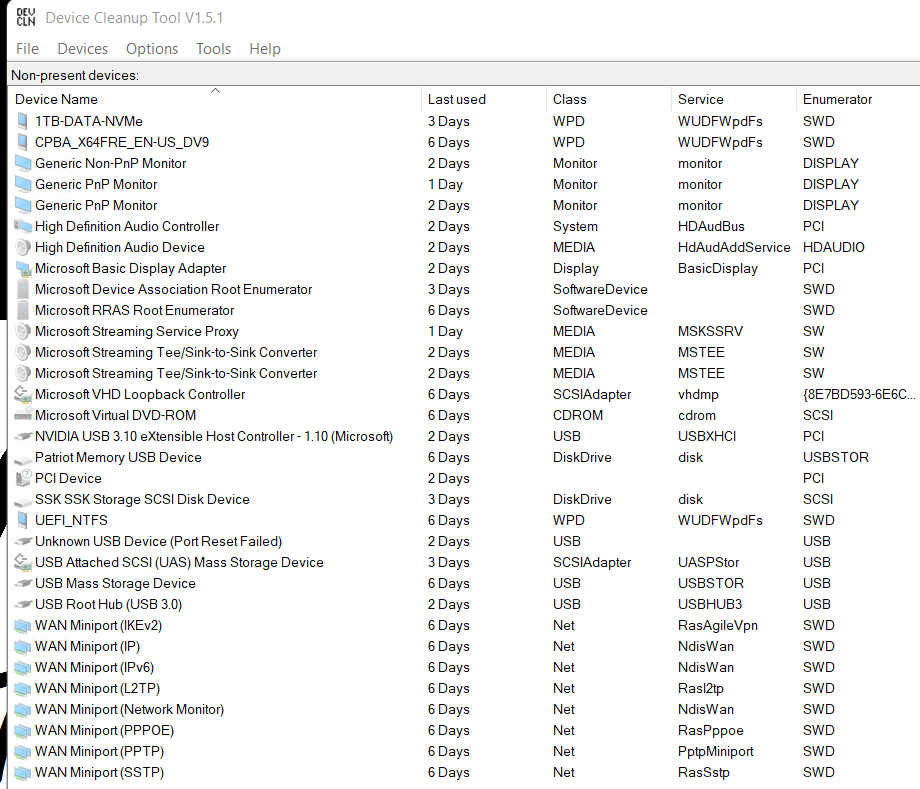
The quickest way to do this is using a tool called Device Cleanup Tool. Check out my video for more how to with this tool.
Here is Device Cleanup Tool running on my newly (<2 months) installed system. As you can see unused devices can build up even after a short time frame.
Debloat, Clean up, and so much more
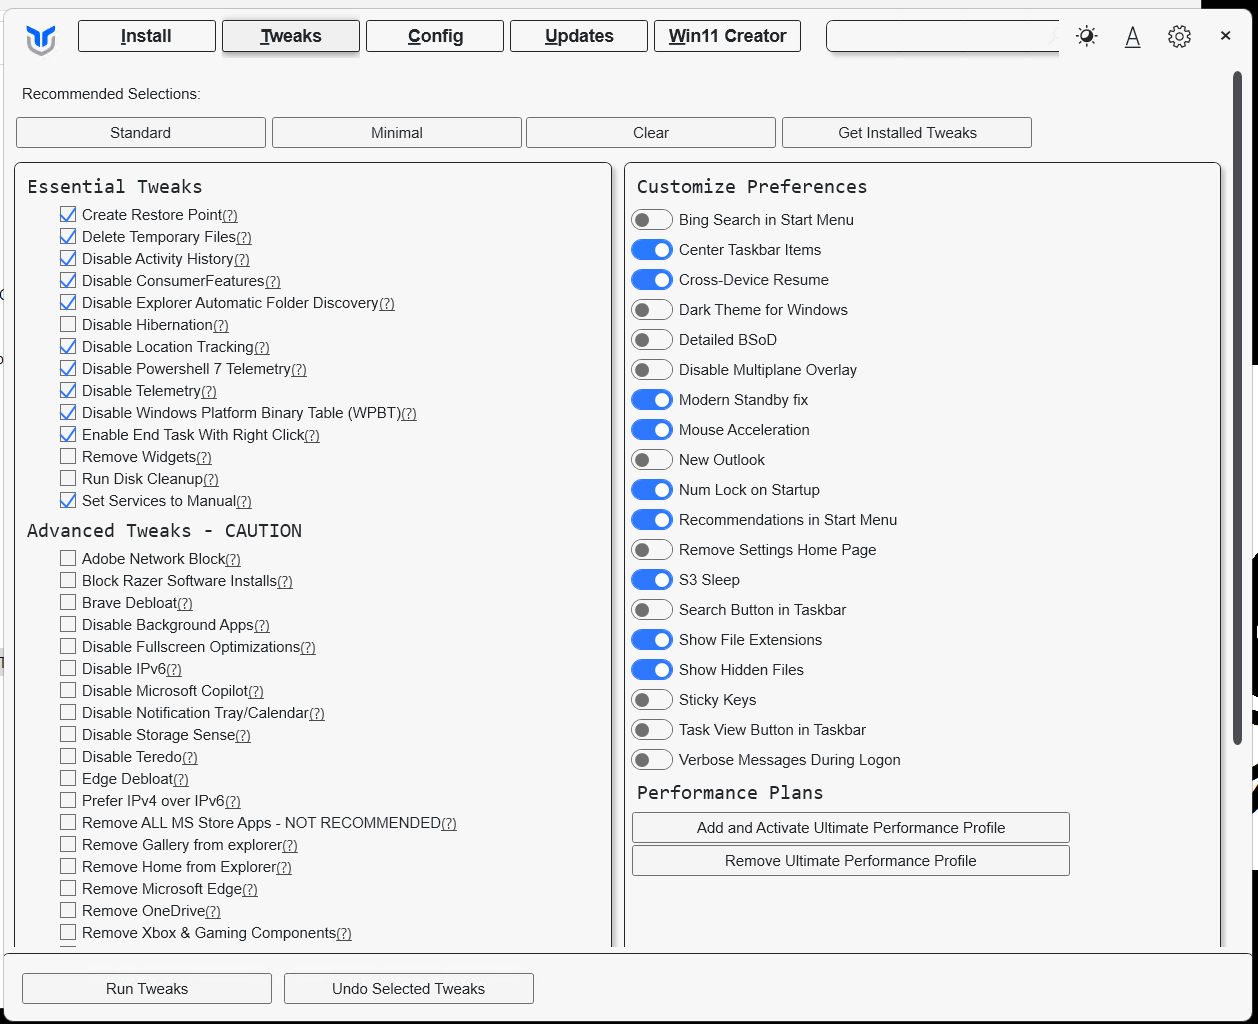
There are several standard Windows based features, software, and cleanup tools that can impact the performance of my deployment. I prefer to run tools that help optimize Windows due to their ability to complete tasks quickly. The tool I use to debloat and clean up my system is Winutil. It’s been a proven util for not only optimizing systems, installing software, updates, but helping to maintain them too. For more information about Winutil check out their most recent update.
For ‘Tweaking’ new installs I do the following:
- Launch the WinUtil program
- Click on Tweaks
- Choose Standard
- Unselect ‘Run Disk Cleanup’
- Click on Run Teaks
Additionally, you may have noticed Winutil can create an Ultimate Preforamnce power plan. That may come in handy.
Remove Windows Programs:
Here is a list of all the Windows Programs I remove, they are simply not needed for a Workstation Deployment. Some of these can be removed using the WinUtil most I remove with Revo Uninstaller Free Edition.
- Cortana
- Co-polit
- Camera
- Game Bar
- Teams
- News
- Mail and Calendar
- Maps
- Microsoft OneDrive
- Microsoft to do
- Movies and TV
- People
- Phone Link
- Solitare
- Sticky Notes
- Tips
- Weather
- Xbox / xbox live
References and Other Performance Articles:
My Silicon Treasures: Mapping My Home Lab Motherboards Since 2009
I’ve been architecting home labs since the 90s—an era dominated by bare-metal Windows Servers and Cisco products. In 2008, my focus shifted toward virtualization, specifically building out VMware-based environments. What began as repurposing spare hardware for VMware Workstation quickly evolved. As my resource requirements scaled, I transitioned to dedicated server builds. Aside from a brief stint with Gen8 enterprise hardware, my philosophy has always been “built, not bought,” favoring custom component selection over off-the-shelf rack servers. I’ve documented this architectural evolution over the years, and in this post, I’m diving into the the specific motherboards that powered my past home labs.
Gen 1: 2009-2011 GA-EP43-UD3L Workstation 7 | ESX 3-4.x
Back in 2009, I was working for a local hospital in Phoenix and running the Phoenix VMUG. I deployed a Workstation 7 Home lab on this Gigabyte motherboard. Though my deployment was simple, I was able deploy ESX 3.5 – 4.x with only 8GB of RAM and attach it to an IOMega ix4-200d. I used it at our Phoenix VMUG meetings to teach others about home labs. I found the receipt for the CPU ($150) and motherboard ($77), wow price sure have changed.
REF Link – Home Lab – Install of ESX 3.5 and 4.0 on Workstation 7
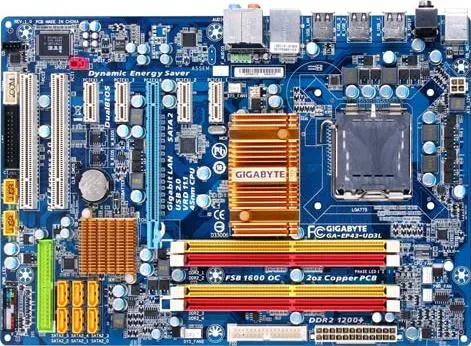
Gen2: 2011-2013 Gigabyte GA-Z68XP-UD3 Workstation 8 | ESXi 4-5
Gen1 worked quite well for what I needed but it was time to expand as my I started working for VMware as a Technical Account Manager. I needed to keep my skills sharp and deploy more complex home lab environments. Though I didn’t know it back then, this was the start of my HOME LABS: A DEFINITIVE GUIDE. I really started to blog about the plan to update and why I was making different choices. I ran into a very unique issues that even Gigabyte or Hitachi could figure out, I blogged about here.
Deployed with an i7-2600 ($300), Gigabyte GA-Z68XP-UD3 ($150), and 16GB DDR3 RAM
REF Link: Update to my Home Lab with VMware Workstation 8 – Part 1 Why
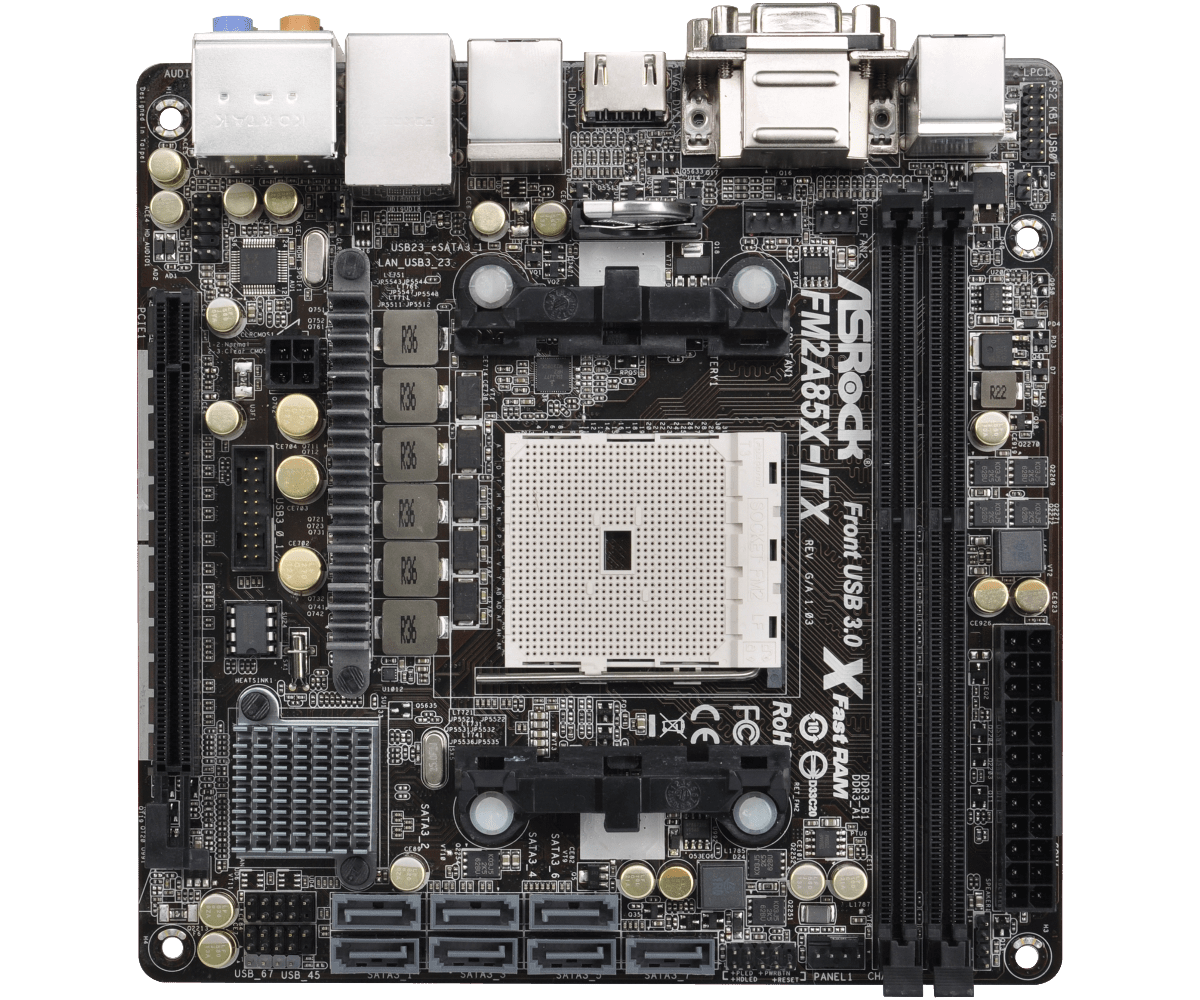
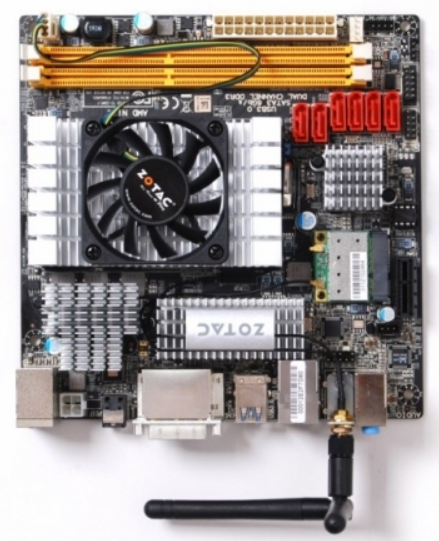
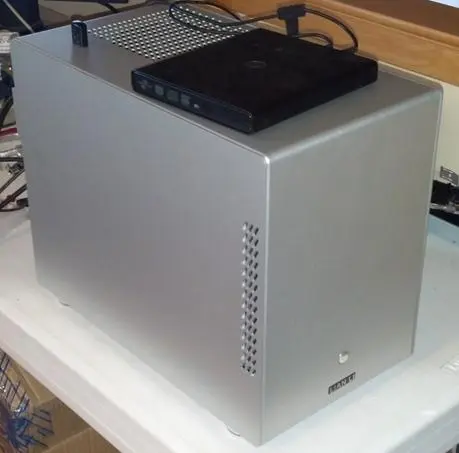
Gen2: Zotac M880G-ITX then the ASRock FM2A85X-ITX | FreeNAS Sever
Back in the day I needed better performance from my shared storage as the IOMega had reached its limits. Enter the short lived FreeNAS server to my home lab. Yes it did preform better but man it was full of bugs and issues. Some due to the Zotac Motherboard and some with FreeNAS. I was happy to be moving on to vSAN with Gen3.
REF: Home Lab – freeNAS build with LIAN LI PC-Q25, and Zotac M880G-ITX
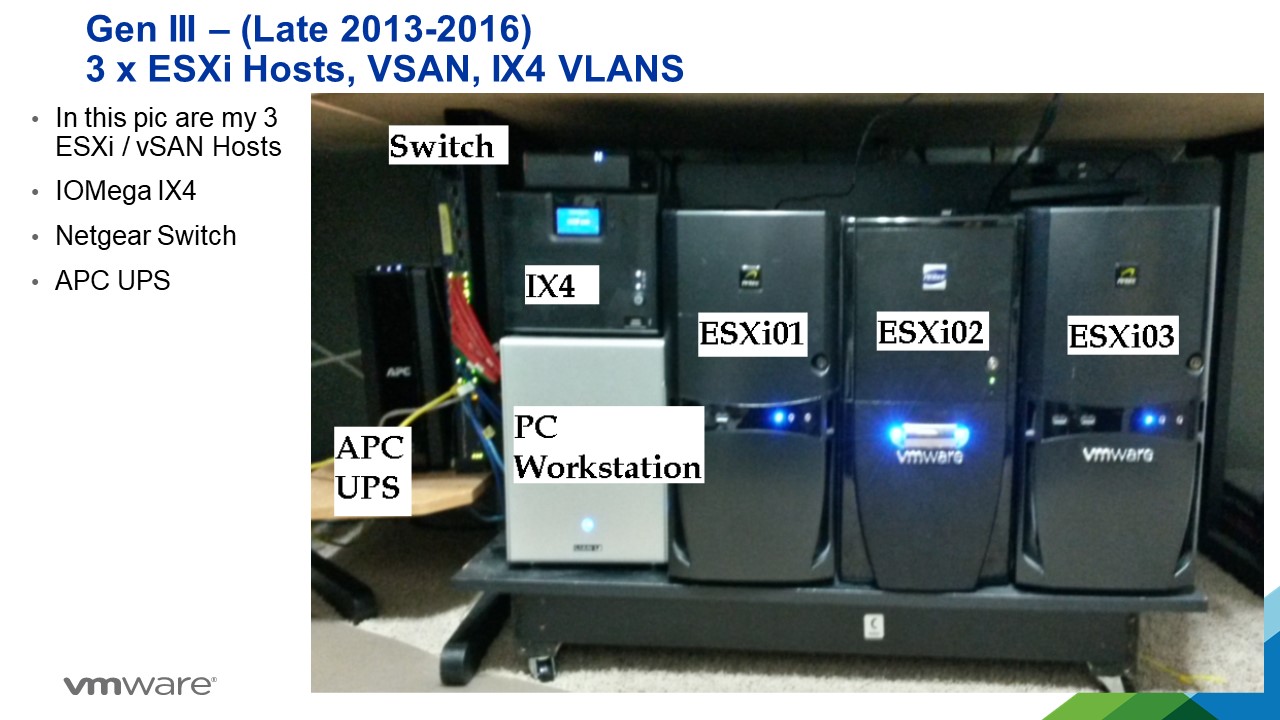
Gen3: 2012-2016 MSI Z68MA-G45 (B3) | ESXi 5-6
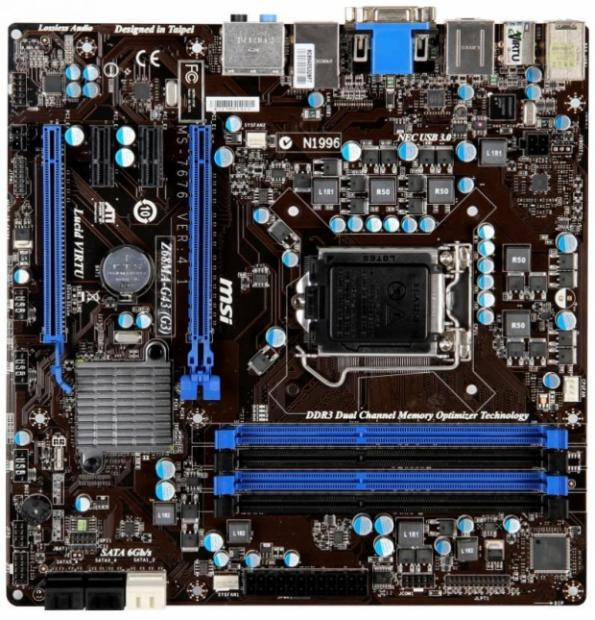
I needed to expand my home lab into dedicated hosts. Enter the MSI Z68MA-G45 (B3). It would become my workhorse expanding it from one server with the Gen 2 Workstation to 3 dedicated hosts running vSAN.
REF: VSAN – The Migration from FreeNAS
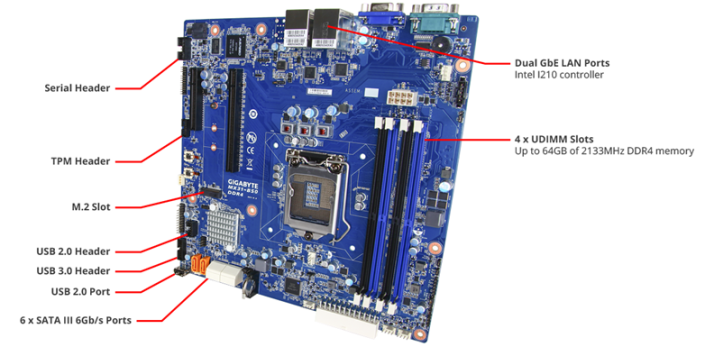
Gen4: 2016-2019 Gigabyte MX31-BS0
This mobo was used in my ‘To InfiniBand and beyond’ blog series. It had some “wonkiness” about its firmware updates but other then that it was a solid performer. Deployed with a E3-1500 and 32GB RAM
REF: Home Lab Gen IV – Part I: To InfiniBand and beyond!
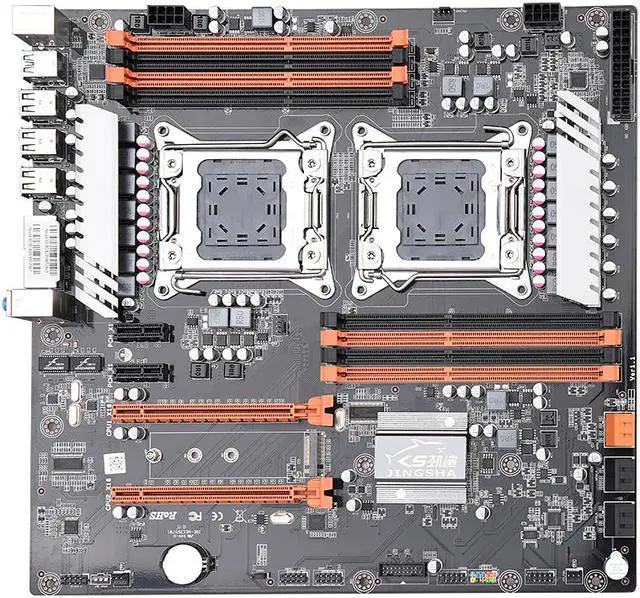
Gen 5: 2019-2020 JINGSHA X79
I had maxed out Gen 4 and really needed to expand my CPU cores and RAM. Hence the blog series title – ‘The Quest for More Cores!’. Deployed with 128GB RAM and Xeon E5-2640 v2 8 Cores it fit the bill. This series is where I started YouTube videos and documenting my builds per my design guides. Though this mobo was good for its design its lack of PCIe slots made it short lived.
REF: Home Lab GEN V: The Quest for More Cores! – First Look
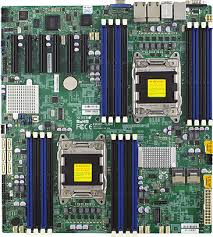
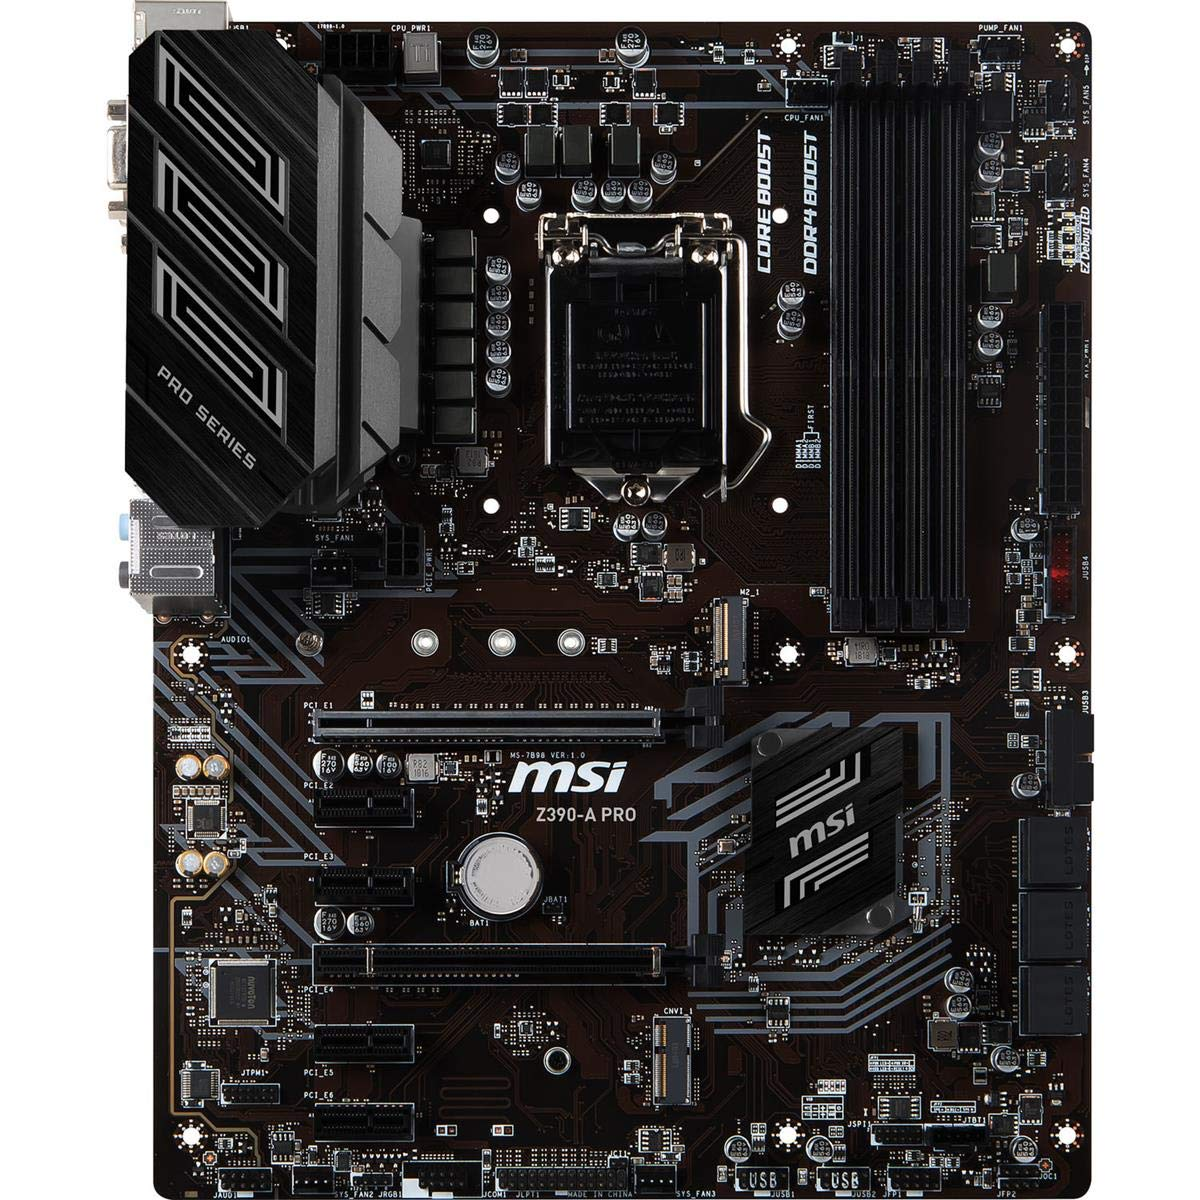
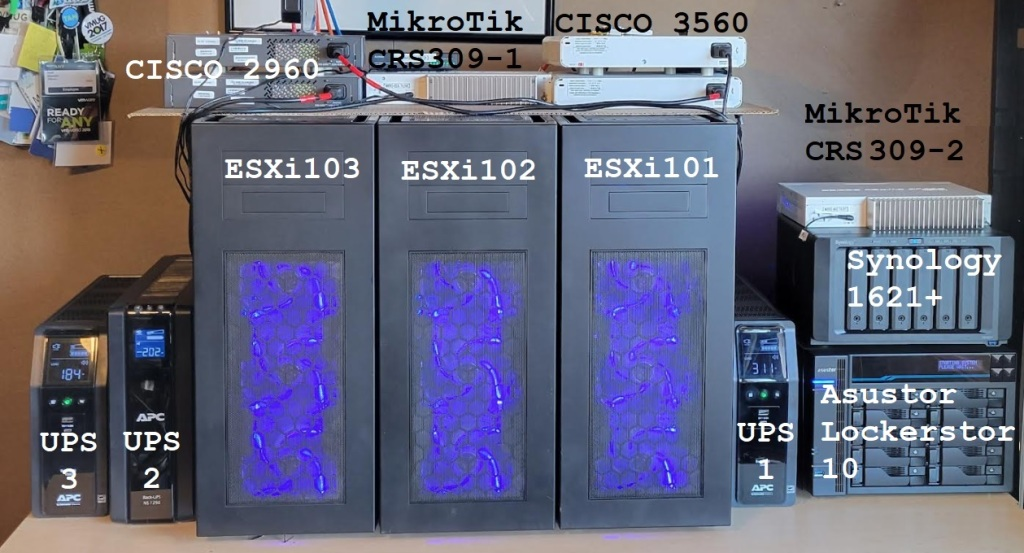
Gen 7: 2020-2023: Supermicro X9DRD-7LN4F-JBOD and the MSI PRO Z390-A PRO
Gen 5 motherboard fell short when I wanted to deploy and all flash vSAN based on NVMe. With this Supermicro motherboard I had no issues with IO and deploying it as all Flash vSAN. It also gathered the attention of Intel to which they offered me their Optane drives to create an All Flash Optane system. More on that in Gen 8.
The MSI motherboard was a needed update to my VMware Workstation system. I built it up as a Workstation / Plex server and it did this job quite well.
This generation is when I started to align my Gen#s to vSphere releases. Makes it much easier to track.
REF: Home Lab Generation 7: Updating from Gen 5 to Gen 7
Gen 8: 2023-2024 Dell T7820 VMware Dedicated Hosts
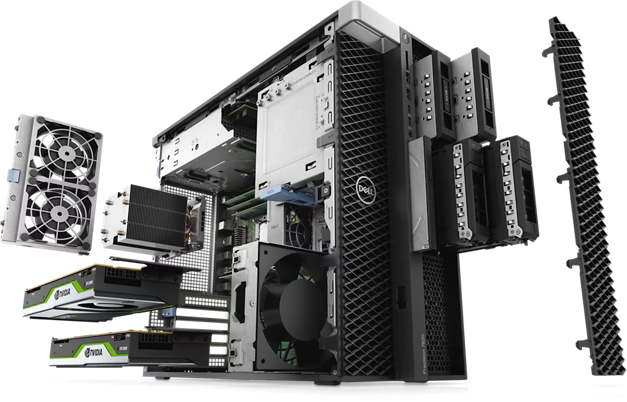
With some support from Intel I was able to uplift my 3 x Dell T7820 workstations into a great home lab. They supplied Engineering Samples CPUs, RAM, and Optane Disks. Plus I was able to coordinate the distribution of Optane disks to vExperts Globally. It was a great homelab and I leaned a ton!
REF: Home Lab Generation 8 Parts List (Part 2)
Gen 8-9: 2023-2026 ASRack Rock EPC621D8A VMware Workstation Motherboard
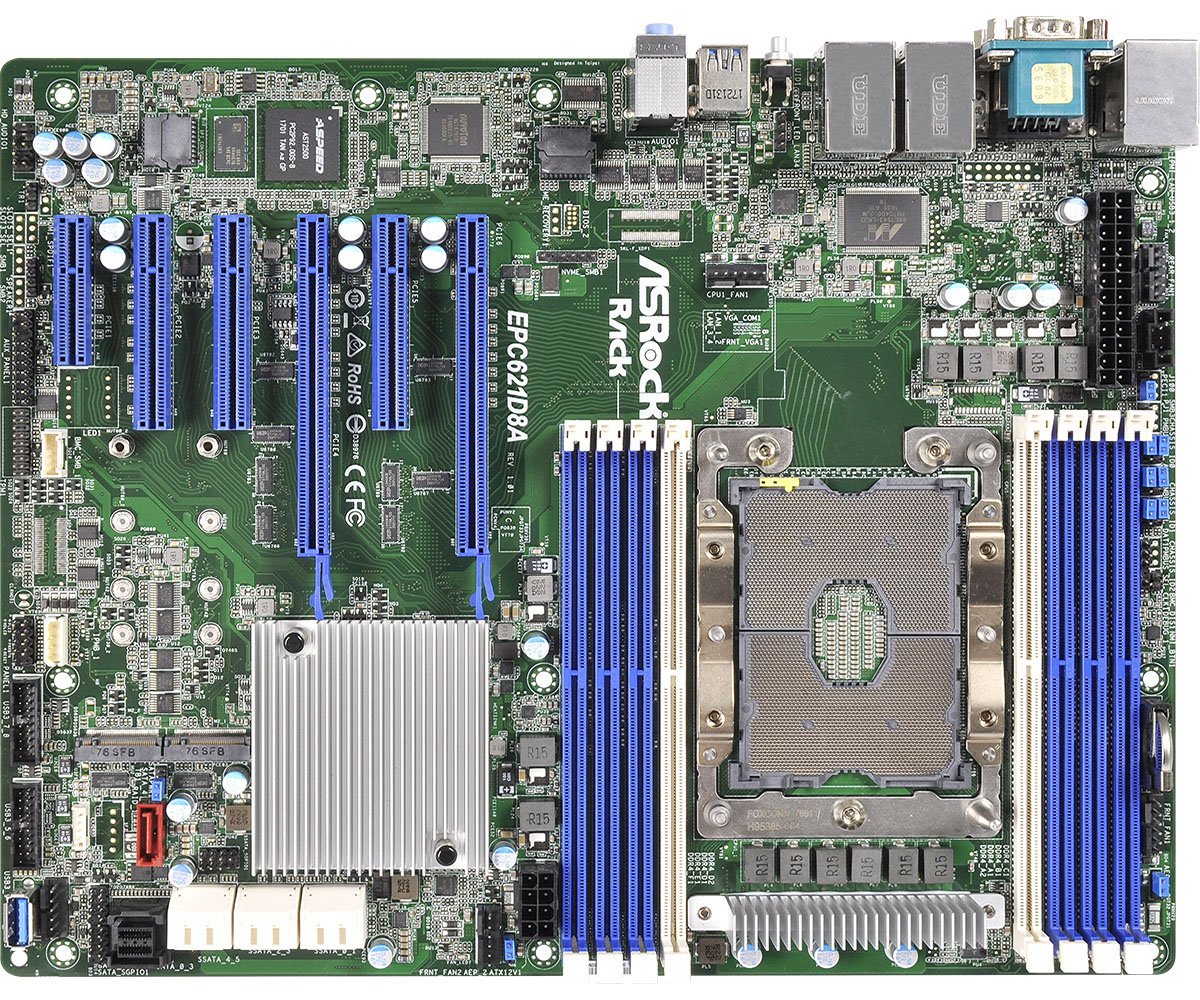
Evolving my Workstation PC I used this ASRack Rock motherboard. It was the perfect solution for running nested clusters of ESXi VMs with vSAN ESA. It was until most recently a really solid mobo and I even got it to run nested VCF 9 simple install.
REF: Announcing my Generation 8 Super VMware Workstation!
Gen 9: 2024 – Current
As of this date its still under development. See my Home Lab BOM for more information. However, I’m moving my home lab to only nested VCF 9 deployment on Workstation and not dedicated servers.

