Windows 11 Workstation VM asking for encryption password that you did not explicitly set
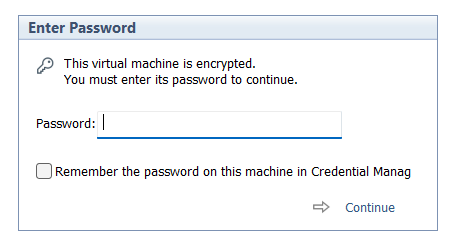
I had created a Windows 11 VM on Workstation 25H2 and then moved it to a new deployment of Workstation. Upon powerup it the VM stated I must supply a password (fig-1) as the VM was encrypted. In this post I’ll cover why this happened and how I got around it.
Note: Disabling TPM/Secure Boot is not recommended for any system. Additionally, bypassing security leaves systems open for attack. If you are curious around VMware system Hardening check out this great video by Bob Plankers.
(Fig-1)
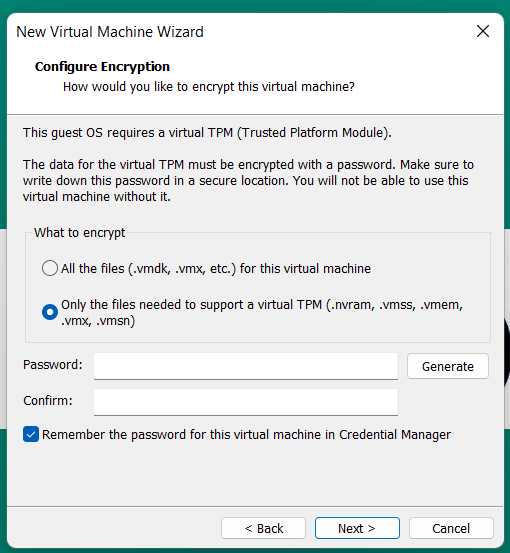
Why did this happen? As of VMware Workstation 17 encryption is required with a TPM 2.0 device, which is a requirement for Windows 11. When you create a new Windows 11×64 VM, the New VM Wizard (fig-2) asks you to set an encryption password or auto-generated one. This enables the VM to support Windows 11 requirements for TPM/Secure boot.
(Fig-2)
I didn’t set a password, where is the auto-generated password kept? If you allowed VMware to “auto-generate” the password, it is likely stored in your host machine’s credential manager. For Windows, open the Windows Credential Manager (search for “Credential Manager” in the Start Menu). Look for an entry related to VMware, specifically something like “VMware Workstation”.
I don’t have access to the PC where the auto-generated password was kept, how did I get around this? All I did was edit the VMs VMX configuration file commenting out the following. Then added the VM back into Workstation. Note: this will remove the vTPM device from the virtual hardware, not recommended.
# vmx.encryptionType
# encryptedVM.guid
# vtpm.ekCSR
# vtpm.ekCRT
# vtpm.present
# encryption.keySafe
# encryption.data
How could I avoid this going forward? 2 Options
Option 1 – When creating the VM, set and record the password.
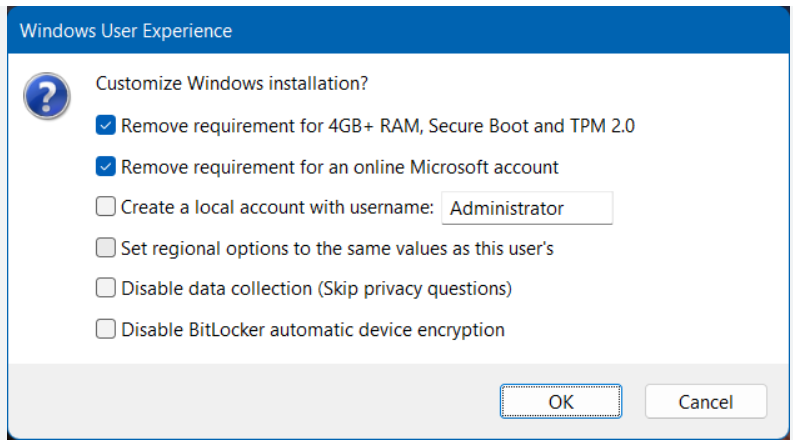
Option 2 – To avoid this all together, use Rufus to create a new VM without TPM/Secure boot enabled.
- Use Rufus to create a bootable USB drive with Windows 11. When prompted choose the options to disable Secure Boot and TPM 2.0.
- Once the USB is created create a new Windows 11×64 VM in Workstation.
- For creation options choose Typical > choose I will install the OS later > choose Win11x64 for the OS > chose a name/location > note the encryption password > Finish
- When the VM is completed, edit its settings > remove the Trusted Platform Module > then go to Options > Access Control > Remove Encryption > put in the password to remove it > OK
- Now attach the Rufus USB to the VM and boot to it.
- From there install Windows 11.
Wrapping this up — Bypassing security allowed me to access my VM again. However, it leaves the VM more vulnerable to attack. In the end, I enabled security on this vm and properly recorded its password.

February 7, 2026 at 3:34 pm
Mine just did this today. I have to ask that if the encryption is this easy to circumvent, it isn’t really protecting anybody from anything. I mean, seriously, comment out half a dozen lines in a VMX file and it’s totally open?
LikeLike
February 10, 2026 at 6:34 am
Hey Greg, great question! So technically on a physical machine you can disable secure boot or remove the TPM after installation. When we edit the VMX on a virtual machine we are doing the same thing. However, depending on what was installed on Windows 11, example – BitLocker, Windows Hello, or other software dependent on these, it may fail to boot. In this blog I didn’t have anything dependent upon TPM or Secure boot so I was able to disable them and boot the VM. Hope this helps.
LikeLike