Home Lab
Quick NAS Topics: Serial USB Server with the LOCKERSTOR 10
In this Quick NAS Topic video I go over how to install VirutalHere USB Server on the LOCKERSTOR 10 and its client on my Windows 10 PC. This enables the client to establish a link to the a USB NULL Model Cable which is connected directly into the NAS. Once established I’m able to use putty to create a serial SSH connection.
** Products in this Video **
- LOCKERSTOR 10 https://www.asustor.com/en/product?p_id=64
- Mikrotik CRS309-1G-8S+IN https://mikrotik.com/product/crs309_1g_8s_in
- VirtualHere https://www.virtualhere.com/home
- StarTech.com USB to Serial RS232 Adapter https://www.amazon.com/USB-Serial-Adapter-Modem-9-pin/dp/B008634VJY?th=1

Quick NAS Topics: Create your own iperf3 Docker Container
In this Quick NAS Topic video and the steps further below, I use docker to create a ubuntu container with Linux tools and iperf3.
This video is a supplement for the 10Gbe Home NAS Lab Part 7. In Part 7 I show how to use these containers to network performance test the 3 NAS devices I have.
Notes:
- Create your own Docker Account – https://hub.docker.com/signup
- My Docker Repository – https://hub.docker.com/u/vmexplorer
- A Blog around using a Docker Image that has Iperf3 but limits you to server mode only.
Docker Ubuntu/iperf3 Basic Steps: Items in-between [ ] and the brackets should be removed
- On the NAS:
- Ensure devices can access the inet OR not covered in this blog, you’ll need to manually import and export images, etc.
- Ensure Docker-ce and if needed Shell-in-a-box and portainer are installed and basic configuration is done. The Synology didn’t need shell in a box or portainter
- Test Docker Install
- docker -v << Shows the version
- docker images << Show the images that are available
- docker ps << Shows the running containers
- Elevate local privileges to run docker commands
- It may be necessary to use ‘sudo’ in front of docker commands to get them to execute, followed by the admin/root password. Example: sudo docker ps
- Download and run Ubuntu
- docker pull ubuntu << Image is located here https://hub.docker.com/_/ubuntu
- docker run -it ubuntu bash << Creates an instance of this image for us to modify and opens up the terminal
- Update the Ubuntu running container
- apt-get -y update
- apt-get install iproute2
- apt-get install net-tools
- apt-get install iputils
- apt-get install iputils-ping
- apt-get install -y iperf3
- Test with ping and iperf3 -v
- Do not exit
- Commit and push the new image
- docker ps -l << Check for the latest running container, and note the Container ID of the container that was just updated with these steps
- docker commit [Container ID] [repository name]/[insert-container-name]
- docker images << will validate that the image is now there
- docker push [repository name]/[Container you want to push]
- Testing Steps
- Check basic ping between all devices
- Put one device in server mode iperf3 -s
- On the other device start the test iperf3 -c [Target IP]


Home Lab Generation 7: Part 2 – New Hardware and Software Updates
In the final part of this 2 part series, I’ll be documenting the steps I took to update my Home Lab Generation 7 with the new hardware and software changes. There’s quite a bit of change going on and these steps worked well for my environment.Pre-Update-Steps:
- Check Product Interoperability Matrix (VCSA, ESXi, NSX, vRNI, VRLI)
- Check VMware Compatibility Guide (Network Cards, JBOD)
- Ensure the vSAN Cluster is in a health state
- Backup VM’s
- Ensure your passwords are updated
- Document Basic Host settings (Network, vmks, NTP, etc.)
- Backup VCSA via the Management Console > Backup
- NOTE: I used /n software SFTP server to receive backup files
Steps to update vCenter Server from 7U2d (7.0.2.00500) to 7U3a (7.0.3.00100):
- Downloaded VCSA 7U3a VMware-vCenter-Server-Appliance-7.0.3.00100-18778458-patch-FP.iso
- Use WinSCP to connect to an ESXi host and upload the update/patch to vSAN ISO-Images Folder
- Mount the ISO from step 1 to VCSA 7U2d VM
- NOTE: A reboot of the VCSA my be necessary for it to recognize the attached ISO
- Went to VCSA Management Console > Update > Check Updates should auto-start
- NOTE: It might fail to find the ISO. If so, choose CD ROM to detect the ISO
- Expanded the Version > Run Pre-Update checks
- Once it passed pre-checks, choose Stage and Install > Accept the Terms > Next
- Check ‘I have backed up vCenter Server…’
- NOTE: Clicking on ‘go to Backup’ will Exit out and you’ll have to start over
- Click Finish and allow it to complete
- Once done log back into the Management console > Summary and validate the Version
- Lastly, detach the datastore ISO, I simple choose ‘Client Device’
Change Boot USB to SSD and upgrade to ESXi 7U3 on Host at a time:
- Remove Host from NSX-T Manager (Follow these steps)
- In vCenter Server
- Put Host 1 in Maintenance Mode Ensure Accessibility (better if you can evacuate all data | run pre-check validation)
- Shut down the host
- Remove Host from Inventory (NOTE: Wait for host to go to not responding first)
- On the HOST
- Precautionary step – Turn off the power supply on the host, helps with the onboard management ability to detect changes
- Remove the old USB boot device
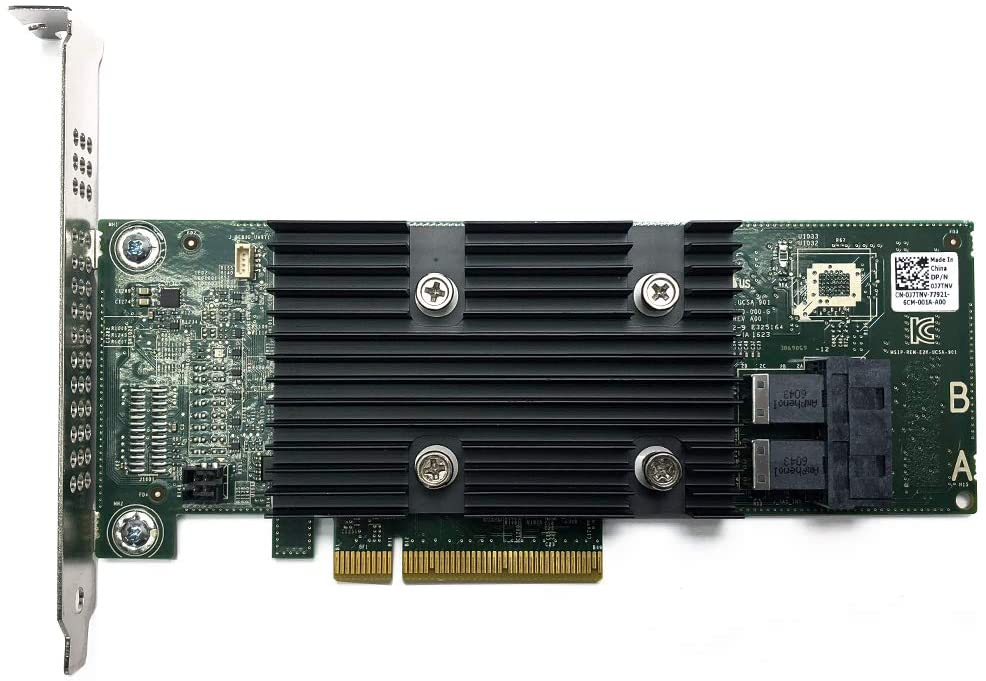
- Install Dell HBA330 and M.2/NVMe PCIe Card w/ 240GB SSD into the Host
- Power On the Host and validate firmware is updated (Mobo, Disk, Network, etc.)
- Here is how I updated the Dell HBA330 Firmware (SEE VIDEO HERE)
- During boot ensure the Dell HBA330 POST screen displays (optional hit CTRL-C to view its options)
- In the Host BIOS Update the boot disk to the new SSD Card
- ESXi Install
- Boot the host to ESXi 7.0U3 ISO (I used SuperMicro Virtual Media to boot from)
- Install ESXi to the SSD Card, Remove ISO, Reboot
- Update Host boot order in BIOS for the SSD Card and boot host
- In the ESXi DUCI, configure host with correct IPv4/VLAN, DNS, Host Name, enable SSH/Shell, disable IPv6 and reboot
- From this ESXi host and from another connected device, validate you can ping the Host IP and its DNS name
- Add Host to the Datacenter (not vSAN Cluster)
- Ensure Host is in Maintenance mode and validate health
- Erase all partitions on vSAN Devices (Host > Configure > Storage Devices > Select devices > Erase Partitions)
- Rename the new SSD datastore (Storage > R-Click on datastore > Rename)
- Add Host to Cluster (but do not add to vSAN)
- Add Host to vDS Networking, could be multiple vDS switches (Networking > Target vDS > Add Manage Hosts > Add Hosts > Migrate VMKernel)
- Complete the Host configuration settings (NTP, vmks)
- Create vSAN Disk Groups (Cluster > Configure > vSAN > Disk Management)
- Monitor and allow to complete, vSAN Replication Objects (Cluster > Monitor > vSAN > Resyncing Objects)
- Extract a new Host Profile and use it to build out the other hosts in the cluster
- ESXi Install – Additional Hosts
- Repeat Steps 1, 2, 3, and only Steps 4.1-4.10
- Attach Host Profile created in Step 4.15
- Check Host Profile Compliance
- Edit and update Host Customizations
- Remediate the host (the remediation will to a pre-check too)
- Optional validate host settings
- Exit Host from Maintenance mode
- Before starting next host ensure vSAN Resyncing Objects is completed
Other Notes / Thoughts:
Host Profiles: You may be thinking “why didn’t he use ESXi Backup/Restore or Host Profiles to simply this migration vs. doing all these steps?”. Actually, at first I did try both but they didn’t work due to the add/changes of PCIe devices and upgrade of the ESXi OS. Backup/Restore and Host Profiles really like things to not change for them to work with out error. Now there are adjustments one could make and I tried to adjust them but in the end I wasn’t able to get them to adjust to the new hosts. They were just the wrong tool for the first part of this job. However, Host Profiles did work well post installation after all the changes were made. vSAN Erase Partitions Step 4.8: This step can be optional it just depends on the environment. In-fact I skipped this step on the last host and vSAN imported the disks with out issue. Granted most of my vm’s are powered off, which means the vSAN replicas are not changing. In an environment where there are a lot of powered on VM’s vSAN doing step 4.8 might be best. Again, it just depends on the environment state. If you like my ‘no-nonsense’ videos and blogs that get straight to the point… then post a comment or let me know… Else, I’ll start posting really boring content!
Home Lab Generation 7: Updating the Dell HBA330 firmware without a Dell Server
In this quick video I review how I updated the Dell HBA330 firmware using a Windows 10 PC.
This video was made as a supplement to my 2 Part blog post around updating my Home Lab Generation 7.
See:
Firmware >> https://www.dell.com/support/home/en-ng/drivers/driversdetails?driverid=tf1m6
Quick NAS Topics Changing Storage Pool from RAID 1 to RAID5 with the Synology 1621+
In this not so Quick NAS topic I cover how to expand a RAID 1 volume and migrate it to a RAID 5 storage pool with the Synology 1621+. Along the way we find a disk that has some bad sectors, run an extended test and then finalize the migration.
** Products / Links Seen in this Video **
Synology DiskStation DS1621+ — https://www.synology.com/en-us/products/DS1621+

Home Lab Generation 7: Part 1 – Change Rational for software and hardware changes
Well its that time of year again, time to deploy new changes, upgrades, and add some new hardware. I’ll be updating my ESXi hosts and vCenter Server to the latest vSphere 7 Update 3a from 7U2d. Additionally, I’ll be swapping out the IBM 5210 JBOD for a Dell HBA330+ and lastly I’ll change my boot device to a more reliable and persistent disk. I have 3 x ESXi hosts with VSAN, vDS switches, and NSX-T. If you want to better understand my environment a bit better check out this page on my blog. In this 2 part blog I’ll go through the steps I took to update my home lab and some of the rational behind it.
There are two main parts to the blog:
- Part 1 – Change Rational for software and hardware changes – In this part I’ll explain some of my thoughts around why I’m making these software and hardware changes.
- Part 2 – Installation and Upgrade Steps – These are the high level steps I took to change and upgrade my Home lab
Part 1 – Change Rational for software and hardware changes:
There are three key changes that I plan to make to my environment:
- One – Update to vSphere 7U3a
- vSphere 7U3 has brought many new changes to vSphere including many needed features updates to vCenter server and ESXi. Additionally, there have been serval important bug fixes and corrections that vSphere 7U3 and 7U3a will address. For more information on the updates with vSphere 7U3 please see the “vSphere 7 Update 3 – What’s New” by Bob Plankers. For even more information check out the release notes.
- Part of my rational in upgrading is to prepare to talk with my customers around the benefits of this update. I always test out the latest updates on Workstation first then migrate those learnings in to Home Lab.
- Two – Change out the IBM 5210 JBOD
- The IBM 5210 JBOD is a carry over component from my vSphere 6.x vSAN environment. It worked well with vSphere 6.x and 7U1. However, starting in 7U2 it started to exhibit stuck IO issues and the occasional PSOD. This card was only certified with vSphere/vSAN 6.x and at some point the cache module became a requirement. My choices at this point are to update this controller with a cache module (~$50 each) and hope it works better or make a change. In this case I decided to make a change to the Dell HBA330 (~$70 each). The HBA330 is a JBOD controller that Dell pretty much worked with VMware to create for vSAN. It is on the vSphere/vSAN 7U3 HCL and should have a long life there too. Additionally, the HBA330 edge connectors (Mini SAS SFF-8643) line up with the my existing SAS break-out cables. When I compare the benefits of the Dell HBA330 to upgrading the cache module for the IBM 5210 the HBA330 was the clear choice. The trick is finding a HBA330 that is cost effective and comes with a full sized slot cover. Its a bit tricky but you can find them on eBay, just have to look a bit harder.
- Three – Change my boot disk
- Last September-2021, VMware announced boot from USB is going to change and customers were advised to plan ahead for these upcoming changes. My current hosts are using cheap SanDisk USB 64GB memory sticks. Its something I would never recommend for a production environment, but for a Home Lab these worked okay. I originally chose them during my Home Lab Gen 5 updates as I need to do testing with USB booted Hosts. Now that VMware has deprecated support for USB/SD devices it’s time to make a change. Point of clarity: the word deprecated can mean different things to different people. However, in the software industry deprecated means “discourage the use of (something, such as a software product) in favor of a newer or better alternative”. vSphere 7 is in a deprecated mode when it comes to USB/SD booted hosts, they are still supported, and customers are highly advised to plan ahead. As of this writing, legacy (legacy is a fancy word for vSphere.NEXT) USB hosts will require a persistent disk and eventually (Long Term Supported) USB/SD booted hosts will no longer be supported. Customers should seek guidance from VMware when making these changes.

-
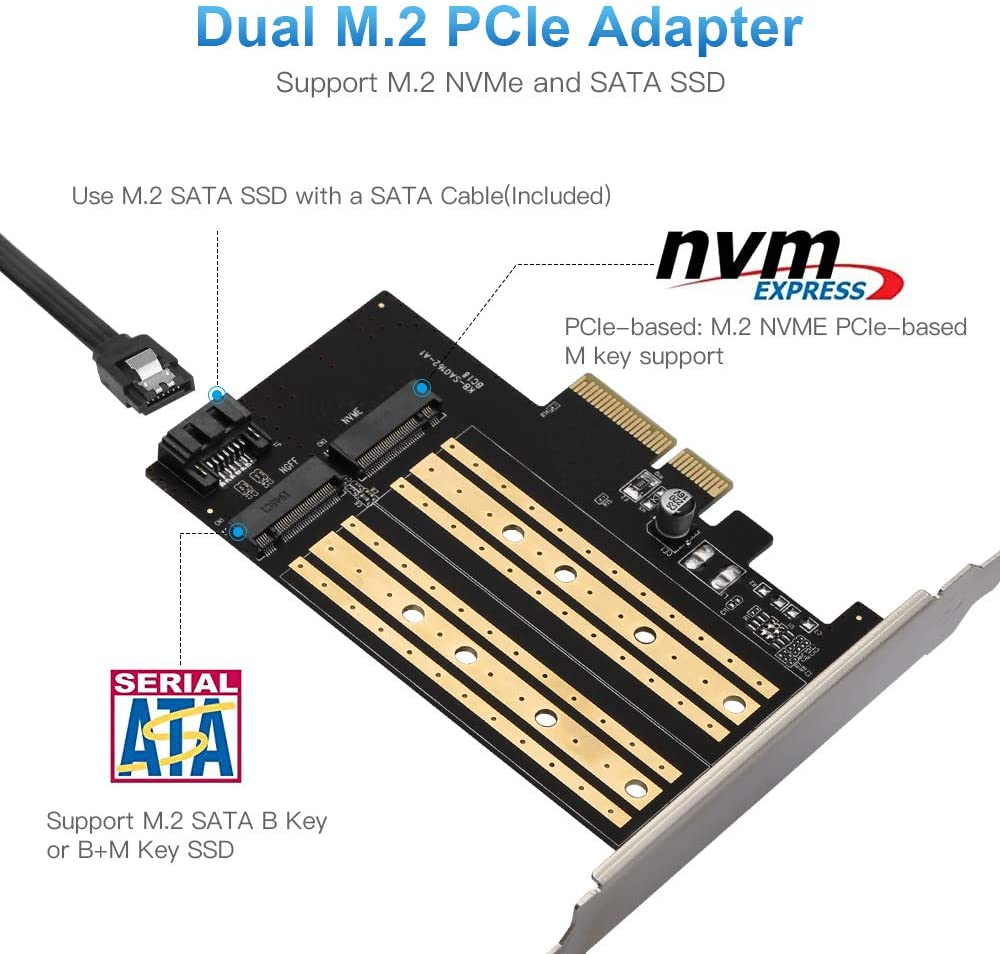
- The requirement to be in a “Long Term Supported” mode is to have a ESXi host be booted from HDD, SSD, or a PCIe device. In my case, I didn’t want to add more disks to my system and chose to go with a PCIe SSD/NVMe card. I chose this PCIe device that will support M.2 (SATA SSD) and NMVe devices in one slot and I decided to go with a Kingston A400 240G Internal SSD M.2 as my boot disk. The A400 with 240GB should be more than enough to boot the ESXi hosts and keep up with its disk demands going forward.

Final thoughts and a important warning. Making changes that affect your current environment are never easy but are sometimes necessary. With a little planning it can make the journey a bit easier. I’ll be testing these changes over the next few months and will post up if issues occur. However, a bit of warning – adding new devices to an environment can directly impact your ability to migrate or upgrade your hosts. Due to the hardware decisions I have made a direct ESXi upgrade is not possible and I’ll have to back out my current hosts from vCenter Server plus other software and do a new installation. However, those details and more will be in Part 2 – Installation and Upgrade Steps.
Opportunity for vendor improvement – If backup vendors like Synology, asustor, Veeam, Veritas, naviko, and Arcoins could really shine. If they could backup and restore a ESXi host to dislike hardware or boot disks this would be a huge improvement for VI Admin, especially when they have tens of thousands of hosts the need to change from their USB to persistent disks. This is not a new ask, VI admins have been asking for this option for years, now maybe these companies will listen as many users and their hosts are going to be affected by these upcoming requirements.
Quick NAS Topics: USB WiFi on the DRIVESTOR 2 Pro
During this Quick NAS Topic I review how to install and test a supported USB WiFi Network device into the DRIVESTOR 2 Pro.
** Products / Links Seen in this Video **
DRIVESTOR 2 PRO
asustor – https://www.asustor.com/en/product?p_id=72 and https://www.asustor.com/datasheet?p_id=72
OR Amazon – https://www.amazon.com/Asustor-Drivestor-Pro-AS3302T-Attached/dp/B08ZD7R72P
ASUS USB-AC56 https://www.asus.com/Networking-IoT-Servers/Adapters/All-series/USBAC56/
** Other Links **
https://www.asustor.com/service/compatibility
https://www.asustor.com/service/wifi?id=wifi
https://downloadgb.asustor.com/download/docs/User_Guide/ADM40/ASUSTOR_NAS_USER_GUIDE_ENU_4.0.0.0304.pdf
https://www.asustor.com/online/College
More details go to: vmexplorer.com
kubeAcademy Building Applications for Kubernetes: Docker Desktop Installation for Windows 10
While taking the course on kubeAcademy ‘Building Applications for Kubernetes’ the first lesson was about setting up your workstation to complete the course. Though the first lesson was good, the instructions were based on the MAC OS and how to install on Windows was very lightly touched on. I soon found out why, the Windows 10 install of Docker Desktop and Tools isn’t a simple process. In this video I go through the choices I made to get my workstation up and running. Moving past lesson one it became obvious that most of these courses are based on CLI commands common on the MAC (example cat, v, and rm). If you choose the Windows install be aware you’ll need to translate commands like these and more. I highly recommend the MAC OS install if you want to really align to these courses.
Post Video Corrections and Observations:
- In the video I showed how to remove the Ubuntu Image via containers and apps. To fully remove the ubuntu image, do so in Docker Desktop > Images > 3Dots > Delete, wait about a min or two and it will disappear.
Some Links from this video:
- kubeAcademy https://kube.academy/pro
- Install Docker Desktop on Windows https://docs.docker.com/desktop/windows/install/#install-docker-desktop-on-windows
- kubeAcademy Course: Building Applications for Kubernetes https://kube.academy/courses/building-applications-for-kubernetes
- WSL 2: Getting started — https://www.youtube.com/watch?v=_fntjriRe48
- WSL 2 with Docker getting started — https://www.youtube.com/watch?v=5RQbdMn04Oc
Home Lab Generation 7: Updating from Gen 5 to Gen 7
Not to long ago I updated my Gen 4 Home Lab to Gen 5 and I posted many blogs and video around this. The Gen 5 Lab ran well for vSphere 6.7 deployments but moving into vSphere 7.0 I had a few issues adapting it. Mostly these issues were with the design of the Jingsha Motherboard. I noted most of these challenges in the Gen 5 wrap up video. Additionally, I had some new networking requirements mainly around adding multiple Intel NIC ports and Home Lab Gen 5 was not going to adapt well or would be very costly to adapt. These combined adaptions forced my hand to migrate to what I’m calling Home Lab Gen 7. Wait a minute, what happen to Home Lab Gen 6? I decided to align my Home Lab Generation numbers to match vSphere release number, so I skipped Gen 6 to align.
First: I review my design goals:
- Be able to run vSphere 7.x and vSAN Environment
- Reuse as much as possible from Gen 5 Home lab, this will keep costs down
- Choose products that bring value to the goals, are cost effective, and if they are on the VMware HCL that a plus but not necessary for a home lab
- Keep networking (vSAN / FT) on 10Gbe MikroTik Switch
- Support 4 x Intel Gbe Networks
- Ensure there will be enough CPU cores and RAM to be able to support multiple VMware products (ESXi, VCSA, vSAN, vRO, vRA, NSX, LogInsight)
- Be able to fit the the environment into 3 ESXi Hosts
- The environment should run well, but doesn’t have to be a production level environment
Second – Evaluate Software, Hardware, and VM requirements:
My calculated numbers from my Gen 5 build will stay rather static for Gen 7. The only update for Gen 7 is to use the updated requirements table which can be found here >> ‘HOME LABS: A DEFINITIVE GUIDE’

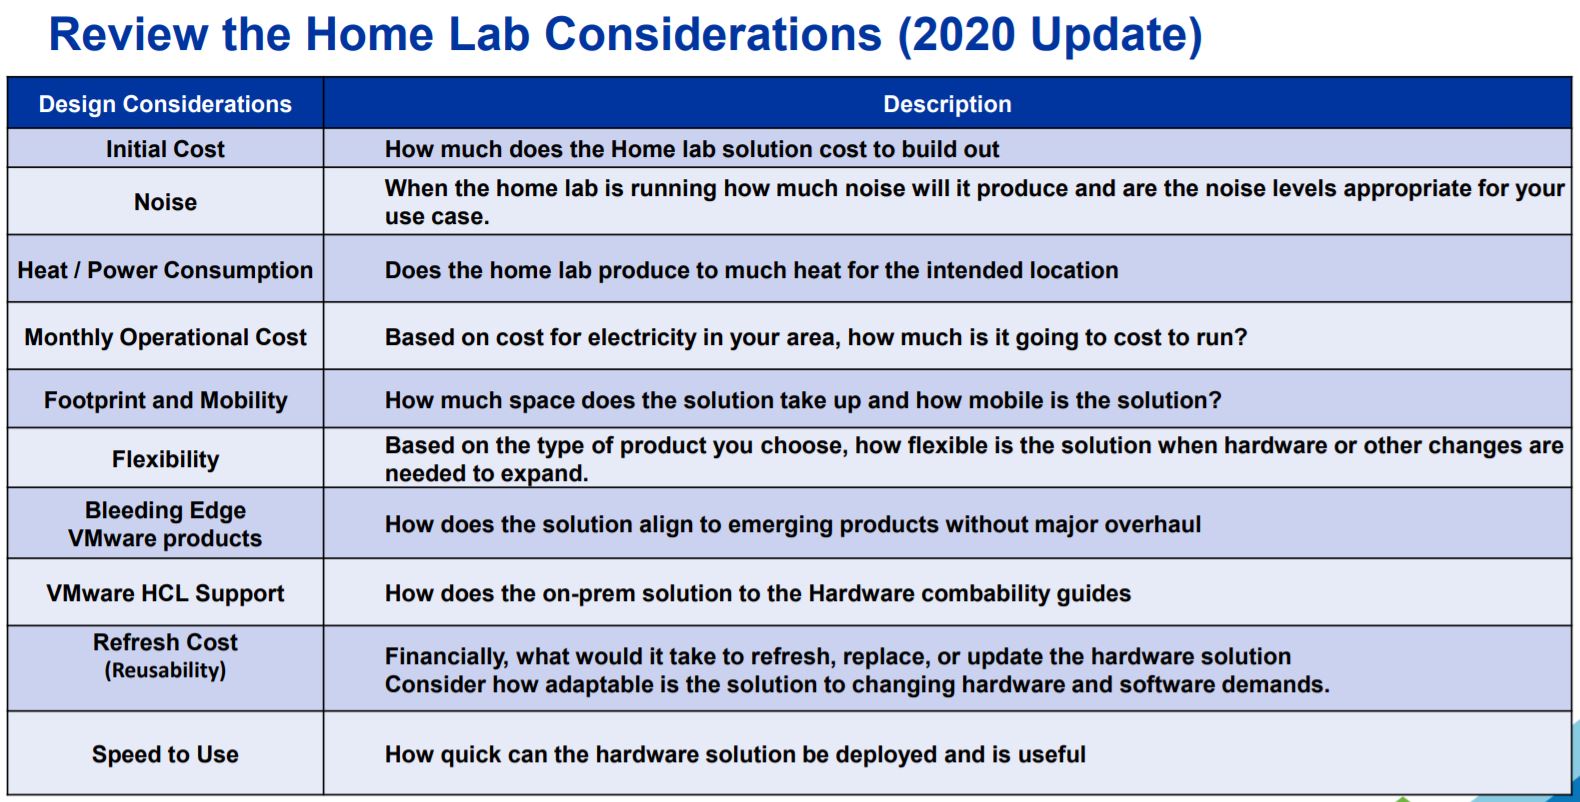
Third – Home Lab Design Considerations
This too will be very similar to Gen 5, but I do review this table and made any last changes to my design
Four – Choosing Hardware
Based on my estimations above I’m going to need a very flexible Mobo, supporting lots of RAM, good network connectivity, and should be as compatible as possible with my Gen 5 hardware. I’ve reused many parts from Gen 5 but the main change came with the Supermicro Motherboard and the addition of 2TB SAS HDD listed below.
Note: I’ve listed the newer items in Italics all other parts I’ve carried over from Gen 5.
Overview:
- My Gen 7 Home Lab is based on vSphere 7 (VCSA, ESXi, and vSAN) and it contains 3 x ESXi Hosts, 1 x Windows 10 Workstation, 4 x Cisco Switches, 1 x MikroTik 10gbe Switch, 2 x APC UPS
ESXi Hosts:
- Case:
- Rosewill RISE Glow EATX (Newegg $54)
- Motherboard:
- Supermicro X9DRD-7LN4F-JBOD (Ebay $159)
- Mobo Stands: 4mm Nylon Plastic Pillar (Amazon $8)
- CPU:
- CPU: Xeon E5-2640 v2 8 Cores / 16 HT (Ebay $30 each)
- CPU Cooler: DEEPCOOL GAMMAXX 400 (Amazon $19)
- CPU Cooler Bracket: Rectangle Socket 2011 CPU Cooler Mounting Bracket (Ebay $16)
- RAM:
- 128GB DDR3 ECC RAM (Ebay $170)
- Disks:
- 64GB USB Thumb Drive (Boot)
- 2 x 200 SAS SSD (vSAN Cache)
- 2 x 2TB SAS HDD (vSAN Capacity – See this post)
- 1 x 2TB SATA (Extra Space)
- SAS Controller:
- 1 x IBM 5210 JBOD (Ebay)
- CableCreation Internal Mini SAS SFF-8643 to (4) 29pin SFF-8482 (Amazon $18)
- Network:
- Motherboard Integrated i350 1gbe 4 Port
- 1 x MellanoxConnectX3 Dual Port (HP INFINIBAND 4X DDR PCI-E HCA CARD 452372-001)
- Power Supply:
- Antec Earthwatts 500-600 Watt (Adapters needed to support case and motherboard connections)
- Adapter: Dual 8(4+4) Pin Male for Motherboard Power Adapter Cable (Amazon $11)
- Adapter: LP4 Molex Male to ATX 4 pin Male Auxiliary (Amazon $11)
- Power Supply Extension Cable: StarTech.com 8in 24 Pin ATX 2.01 Power Extension Cable (Amazon $9)
- Antec Earthwatts 500-600 Watt (Adapters needed to support case and motherboard connections)
Network:
- Core VM Switches:
- 2 x Cisco 3650 (WS-C3560CG-8TC-S 8 Gigabit Ports, 2 Uplink)
- 2 x Cisco 2960 (WS-C2960G-8TC-L)
- 10gbe Network:
- 1 x MikroTik 10gbe CN309 (Used for vSAN and Replication Network)
- 2 ea. x HP 684517-001 Twinax SFP 10gbe 0.5m DAC Cable (Ebay)
- 2 ea. x MELLANOX QSFP/SFP ADAPTER 655874-B21 MAM1Q00A-QSA (Ebay)
Battery Backup UPS:
- 2 x APC NS1250
Windows 10 Workstation:
- Case: Phanteks Enthoo Pro series PH-ES614PC_BK Black Steel
- Motherboard: MSI PRO Z390-A PRO
- CPU: Intel Core i7-8700
- RAM: 64GB DDR4 RAM
- 1TB NVMe
Thanks for reading, please do reach out if you have any questions.
If you like my ‘no-nonsense’ videos and blogs that get straight to the point… then post a comment or let me know… Else, I’ll start posting really boring content!
Home Lab Generation 7: Upgrading vSAN 7 Hybrid capacity step by step
My GEN5 Home Lab is ever expanding and the space demands on the vSAN cluster were becoming more apparent. This past weekend I updated my vSAN 7 cluster capacity disks from 6 x 600GB SAS HDD to 6 x 2TB SAS HDD and it went very smoothly. Below are my notes and the order I followed around this upgrade. Additionally, I created a video blog (link further below) around these steps. Lastly, I can’t stress this enough – this is my home lab and not a production environment. The steps in this blog/video are just how I went about it and are not intended for any other purpose.
Current Cluster:
- 3 x ESXi 7.0 Hosts (Supermicro X9DRD-7LN4F-JBOD, Dual E5 Xeon, 128GB RAM, 64GB USB Boot)
- vSAN Storage is:
- 600GB SAS Capacity HDD
- 200GB SAS Cache SDD
- 2 Disk Groups per host (1 x 200GB SSD + 1 x 600GB HDD)
- IBM 5210 HBA Disk Controller
- vSAN Datastore Capacity: ~3.5TB
- Amount Allocated: ~3.7TB
- Amount in use: ~1.3TB
Proposed Change:
- Keep the 6 x 200GB SAS Cache SDD Drives
- Remove 6 x 600GB HDD Capacity Disk from hosts
- Replace with 6 x 2TB HDD Capacity Disks
- Upgraded vSAN Datastore ~11TB
Upgrade Notes:
- I choose to backup (via clone to offsite storage) and power off most of my VMs
- I clicked on the Cluster > Configure > vSAN > Disk Management
- I selected the one host I wanted to work with and then the Disk group I wanted to work with
- I located one of the capacity disks (600GB) and clicked on it
- I noted its NAA ID (will need later)
- I then clicked on “Pre-check Data Migration” and choose ‘full data migration’
- The test completed successfully
- Back at the Disk Management screen I clicked on the HDD I am working with
- Next I clicked on the ellipse dots and choose ‘remove’
- A new window appeared and for vSAN Data Migration I choose ‘Full Data Migration’ then clicked remove
- I monitored the progress in ‘Recent Tasks’
- Depending on how much data needed to be migrated, and if there were other objects being resynced it could take a bit of time per drive. For me this was ~30-90 mins per drive
- Once the data migration was complete, I went to my host and found the WWN# of the physical disk that matched the NAA ID from Step 5
- While the system was still running, removed disk from the chassis, and replaced it with the new 2TB HDD
- Back at vCenter Server I clicked on the Host on the Cluster > Configure > Storage > Storage Devices
- I made sure the new 2TB drive was present
- I clicked on the 2TB drive, choose ‘erase partitions’ and choose OK
- I clicked on the Cluster > Configure > vSAN > Disk Management > ‘Claim Unused Disks’
- A new Window appeared and I choose ‘Capacity’ for the 2TB HDD, ‘Cache’ for the 200GB SDD drives, and choose OK
- Recent Task showed the disk being added
- When it was done I clicked on the newly added disk group and ensured it was in a health state
- I repeated this process until all the new HDDs were added
Final Outcome:
- After upgrade the vSAN Storage is:
- 2TB SAS Capacity HDD
- 200GB SAS Cache SDD
- 2 Disk Groups per host (1 x 200GB SSD + 1 x 2TB HDD)
- IBM 5210 HBA Disk Controller
- vSAN Datastore is ~11.7TB

Notes & other thoughts:
- I was able complete the upgrade in this order due to the nature my home lab components. Mainly because I’m running a SAS Storage HBA that is just a JBOD controller supporting Hot-Pluggable drives.
- Make sure you run the data migration pre-checks and follow any advice it has. This came in very handy.
- If you don’t have enough space to fully evacuate a capacity drive you will either have to add more storage or completely remove VM’s from the cluster.
- Checking Cluster>Monitor>vSAN>Resyncing Objects, gave me a good idea when I should start my next migration. I look for it to be complete before I start. If you have an very active cluster this maybe harder to achieve.
- Checking the vSAN Cluster Health should be done, especially the Cluster > Monitor > Skyline Health > Data > vSAN Object Health, any issues in these areas should be looked into prior to migration
- Not always, but mostly, the disk NAA ID reported in vCenter Server/vSAN usually coincides with the WWN Number on the HDD
- By changing my HDDs from 600GB SAS 10K to 2TB SAS 7.2K there will be a performance hit. However, my lab needed more space and 10k-15K drives were just out of my budget.
- Can’t recommend this reference Link from VMware enough: Expanding and Managing a vSAN Cluster
Video Blog:
Various Photos:
 |
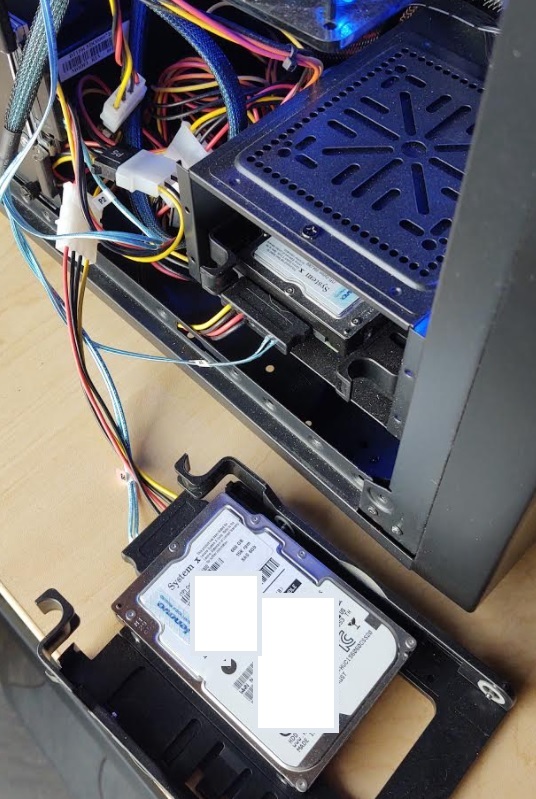 |
If you like my ‘no-nonsense’ videos and blogs that get straight to the point… then post a comment or let me know… Else, I’ll start posting really boring content!
- ← Previous
- 1
- 2
- 3
- …
- 8
- Next →
