Month: April 2026
Managing the SDDC Installer admin@local Account – Password Resets and lockouts
We’ve all been there. We deploy an appliance and then we can’t find the password. We try to log in a few times and the accout gets locked out. For administrators managing VMware Cloud Foundation (VCF), the admin@local account is a critical account. Introduced to provide access to the SDDC Manager APIs and the VCF Installer even when the management vCenter Server or Identity Provider (SSO) is unavailable, it ensures you aren’t locked out of your environment during critical failures.
Phase 1: Resetting the Forgotten Password
If you don’t know the current password, you must manually inject a new one via the SDDC Manager console. This process involves creating a secure credential file and hashing your new password using OpenSSL.
According to KB 403099, follow these steps on the SDDC Manager VM:
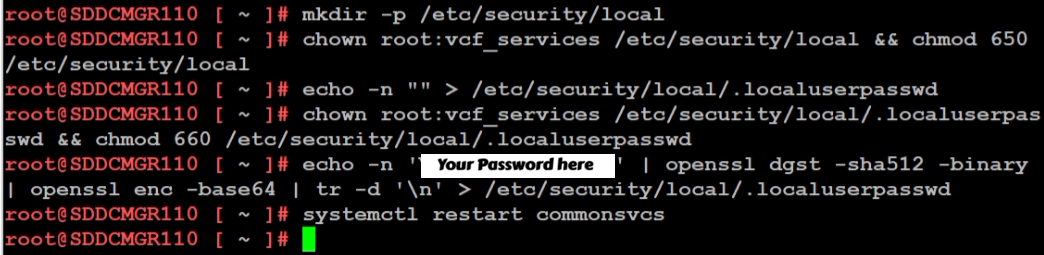
- Access the Console: Log in to the SDDC Manager via SSH as the
vcfuser, then switch to root:su -or simply logon as root. - Initialize the Security Directory: Ensure the local security directory exists with the correct permissions:
mkdir -p /etc/security/local chown root:vcf_services /etc/security/local && chmod 650 /etc/security/local - Create the Password File: Create an empty file to house the secret:
echo -n "" > /etc/security/local/.localuserpasswd chown root:vcf_services /etc/security/local/.localuserpasswd && chmod 660 /etc/security/local/.localuserpasswd - Generate the New Password: Replace
You Password herein the command below with a password that meets the VCF requirements (12-127 characters, including uppercase, lowercase, numbers, and special characters):echo -n 'Your Password Here' | openssl dgst -sha512 -binary | openssl enc -base64 | tr -d '\n' > /etc/security/local/.localuserpasswd - Restart Services: Apply the change by restarting the SDDC Manager services:
/opt/vmware/vcf/operationsmanager/scripts/cli/sddcmanager_restart_services.sh
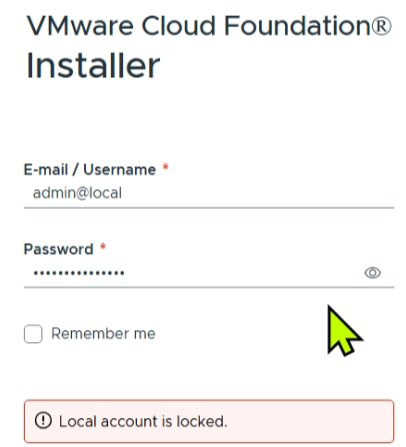
Phase 2: Unlocking the Account
Even with a fresh password, if the account was previously locked due to too many failed attempts, the system may still reject your login. You must now clear the lockout state.
Based on KB 403316, you can clear the lockout by restarting the common services component:
- Stay in the Console: From your existing
rootsession on the appliance (or via the VCF Installer appliance if that is where the lockout occurred). - Clear the Lockout: Run the following command to restart the service responsible for authentication:
systemctl restart commonsvcs - Final Verification: Wait a moment for the service to initialize, then attempt to log in to the web interface using the new password you created in Phase 1.
Summary
When you are locked out of your VCF environment and have forgotten your credentials, the path to recovery is a two-step process. By first following KB 403099 to manually reset the password via the command line, and then following KB 403316 to restart the commonsvcs and clear the lockout, you can regain control of your SDDC Manager and VCF Installer.
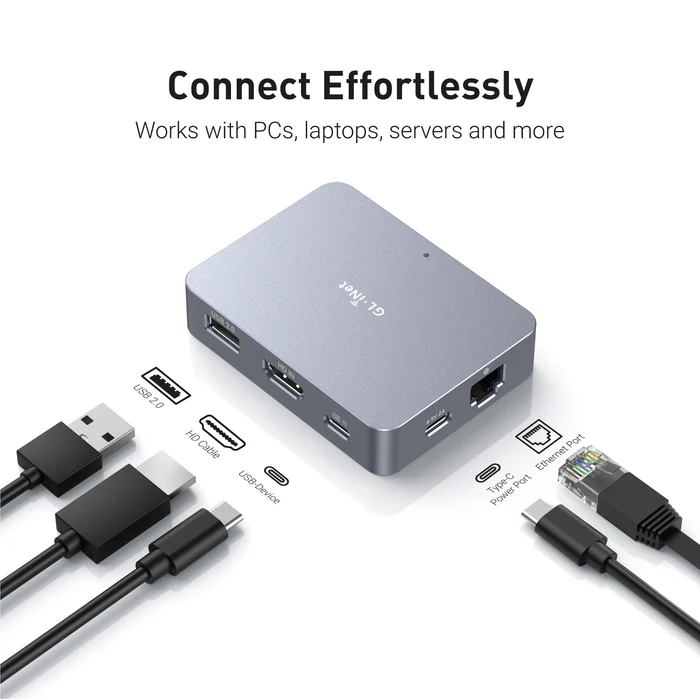
GL.iNet Comet (GL-RM1) a handy single KVM Over IP
Recently I was working on my Ubuntu 25 workstation and I needed a way to reliably remote into the system. This Workstation uses a Supermicro motherboard. It has built in IPMI (remove KVM) but the it only supports remote KVM to the on board video card. xrdp was other option but it is no longer supported under Ubuntu 25. Using Microsoft RDP to Ubuntu desktop or remote sharing constantly disconnected, had issues, or would show black screens. The VNC options I looked at were either buggy or had a subscription fee. Other options like Team Viewer, and No Machine either cost too much or simply were too complex.
Enter the GL.iNet Comet (GL-RM1) It is a specialized hardware-based KVM-over-IP (Keyboard, Video, Mouse) device designed to give you complete remote control over a computer event at the BIOS level. Unlike software solutions, the Comet allows you to access a machine even if the operating system has crashed or hasn’t booted yet.
Key Features
| Feature | Specification |
|---|---|
| Max Resolution | 4K @ 30fps (also supports 2K @ 60fps) |
| Processor | Quad-core ARM Cortex-A7 |
| Memory / Storage | 1GB DDR3L RAM / 8GB eMMC Storage |
| Connectivity | 1x Gigabit Ethernet port (No built-in Wi-Fi) |
| Remote Access | Tailscale integration, GoodCloud, and local web UI |
| Ports | HDMI In, USB-C (Keyboard/Mouse), USB 2.0 (Expansion) |
| Dimensions | 80 x 60 x 17.5mm; 85g |
What I like and don’t like about it:
Pros
- Feature Rich: For a “budget” KVM over IP the amount of well laid out features and settings is a huge plus.
- BIOS-Level Access: It’s nice to have full control over the workstation. I can remotely troubleshoot a PC before the OS loads, allowing for remote OS installations and BIOS setting changes.
- Ease of Setup: Once I found its IP on my network it was very simple to set up. The web interface is designed very well and works great.
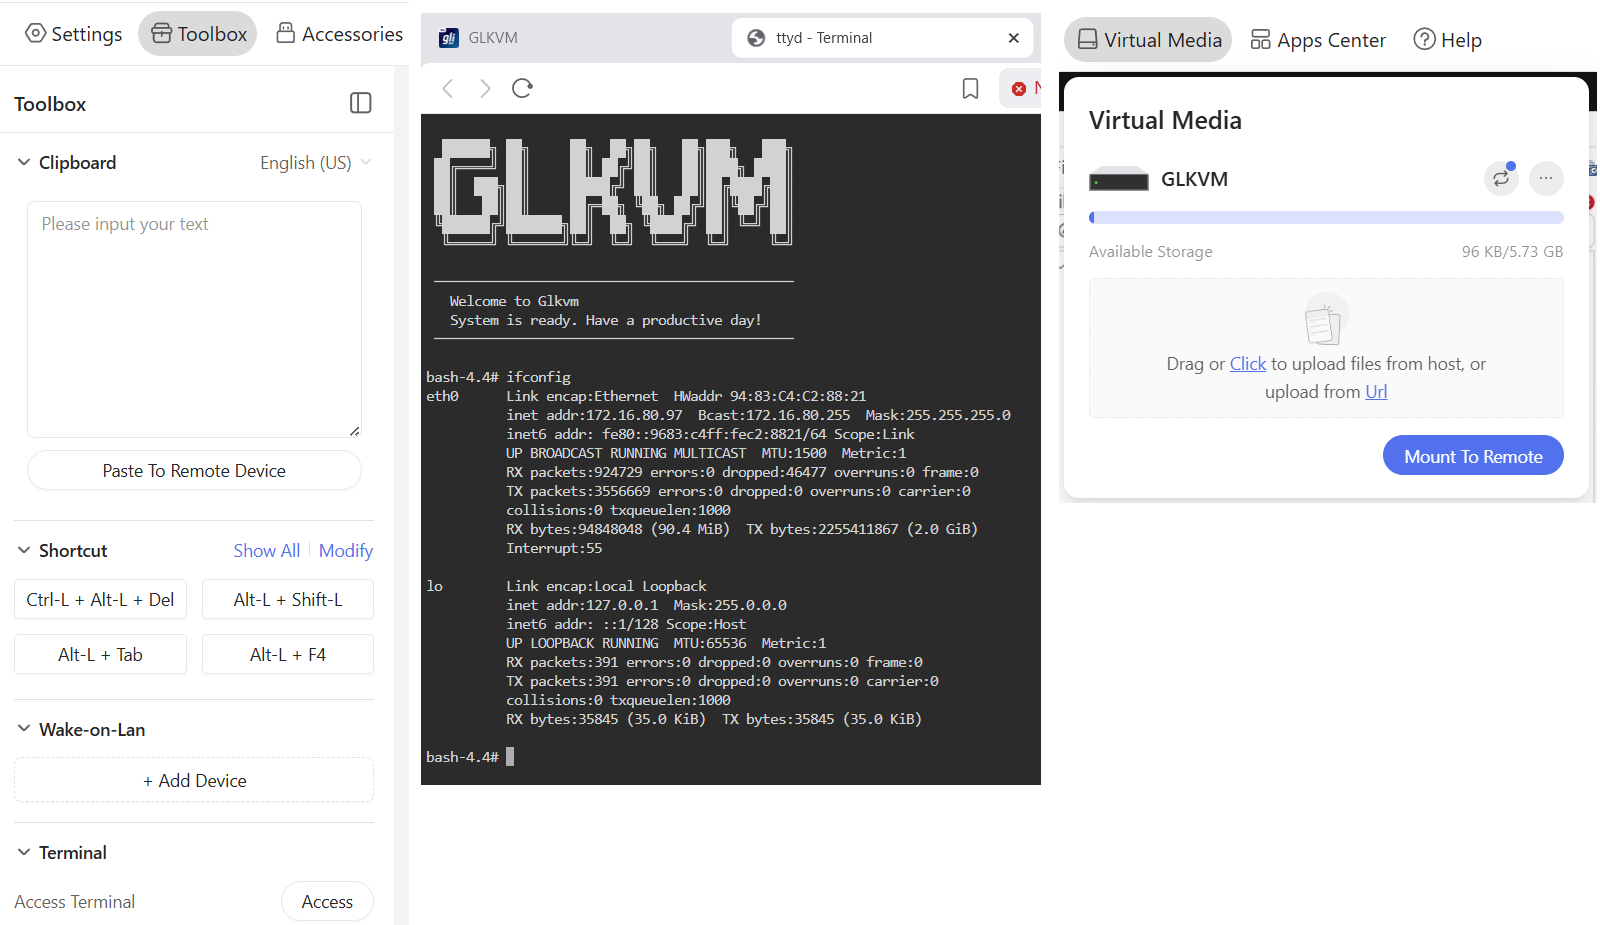
- Toolbox feature: (Fig-1): The Clipboard allows for pasted text to be pasted into a remote device. It also has keyboard shortcuts, WOL, and Terminal access
- Virtual Media and Accessories (Fig-1): It has ~5.5GB of built in storage to mount to the remote host or via the Accessories I can mount a USB memory stick.
- Compact Design: Roughly the size of a computer mouse, making it highly portable for field technicians.
- Mouse Jiggle: Has a feature to enable mouse jiggle on the remote system to keep the remote desktop from locking.
- Remote Cloud Access: I have not tried this feature but you can set it up to be accessed over the internet.
Cons
- No Built-in Wi-Fi: The standard GL-RM1 requires a wired Ethernet connection for internet access.
- USB 2.0 Only: The expansion port is limited to USB 2.0 speeds, which may be slow for large virtual media transfers.
- Power Requirements: It cannot be powered by some PD (Power Delivery) adapters and requires a standard 5V/2A source.
- Limited High-Speed Video: While it supports 4K, it is capped at 30fps, which is sufficient for productivity but not ideal for gaming or smooth video playback.
What could be better:
- Video Display: The initial video display looks a bit pixelated, but with a few video quality changes it works well. It’s totally usable but even in lossless mode it could be a bit more clear.
- The ESC Key: To exit the remote screen you have to push the ESC key or hold the ESC key to exit full screen. Sometimes this ESC key is registered by the remote system and can cause unexpected behaviors. Example – Press ESC and your current window closes out. A work around I found with Windows was to press ALT + TAB and it releases the mouse back to the local OS.
- Mouse Movement: Initially there are two mouse icons (local and remote) and a bit of a delay between them. A few changes in the mouse settings and the experience is much better. Would rather see these be the default settings. Mouse speed is a bit slow, a simple adjustment to the OS mouse speed is helpful.
- High CPU: when running HTML interface in Chrome I notice my laptop fan start up and Chrome uses a lot of RAM. I simply switched to the Brave browser and it works great. Could be something about my setup and Chrome.
How It Compares
The GL.iNet Comet occupies a unique “budget-friendly” tier in the IP-KVM market.
- Vs. PiKVM: While the PiKVM is highly expandable and open-source, it often requires buying a Raspberry Pi separately and assembling it, which can end up being more expensive and bulkier. The Comet is a “plug-and-play” alternative that is significantly cheaper as a complete package.
- Vs. JetKVM: The JetKVM includes a local display for easier on-site monitoring, whereas the Comet is more minimalist. However, users have noted that the Comet’s availability and stability for remote connections (via GoodCloud/Tailscale) make it a very competitive choice.
- Vs. Comet PoE (GL-RM1PE): The PoE variant is slightly larger but allows you to power the device and provide data through a single cable, which is a major advantage for clean server rack setups.
Summing it up
The Comet (GL-RM1) is working out well for my home lab as I needed reliable remote access into my workstation. To me, its primary advantage is providing a reliable, cost effective, feature rich, and quick way to do remote access with out having to install and maintain buggy software based remote access.
