Migrating VMs running on Workstation 25H2
I came across a need to migrate my Workstation based VCSA 8 appliance into the vSphere/vSAN cluster. Both the VCSA and vSphere Cluster are VM’s and both are running on my Gen8 Workstation Home Lab. In this case I need to complete this migration to prepare for a VCSA 9 upgrade. Part of the VCSA 9 upgrade process requires VCSA to be running directly on an ESXi host plus it will better align my Workstation environment to VCF 9 standards. In this blog I’m going to demonstrate how I migrated my VCSA 8 appliance.

Note: These steps were performed on my Gen 8 Workstation Home lab as I start preparing it for Gen 9 with VCF 9. Though I will try to write this blog post rather generally it may contain references to my home lab. For more information around this Home Lab check out my recent blog post.
Some options for migration:
- Connect to Server option in Workstation
- Workstation offers a convenient ‘Connect to Server’ feature. This allows users to connect to an ESX or VCSA server. When connected you can migrate VMs.
- However, this solution won’t work in my case, as my VCSA and ESXi hosts are on a private network that is inaccessible from my Workstation PC. Check out this link for more information >> ‘Connect to a Remote Server’
- VMware vCenter Converter Standalone (6.6.0 or 9.x)
- VMware vCenter Converter Standalone is a free product allowing for Live or Powered off P2V and V2V migrations. You simply install it on a supported OS and migrate your VM to a target Hosts.
- However, this solution doesn’t support migrating VMware Appliance VM’s.
- Use Workstation to Export to OVF
- OFV is a way to backup your VM’s to files and prepare them to be imported to a different host. Workstation allows users to export VM’s to an OVF file. Once exported I can go to the ESXi Host and import.
Option 3 is the one I choose and here are the steps:
Pre checks:
- I reviewed how many cores the ESXi target host supports (8 cores) and how many cores the VCSA 8 Appliance (4 cores) was deployed with. I do this check to ensure the ESXi host will support the workload.
- I check the HDD size of the VCSA VM (~120GB Used) and ensure I have enough vSAN Storage (~3TB Free) to support it.
- Ensure you have root access to the VCSA server and the ESXi hosts
- Important — Check to ensure a there is a ephemeral/non-static binding vDS port group and it is connected to the same network the VCSA server requires. For more information about static/non-static port groups, see my blog about setting this up.
Let’s migrate the VCSA server.
With the VM’s powered off, I remove any Workstation snapshots on the VCSA 8 Appliance and all 3 vSAN ESXi Hosts.

I power up the vSphere 8 environment (AD, VCSA, ESXi hosts) and ensure everything is functioning properly.
In the vSphere Client, I ensure there is an appropriate Ephemeral or non-static binding port group attached to the management network.

Then I gracefully shutdown the VCSA server. I do not power off the ESXi.
In Workstation I choose the VCSA appliance then choose File > Export to OVF

I choose a location, file name, and choose save.
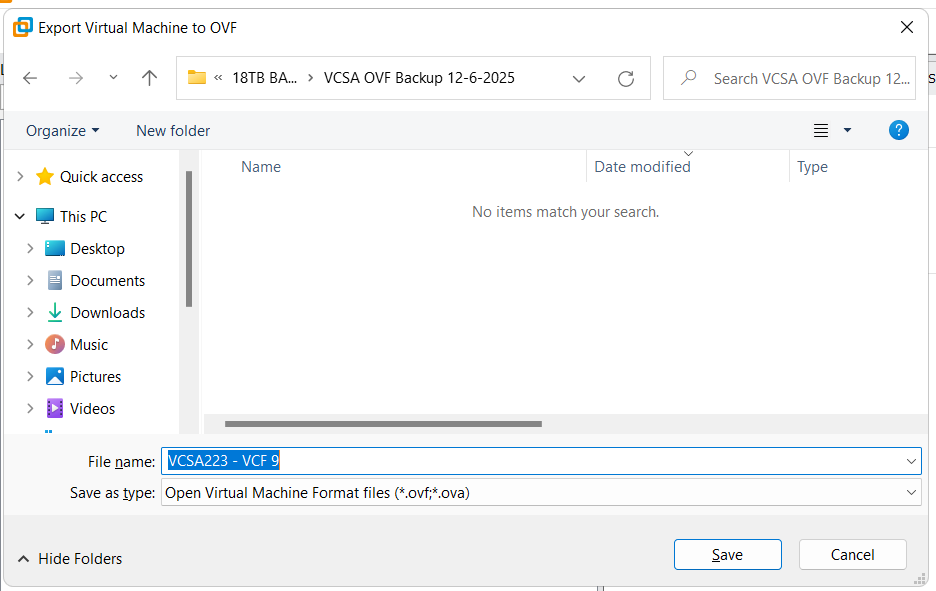
Workstation creates the OVF files and displays a progress bar. Depending on the size this could take some time to complete.

Once completed, I open up the ESXi Host Client on the target host. Then I right click on Host and choose Create/Register VM.

Choose ‘Deploy a virtual machine from an OVF or OVA file’ then Next.
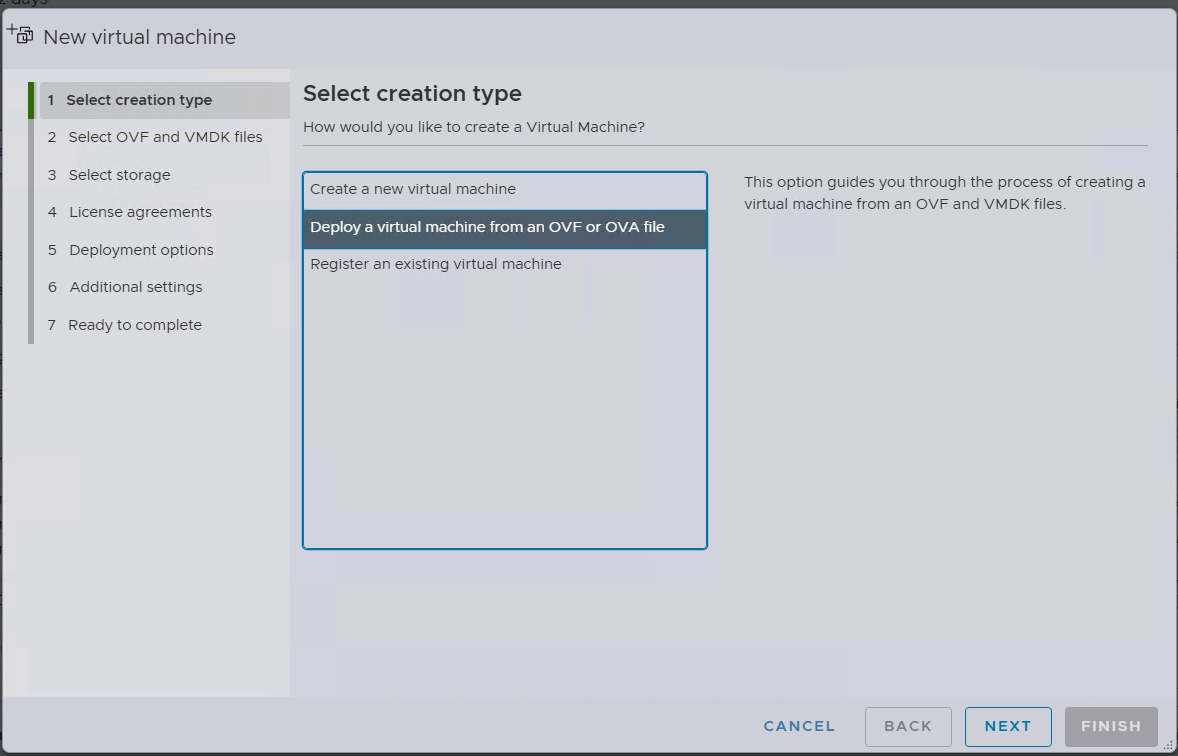
Enter the name you want for the VM. Choose ‘Click to Select files or drag/drop’, I choose the location where the OVF files are, select ALL the files (not just the OVF file), click on Open and then Next.

Next choose the target datastore. I choose the vsanDatastore.

Validate the Network Mappings is pointed to the Non-Static port group, then click on Next.
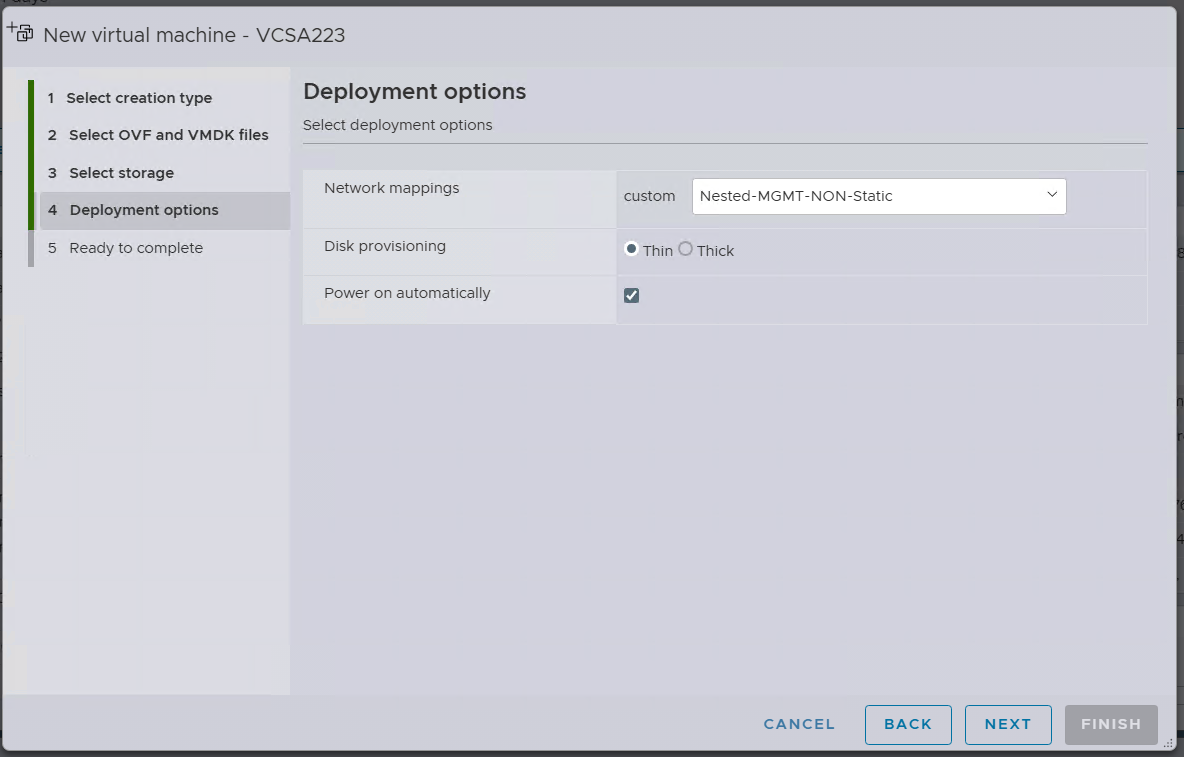
Then I click on Finish.

Several tasks are created and I monitor the progress in the Recent tasks display. The task named ‘Import VApp’ tracks the progress of the entire import. When its progress is completed the OVF import will be complete. Depending on the size this could take some time to complete.

Once the transfer is complete and I boot the VCSA server. Once it is ready I log into it via the vSphere Client. From there I right click on the VM > Settings > Network Adapter > Browse Network and choose the Static bound Port Group.

And, that’s all folks. My Workstation based VCSA 8 Appliance has been migrated to a vSphere Cluster which is running as Workstation VMs.
Thanks for reading and I do hope you picked up tip or two. Please do reach out if you have any questions or comments.
