automation
VMware Workstation Gen 9: BOM2 P5 Expanding VCF9 by adding a 4th Node
The first 3 Nodes in my VCF9 deployment worked well for the load I placed on BOM1. However, in BOM2 I plan to install more of the VCF9 Management Components, namely VCF Automation. With this expansion comes a strong demand on resources (CPU, RAM, and Disk). Though BOM2 has plenty of resources, Workstation has a limit of 128GB of RAM per ESX VM. In this blog post I’ll show you how I adjusted the BOM1 VMs and created the 4th node.
Note: There really isn’t a playbook or documentation for what I am attempting to do with Workstation, VCF 9, and BOM2. I’m pushing it beyond its limits and it’s going to be a bit of hit or miss. As I move forward these blogs may be updated or corrected.
Calculating VM Load Requirements
I need to align my ESX VMs to the load I’m about to put on them. Using the table below, I calculate the total load of vCPU, RAM, and disk I’ll need to support ONE Node of each component.
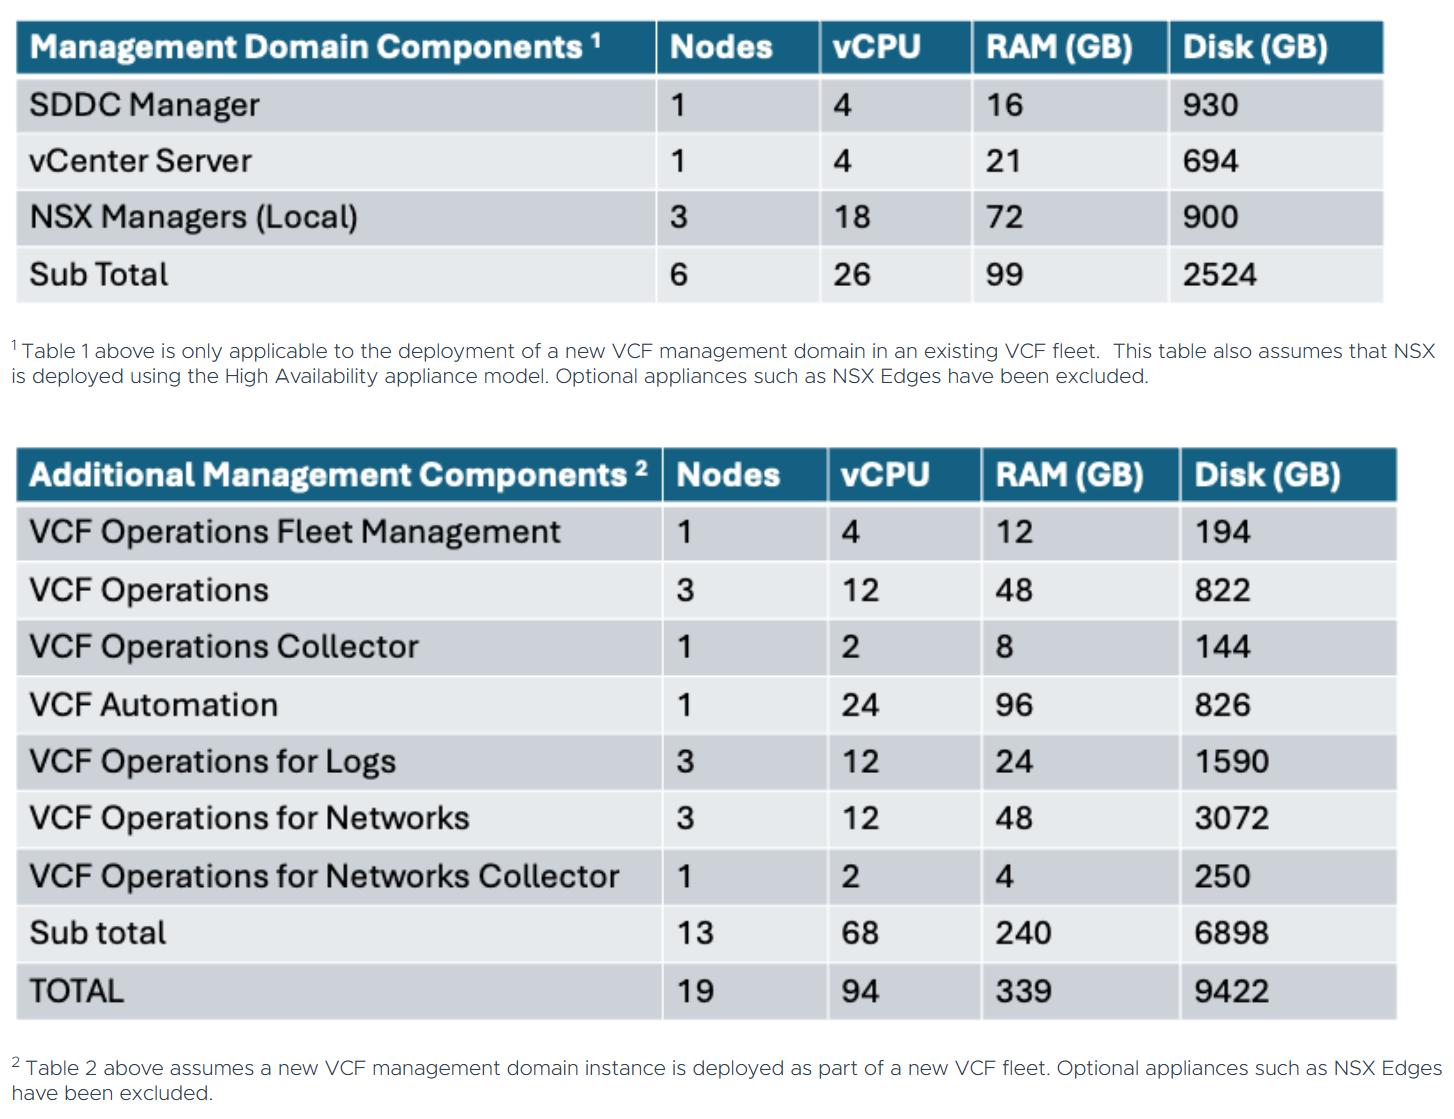
If I deploy a single node from each management component I’ll need to plan for the following load:
- RAM: ~250
- vCPU: ~70
- Disk: ~5.2TB
To meet these requirements, the plan is to have 4 Nested ESX Hosts, each with the following settings.
- 4 x ESX 9 Hosts
- 2 CPU / 14 Cores
- 128GB RAM
- 142 GB NVMe Boot
- 4 x 860GB NVMe vSAN
- 8 x vNICs
Nested ESX Host Adjustments:
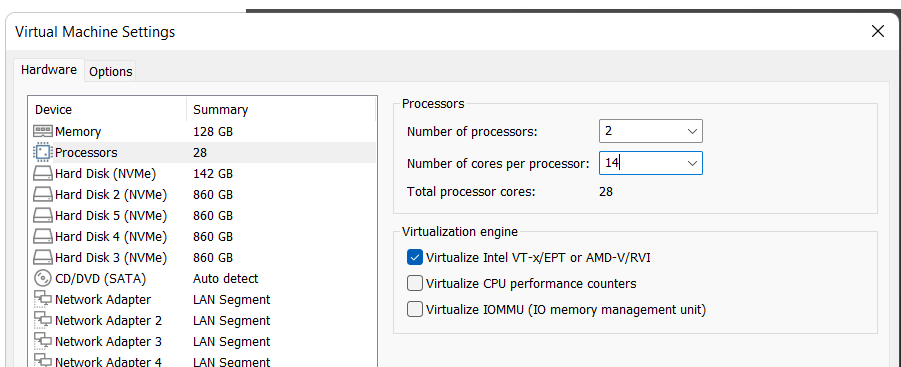
My deployment currently has 3 ESX nested Hosts: VCF9111, VCF9112, and VCF9113. I make the following changes to them:
- CPU: I am going with 2 Processors with 14 cores per processor
- RAM: I set each of the Nested ESX Hosts to 128GB. This is their max setting.
Creation of VCF9114
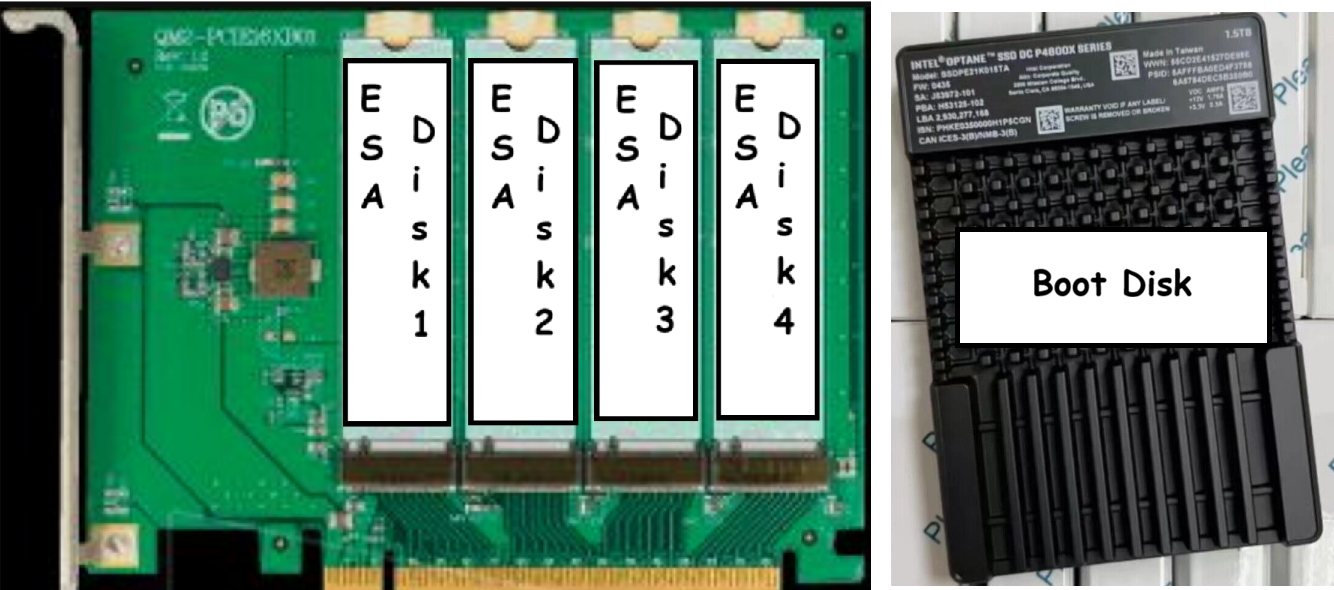
VCF9114 is going to be deployed a bit differently than the other ESX hosts. The other ESX hosts were deployed on 2 x 2TB NVMe physical disks and their virtual disks were spread across them. Using what I had on hand I divided VCF9114 virtual disks as follows.
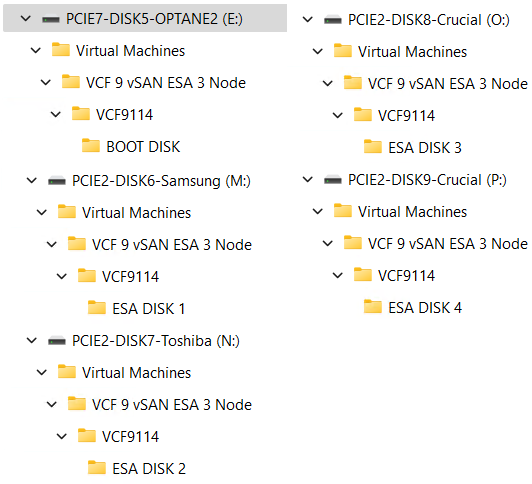
Its virtual BOOT Disk will reside on Optane2 and its 4 vSAN ESA virtual disks will reside on one of the four 1TB NVMe physical disks. Spreading the virtual disks to separate physical drives helps with overall performance.
I created the following folders to support the disk layout for VCF9114.
Next I deploy the ESX Template and create VCF9114.
- Create VM from Template: I follow my blog under the section Deploy the ESX Template to do so.
- Install ESX and configure: I follow my blog and complete this task
Next is to add the 4th node to the vSphere cluster, but I’ll cover that in my next blog post.
