Fusion
Tips for installing Windows 7 x32 SP1 on Workstation 16.1.2
This past weekend I needed to install Windows 7 x32 to support some older software. After installing Windows 7 x32 I noticed VMware tools is grayed out. I then tried to install VMware tools manually but it failed. There are a few tricks to overcome this issue and in this blog I’ll cover the steps I took to resolve.
So what changed and why all these extra steps?
You may recall that Workstation 16.0.0 could install Windows 7SP1 x32 without any additional intervention. Starting September 2019, Microsoft added SHA-2 algorithm requirements for driver signing. As Workstation 16 released updates it too included updated VMtools that were complaint with the Microsoft SHA-2 requirements. So if you deploy the Windows 7 SP1 x32 ISO (which doesn’t have the SHA-2 patch) the vmtools install will fail because it cannot validate the drivers. For a bit more information See VMware KB 78655.
What are options to fix this?
By default Windows 7×32 SP1 doesn’t include the needed SHA-2 updates. Users have 2 options when doing new installs.
Option 1: Create an updated Windows 7SP1 ISO by slip streaming in the Convenience Rollup Patch (More details here) and then use this slipstreamed ISO to do the install on Workstation. From there you should be able to install VMTools.
Option 2: After Windows 7 SP1 installation is complete, manually install the SHA-2 update, and then install VMtools. See steps below.
Steps for Option 2:
- First I created a new Workstation VM. When creating it I made sure the ISO path pointed to the Windows 7 SP1 ISO and Workstation adjusted the VM hardware to be compatible with Windows 7 SP1. I allowed the OS installation to complete.
- After the OS was installed I applied the following MS Patch.
- VMware Tools requires Windows 7 SP1 to have KB4474419 update installed, See https://kb.vmware.com/s/article/78708
- I downloaded this patch (2019-09 Security Update for Windows 7 for x86-based Systems (KB4474419)) directly to the newly create Windows 7 VM and installed it.
- Download TIP – To download this update, I needed to right click on the *.msu link > choose save link as > pushed the up arrow next to ‘Discard’ and choose ‘Keep’ > and saved it to a folder

- After the rebooted, I went into Workstation and did the following:
- Right clicked on the VM > Settings > CD/DVD
- Made sure ‘Devices status’ was check for connected and connect at power on
- Clicked on ‘Use ISO Image’ > Browse
- Browsed to this folder ‘C:\Program Files (x86)\VMware\VMware Workstation’
- Choose ‘windows.iso’
- Choose OK to closed the VM Settings
- Back in the Windows 7 VM I went into File Explorer opened up the CD and ran setup.exe
- From there I followed the default steps to install VM Tools and rebooted
- Screenshot of the final outcome


Using VMware Fusion for your VM Remote Console
These last few months I’ve been working to totally rebuild my Home Lab and I ran into a neat feature of Fusion. This blog article is a quick tip on using Fusion for your VM Remote console.
Issue – When you want to start a remote console to your VM’s typically you download and install VMRC (VMware Remote Console) service. Sometimes getting it to run can be a bit of a burden (Normally an OS issue).
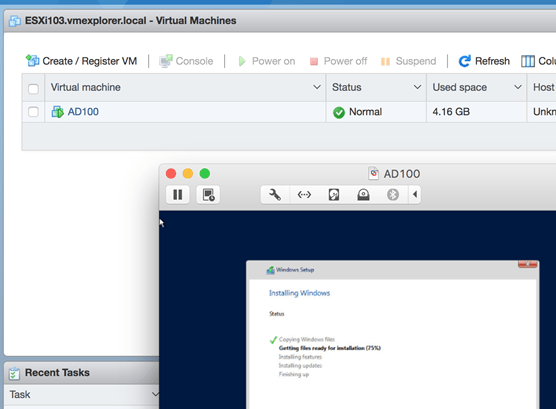
Observation – While on my MAC I was setting up a VM via the Web Host Client and I need to mount an ISO. When I right clicked on the VM I choose ‘Launch Remote Console’ vs. the normal ‘Download VMRC’

After clicking I was prompted to choose Fusion
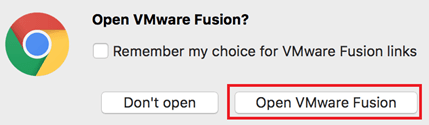
And there it was… a simple way to work with VM’s via Fusion! From there I mounted my ISO and started the rebuild of my home lab.
If you like my ‘no-nonsense’ blog articles that get straight to the point… then post a comment or let me know… Else, I’ll start writing boring blog content.
Fusion 8 Macintosh Keyboard Commands
I use a MAC Powerbook with VMware fusion on a daily basis. One item that I look for from time to time is how to translate “PC” style keypresses (Print Screen, Function keys, etc) from the MAC keyboard into the Windows OS.
I’ve located these great KB’s around working with the MAC Keyboard and Fusion
Tips on using a Macintosh keyboard (1001675)
Sending print screen commands to virtual machines running in VMware Fusion (1005335)
Fusion 8 — Using Mac Keyboards in a Virtual Machine
If you like my ‘no-nonsense’ blog articles that get straight to the point… then post a comment or let me know…
Else, I’ll start writing boring blog content.
Caching your Windows 8 / 10 Domain Credentials via VPN
I was setting up a fresh Windows 8 Fusion 6 VM last weekend and realized I needed to cache my home domain credentials. I was remote to my home office and the only way I could access the domain was via VPN.
With only the ability to logon locally and then launch the VPN I was prompted for my password and security keys multiple times a day – Not a fun experience. To fix this I really needed my domain user account credentials cached so that I could initially log on to Windows 8 without the VPN, and then launch the VPN connection after logon.
Here is how I solved this issue…
- Logged in with my local account
- Attached to the VPN
- Added my Windows 8 VM to the domain
- Added my domain account to a Local group
- Rebooted (Just adding my Win 8 VM to domain, doesn’t cache my credentials)
- Logged in with my local account
- Attached to the VPN
- Closed all Internet Explorer (IE) windows, held down CTRL+Shift, right click on IE, and finally choose ‘Run as Different User’ (PIC1)
- I typed in my domain user account/password and allowed IE to load << This should cache your credentials (PIC2)
- Close all windows, restart, and I was able to logon with my Domain Account
- Attached to the web based VPN and viola… all is working well
Pic 1 – hold down CTRL+Shift then right click on IE, and finally choose ‘Run as Different User’

PIC 2 – Enter your Credentials

Summary – Using ‘Run as Different User’ ensures you have a local account cached from the domain your attempting to log on to. Your experience may vary depending on your rights as a domain user and the security policies enforced in your domain.
** Update 12/18/2017**
Recently I tired this same process with Windows 10 and it worked like a charm!
