VMware Workstation Gen 9: Part 2 Using Workstation Templates
Workstation templates are a quick and easy way to create VMs with common settings. My nested VCF 9 ESX Hosts have some commonalities where they could benefit from template deployments. In this blog post I’ll show you how I use Workstation templates to quickly deploy these hosts and the hardware layout.
My nested ESX Hosts have a lot of settings. From RAM, CPU, DISK, and networking there are tons of clicks per host which is prone to mistakes. The LAN Segments as an example entail 8 clicks per network adapter. That’s 192 clicks to set up my 3 ESX hosts. Templates cover about 95% of all the settings, the only caveat is the disk deployment. Each host has a unique disk deployment which I cover below.
There are 2 things I do first before creating my VM templates. 1) I need to set up my VM folder Structure, and 2) Setup LAN Segments.
VM folder Structure
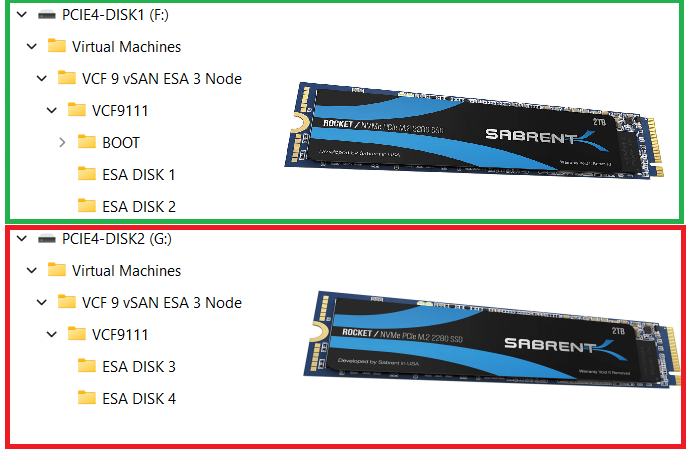
The 3 x Nested ESX hosts in my VCF 9 Cluster will be using vSAN ESA. These nested ESX Hosts will have 5 virtual NVMe disks (142GB Boot, and 4 x 860GB for vSAN). These virtual NVMe disks will be placed on to 2 physical 2TB NVMe Disks. At the physical Windows 11 layer I created folders for the 5 virtual NVMe disks on each Host. On physical disk 1 I create a BOOT, ESA DISK 1, and ESA DISK 2 folders. Then on physical disk 2 I created ESA DISK 3 and ESA DISK 4. By doing this I have found it keeps my VMs disks more organized and running efficiently. Later in this post we’ll create and position these disks into the folder.
Setup LAN Segments
Prior to creating a Workstation VM Template I need to create my LAN Segments. Workstation LAN Segments allow VLAN traffic to pass. VLANs are a requirement of VCF 9. Using any Workstation VM, choose a network adapter > LAN Segments > LAN Segments Button. The “Global LAN Segments” window appears, click on Add, name your LAN Segment, and OK when you are done.
For my use case I need to make 4 LAN Segments to support the network configuration for my VCF 9 deployment.

Pro-Tip: These are Global LAN Segments, which makes them universally available—once created, every VM can select and use them. Create these first before you create your ESX VM’s or Templates.
Create your ESX Workstation Template
To save time and create all my ESX hosts with similar settings I used a Workstation Template.
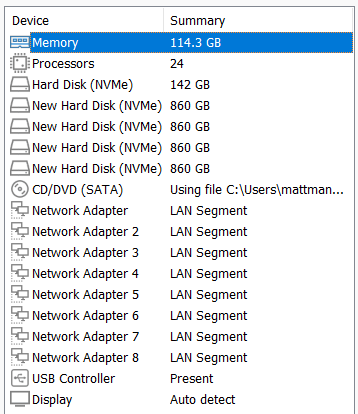
NOTE: The screenshot to the right it is the final configuration.
1) I created an ESX 9 VM in Workstation:
- Click on File > New Virtual Machine
- Chose Custom
- For Hardware I chose Workstation 25H2
- Chose my Installer disc (iso) for VCF 9
- Chose my directory and gave it a name of VCF9 ESX Template
- Chose 1 Processor with 24 Cores (Matches my underlying hardware)
- 117GB of RAM > Next
- Use NAT on the networking > Next
- Paravirtualized SCSI > Next
- NVMe for the Disk type > Next
- Create a new Virtual Disk > Next
- 142GB for Disk Size > Store as a Single File > Next
- Confirm the correct Directory > Next
- Click on the Customize Hardware button
- Add in 8 NICs > Close
- Make sure Power on this VM after creation is NOT checked > Finish
- Go back in to VM Settings and align your Network adapters to your LAN Segments
- NIC 0 and 2 > 10 VLAN Management
- NIC 3 and 4 > 11 VLAN ESA Network
- NIC 5 and 6 > 12 VLAM FT vMo RPL
- NIC 7 and 8 > 13 VLAN VM Network

Note: You might have noticed we didn’t add the vSAN disks in this deployment, we’ll create them manually below.
2) Next we’ll turn this VM into a Template
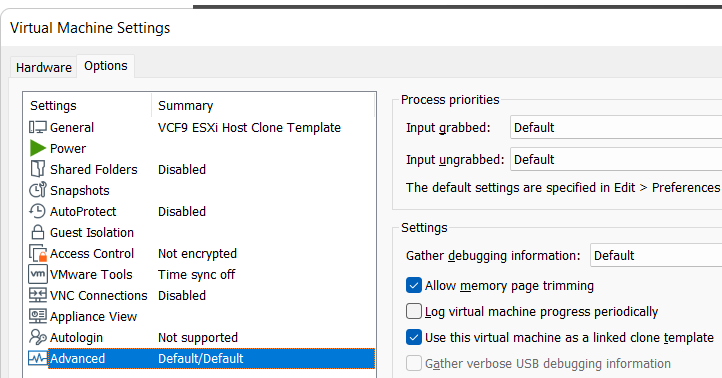
Go to VM Settings > Options > Advanced > Check Box “Use this virtual machine as a linked clone template” and click on ok.
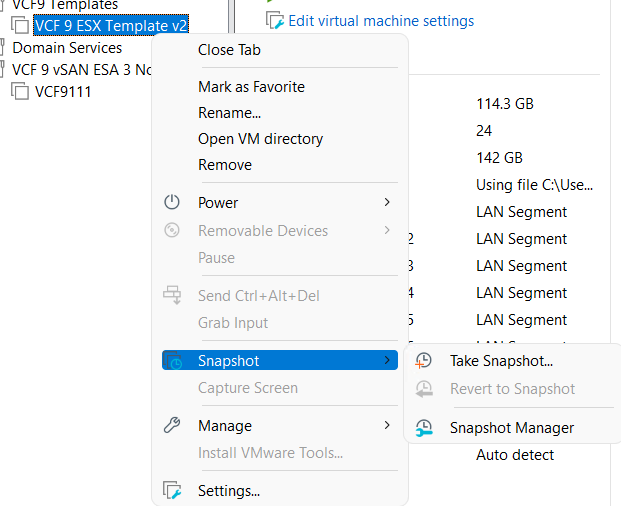
Next, make a snapshot of the VM. Right click on VM > chose Snapshot > Take Snapshot. In the description I put in “Initial hardware configuration.”
Deploy the ESX Template
I’ll need to create 3 ESX Hosts base off of the ESX template. I’ll use my template to create these VM’s, and then I’ll add in their unique hard drives.
Right click on the ESX Template > Manage > Clone
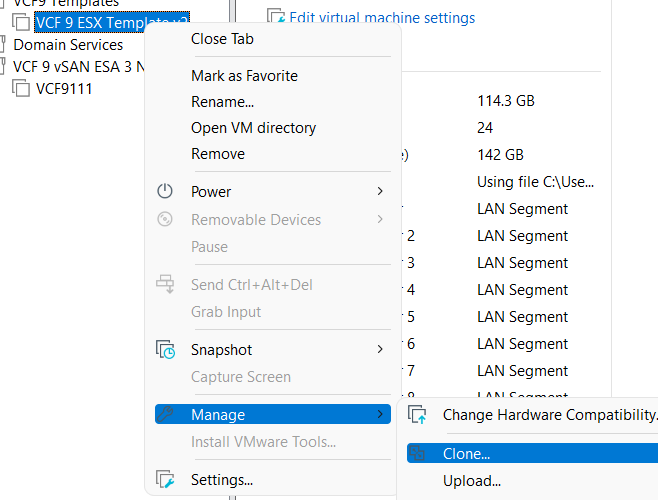
Click Next > Choose “The current state of the VM” > Choose “Create a full clone”
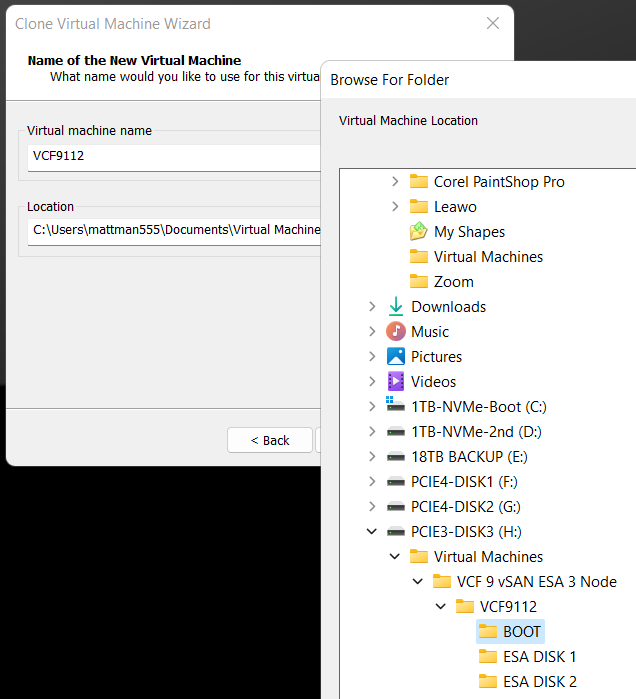
Input a name for the VM
MOST Important – Make sure you select the correct disk and folder you want the boot disk to be deployed to. In the Fig-1 below, I’m deploying my second ESX host boot disk so I chose its BOOT folder.
Click on finish > The VM is created > click on close
(Fig-1)
Adding the vSAN Disks
Since we are using unique vSAN disk folders and locations we need to add our disks manually.
For each nested ESX host I right click on the VM > Settings
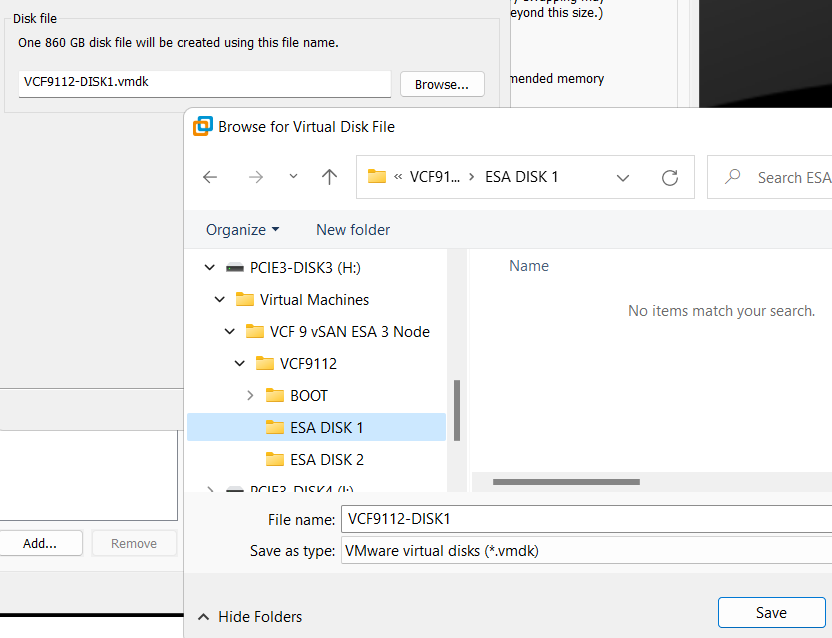
Click on Add > chose Hard disk > Next > NVMe > Create New Virtual Disk
Type in the size (860GB) > Store as a single file > Next
Rename the disk filename to reflect the nested vSAN ESA disk number
Choose the correct folder > Save
Repeat for the next 3 disks, placing each one in the correct folder
When I’m done I created 4 x 860GB disks for each host, all as single files, and all in unique folders and designated physical disks.
(Fig-2, below) I’m creating the first vSAN ESA disk named VCF9112-DISK1.vmdk
That’s it!
Workstation Templates save me a bunch of time when creating these 3 ESX Hosts. Next we’ll cover Windows Core Services and Routing.

February 3, 2026 at 2:05 pm
[…] I create a simple VM and add in all the VLAN Segments. For more information on this process, see my post under LAN […]
LikeLike
March 2, 2026 at 2:49 pm
[…] I add in one VM and then recreate all the VLAN Segments. For more information on this process, see my post under LAN […]
LikeLike