Month: July 2010
VMware vExpert 2010
The other day I was selected as a VMware vExpert for 2010. John Troyer (of VMWARE) is building a great community of vExperts with like minded individuals that are proponents of virtualization evangelism. On another note I nominated my entire Phoenix VMUG Team (Luke, Rob, Duke, and Charles) for the award and they all were excepted ! Congrats Guys, you have earned it.
For those of you that do not know, the VMware vExpert program was created in 2009 to show appreciation for those individuals who have significantly contributed to the community of VMware users over the past year. For more information on the program visit the vExpert site
HP c7000 Mid-Plane Replacement
If you’re reading this blog, I’m hoping you never have to do this procedure. However the other day we had a c7000 Mid-plane go out.
We first noticed some odd issues with Ethernet NICs randomly disconnecting. Then, our chassis started to fail entire Ethernet pass through modules, it came back online and then a few weeks later just one Ethernet port stayed in a failed state. Working with HP and our local VAR we tried all the troubleshooting steps and found it was the mid-plane had failed.
This blog post is merely my notes and some of my findings during the replacement of the mid-plane. I worked with an HP certified technician and he had a punch list from HP to complete this repair. I recommend a certified technician do the repair as you never know what you’re going to run into and we did run into a few gotchas that stumped us all.
Quick Disclaimer – This is not a guide for repairing this device but merely my notes…
First thing – The Plan:
- 7:00 Migrate VM’s to BC2 (BC = blade chassis) and shut down ESX hosts on BC1
- 8:00 Shutdown remaining blades in BC1
- 8:20 Start Repair on BC1
- 8:40 Test repair on BC1
- 8:50 bring up Blades on BC1
- 9:00 TEST applications
- 9:10 Migrate VM’s from BC2 to BC1
- 10:00 Finish
The Plan with Notes:
7:00 Migrate VM’s to BC2 (BC = blade chassis) and shut down ESX hosts in BC1
- No issues, vMotion worked without issues & shutdown 6 ESX hosts via vCenter Server
8:00 Shutdown remaining blades in BC1
- No issues, shut down blade servers
8:20 Start Repair on BC1
Power down the c7000 chassis, remove all the cards, power supplies and blades
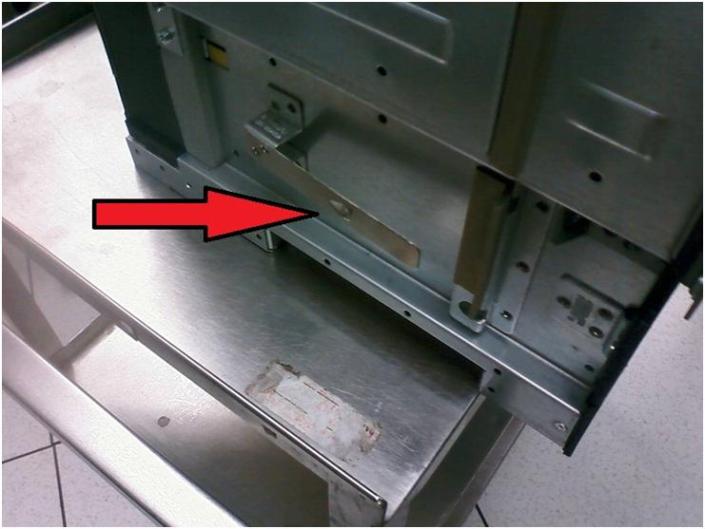
This is a pic where we removed the rear cards. One thing we were able to do was remove the Ethernet & Fibre Pass through cards without having to disconnect the cables.
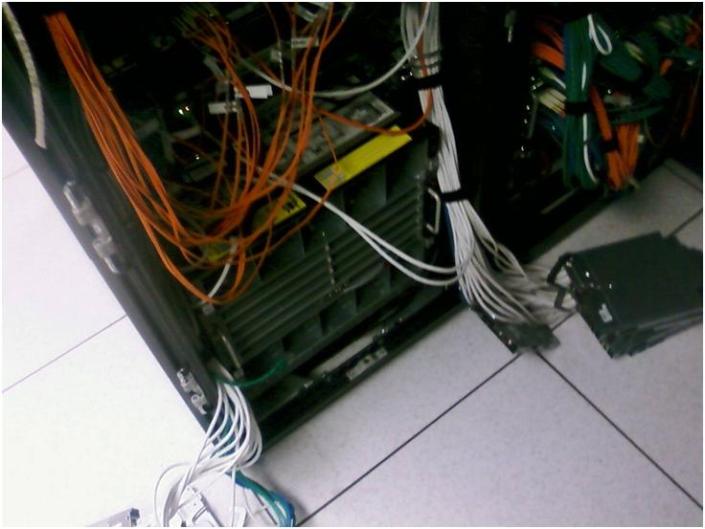
Second shot of the removal
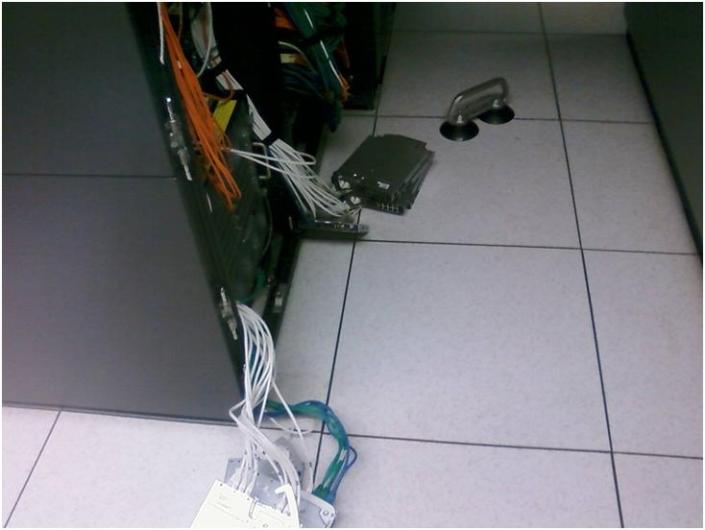
Remove the blades and Power supplies
To remove the mid-plane there were four bolts holding in it in place. We removed them and then pull it till it stops. The retaining clips needed depressed to allow the unit to be removed and we pressed them in and it removed with ease. Note: The manual fails to mention this.
Here is a shot of the retaining clips. They help to hold the mid-plane in. At first we could not figure out why the mid-place would not come out. This held us up a bit as the instructions failed to mention depressing them to allow the mid-plane removal.
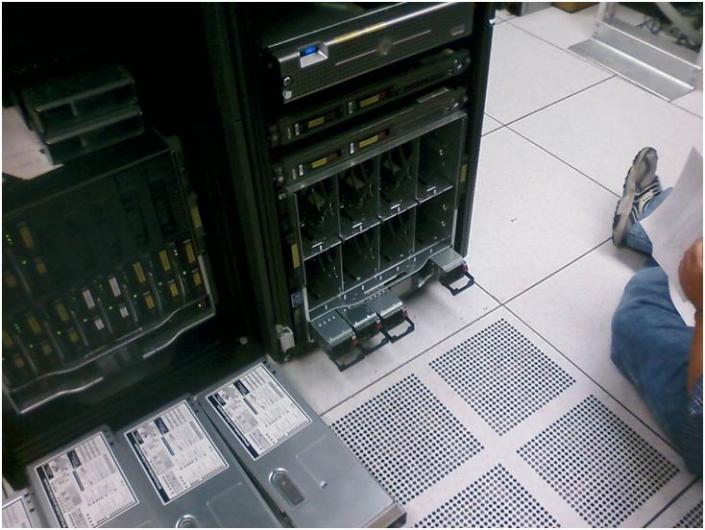
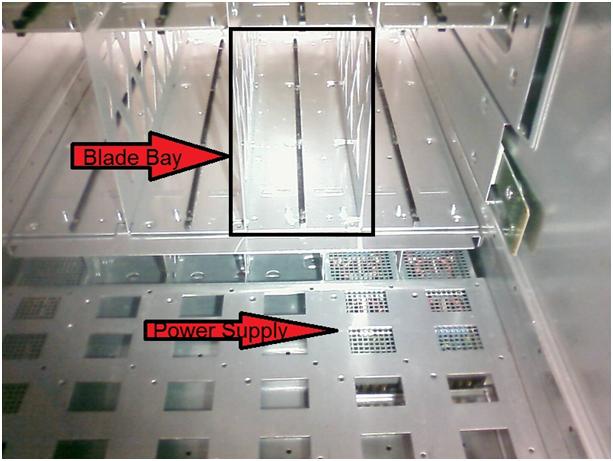
Inside the blade chassis – Rear
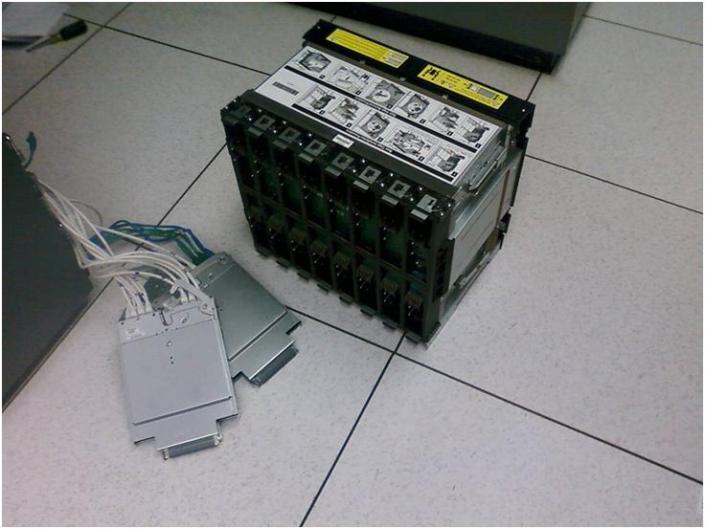
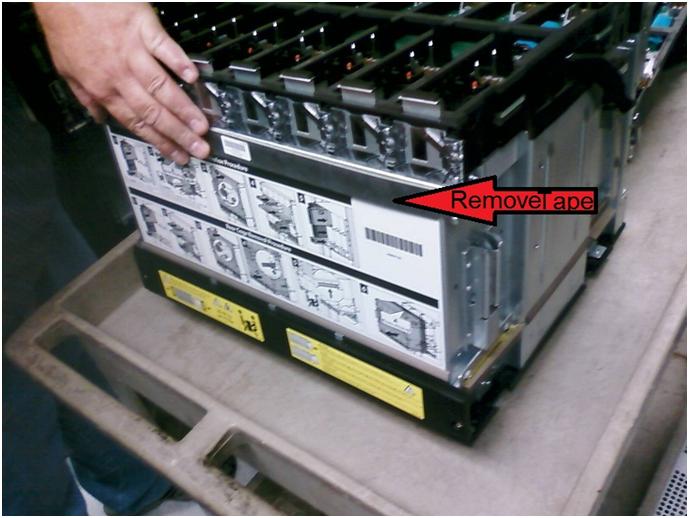
After removing the mid-plane chassis there are several bolts that hold in this together. One item you have to do is remove the foam tape in the screen shot below.
This will allow you to separate the mid-plane board from the chassis. This was another gotcha that the instructions failed to mention this step.
Our package came with replacement tape, yours may vary.
After replacing the mid-plane board we reassemble the chassis in this order..
- Reinserted the Mid-Plane chassis
- ilo Control Modules
- Power Supplies
- Powered on device, wait
- Inserted pass though modules, wait
- Inserted Blades and powered them on
9:00 Ensure the Blades on BC1 are reporting in
-
No issues, everything is now working!
9:15 TEST applications
-
No issues, all blades and apps came right up
9:30 Migrate VM’s from BC2 to BC1
- No Issues, all VM’s migrated perfectly
10:00 Finish
Gotchas / Notes
2 Items slowed us down
- The retaining clips on the lower right and left hand sides were not noted in the documentation. We had lots of cables on the left and right side so it made it hard to clearly see where they were.
- The tape holding on the mid-plane board wasn’t documented. It took us a bit to figure out that a simple piece of foam tape could hold together, but it did.
Next time I mount a c7000 chassis I’ll remember to mount it about 4U from the base of a rack. The issue we were having was the cabling and PDU power cords were getting in the way of the mid-plane and this made it harder to remove.
Other than these minor issues, the repair went smooth, and it was fun to see the “guts” of a c7000.
Home Lab – Workstation 7 to 7.1 Upgrade
I upgraded my Home Lab from Workstation 7.0 to 7.1 tonight..
More info on my home lab here…
http://vmexplorer.blogspot.com/2010/02/home-lab-install-of-esx-35-and-40-on.html
Upgrade Steps I took…
- First step was to uninstall Workstation 7, then install 7.1
- Note: The install will do this automatically if needed
- Once the uninstall is completed a reboot is necessary
- After the reboot I noticed Windows 7 reconfigure the Network adapters
- Note.. At this point if you need to adjust your local subnets now might be a good time, once you install 7.1 it will reconfigure all the vmnets around this.
- The install of Workstation 7.1 is pretty simple, Choose Custom and Next a few times and one reboot
- After the reboot Windows 7 finds the new network adapters, and it was all done..
What I noticed after the upgrade..
- WS7.1 launched with out issues, it didn’t require me to input my serial number again, and it came right up.
- I opened up the Virtual Network Editor, and it took about a minute to assign subnets to the 8 difference vmnets. (This is something I should have documented better, as I don’t recall all the subnets. However I did have 2 documented)
- When I powered on my good old XP VM, locally Windows 7 noticed this as needing an USB updated driver, it quickly went to the update site and downloaded the driver, no issue. In the XP VM I updated the vmware tools, rebooted, and it worked normally
- One new thing was the vmtools ICON now is grey and white
- I powered up my ESX test environment..
- 1st my vCenter Server is connected to VMnet0 in Auto-Bridged mode
- On Power up I noticed my vm had been switched from a static ip to DHCP
- I correct this by entereing its static IP and it functioned normally
- 2nd I powered up my ESX 3.5 host
- It booted fine and attached itself to the vCenter server without issue
- 3rd I powered up my ESX 4.0 host
- It booted fine and attached itself to the vCenter server without issue
Final thoughts…
This upgrade was a good warm up for the next Workstation upgrade that I need to do.
This environment was pretty simple, nothing very complex, and pretty much went smoothly.
I think the best rule of thumb is before you upgrade know and document your lab then upgrade.
My home lab was partially documented it would have went smoother if it was fully documented.
Next up… Update of a more complex WS lab with an IOMega iSCSI NAS and multiple subnets…
I’ll post up how it goes…
Here’s whats new with WS7.1… I got this from VMware site…
http://www.vmware.com/support/ws71/doc/releasenotes_ws71.html#whatsnew
What’s New
This release of VMware Workstation adds the following new features and support:
•New Support for 32-Bit and 64-Bit Operating Systems
•New Features in VMware Workstation
New Support for 32-Bit and 64-Bit Operating Systems
This release provides support for the following host and guest operating systems:
Operating System Host and Guest Support
Ubuntu 8.04.4 Host and guest
Ubuntu 10.04 Host and guest
OpenSUSE 11.2 Host and guest
Red Hat Enterprise Linux 5.5 Host and guest
Fedora 12 Guest
Debian 5.0.4 Guest
Mandriva 2009.1 Guest
New Features in VMware Workstation
•OpenGL 2.1 Support for Windows 7 and Windows Vista Guests — Improves the ability to run graphics-based applications in virtual machines.
•Improved Graphics Performance — Enhanced performance with better benchmarks, frame rates, and improved rendering on Windows 7 and Windows Vista guests allows you to run various graphics-based applications. In addition, major improvements in video playback enable you to play high-resolution videos in virtual machines.
•Automatic Software Updates — Download and install VMware Tools and receive maintenance updates when available.
•Direct Launch — Drag guest applications from the Unity start menu directly onto the host desktop. Double-click the shortcut to open the guest application. The shortcut remains on the desktop after you exit Unity and close VMware Workstation.
•Autologon — Save your login credentials and bypass the login dialog box when you power on a Windows guest. Use this feature if you restart the guest frequently and want to avoid entering your login credentials. You can enable Autologon and use direct launch to open guest applications from the host.
•OVF 1.1 Support — Import or export virtual machines and vApps to upload them to VMware vSphere or VMware vCloud. The VMware OVF Tool is a command-line utility bundled in the VMware Workstation installer. Use this tool along with VMware Workstation to convert VMware .vmx files to .ovf format or vice versa. VMware recommends that you use the OVF command-line utility. For more information, see the OVF Web site and OVF Tool User Guide.
•Eight-Way SMP Support — Create and run virtual machines with a total of up to eight-processor cores.
•2TB Virtual Disk Support — Maximum virtual disks and raw disks size increased from 950GB to 2TB.
•Encryption Enhancements — VMware Workstation includes support for Intel’s Advanced Encryption Standard instruction set (AES-NI) to improve performance while encrypting and decrypting virtual machines and faster run-time access to encrypted virtual machines on new processors.
•Memory Management — User interface enhancements have simplified the handling of increased virtual memory capacity.
•User Experience Improvement Program — Help VMware improve future versions of the product by participating in the User Experience Improvement Program. Participation in the program is voluntary and you can opt out at any time. When you participate in the User Experience Improvement Program, your computer sends anonymous information to VMware, which may include product configuration; usage and performance data, virtual machine configuration; usage and performance data, and information about your host system specifications and configuration.
The User Experience Improvement Program does not collect any personal data, such as your name, address, telephone number, or email address that can be used to identify or contact you. No user identifiable data such as the product license key or MAC address are sent to VMware. VMware does not store your IP address with the data that is collected.
For more information about the User Experience Improvement Program, click the Learn More link during installation or from the VMware Workstation Preferences menu.
vSphere Hot Memory Add
I was playing around with vSphere Hot memory add with ESX 4 U1 on a Windows 2008 ETP x64 VM.
I was simple to configure and could be a quick upgrade…
- In vCenter Server Shutdown the VM
- Right Click > Edit Settings > Options > Under Advanced Choose Memory/CPU Hotplug
-
Enable Memory Hot Add and CPU Hot Plug
- Power on your VM, Go to the Consol for this VM, Wait for it to boot, logon
- I noticed mine had a pop up that it added a snap-in
-
In vCenter Server Right click on the VM, Edit Settings, click on Memory and add the memory you wish..
(Notice you can’t go down only up… You’ll need to power down to do this)
Notes…
I noticed after clicking OK, my vm console screen went blank for about 10 seconds and then it came back.
When it did I had the upgraded memory and all was well.
Here’s a great post with more information…
http://www.boche.net/blog/index.php/2009/05/10/vsphere-memory-hot-add-cpu-hot-plug/
