VMware Workstation Gen 9: BOM2 P1 Motherboard upgrade
To take the next step in deploying my nested VCF 9 and adding VCF Automation, I’m going to need to make some updates to my Workstation Home Lab. BOM1 simply doesn’t have enough RAM, and I’m a bit concerned about VCF Automation being CPU/Core demanding. In this blog post I’ll cover some of the products I chose for BOM2.
Note: There really isn’t a playbook or documentation for what I am attempting to do with Workstation, VCF 9, and BOM2. I’m pushing it beyond it limits and it’s going to be a bit of hit or miss. Fair Warning — As I move forward everything I post is subject to be changed, updated, or corrected.
A bit of Background
It should be noted, my ASRock Rack motherboard (BOM1) was performing well with nested VCF9. However, it was constrained by its available memory slots plus only supported one CPU. I considered upgrading to higher-capacity DIMMs; however, the cost was prohibitive. Ultimately, replacing the motherboard proved to be a more cost-effective solution, allowing me to leverage the memory and CPU I already owned.
Initially, I chose the Gigabyte Gigabyte MD71-HB0. At the time it was rather affordable but it lacked PCIe bifurcation. Bifurcation is a feature I needed to support the dual NVMe disks into one PCIe slot. To overcome this I chose the RIITOP M.2 NVMe SSD to PCI-e 3.1 These cards essentially emulate a bifurcated PCIe slot but added additional expense to the solution. Though I was able to get my nested VCF environment up and running, it was short lived due to a physical fault. I was able to return it but to buy it again the cost doubled so I went a different direction. If you are interested in my write up about the Gigabyte mobo click here, but do know I am not longer using it.
My Motherboard choice for BOM2
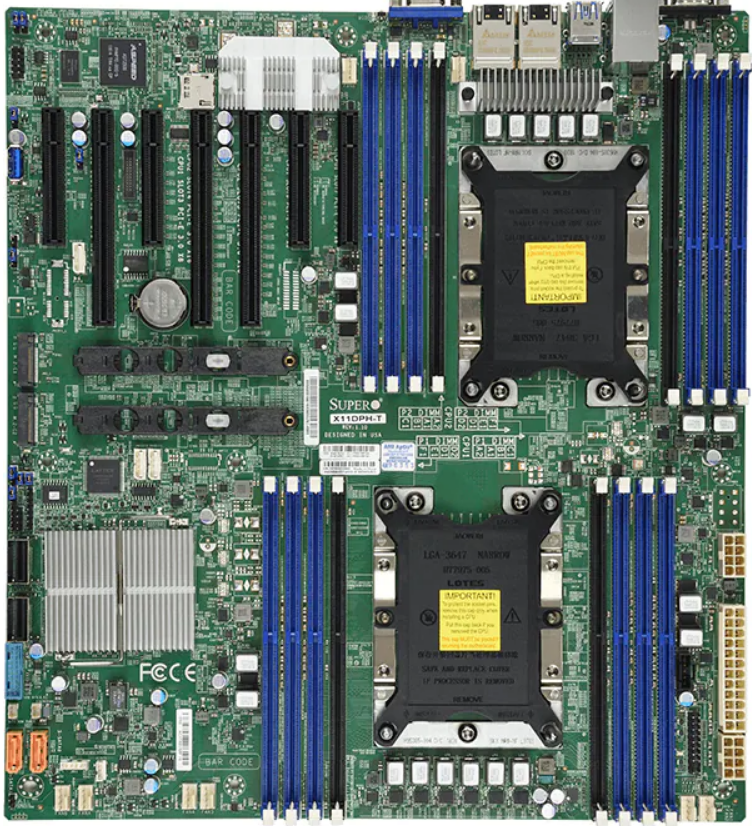
I started looking for a motherboard that would fit my needs. Some of the features I was looking for was: support dual Gold 6252 CPUs, support existing 32/64GB RAM modules, adequate PCIe slots, will it fit in my case, what are its power needs, and support for bifurcation. The motherboard I chose was the SuperMicro X11DPH-T. Buying it refurbished was a way to keep the cost down and meet my needs.
The migration from BOM1 to BOM2
The diagram and table below outline the changes planned from BOM1 to BOM2. There were minimal unused products from the original configuration. After adding some new items and migrating components, the updated build will provide more than sufficient resources to meet my VCF 9 compute/RAM requirements.
In the diagram below, I have added a yellow and grey sections. Grey indicates my deployment with BOM1 and yellow indicates what intend to do with BOM2. Due to max RAM limitation of 128GB per nested ESX VM, I will be adding a 4th virtual host to my configuration. Additionally, to support this 4th host I’ll also be adding 4 x 1TB NVMe disks.
Pro Tip: When assembling new hardware, I take a methodical, incremental approach. I install and validate one component at a time, which makes troubleshooting far easier if an issue arises. I typically start with the CPUs and a minimal amount of RAM, then scale up to the full memory configuration, followed by the video card, add-in cards, and then storage. It’s a practical application of the old adage: don’t bite off more than you can chew—or in this case, compute.
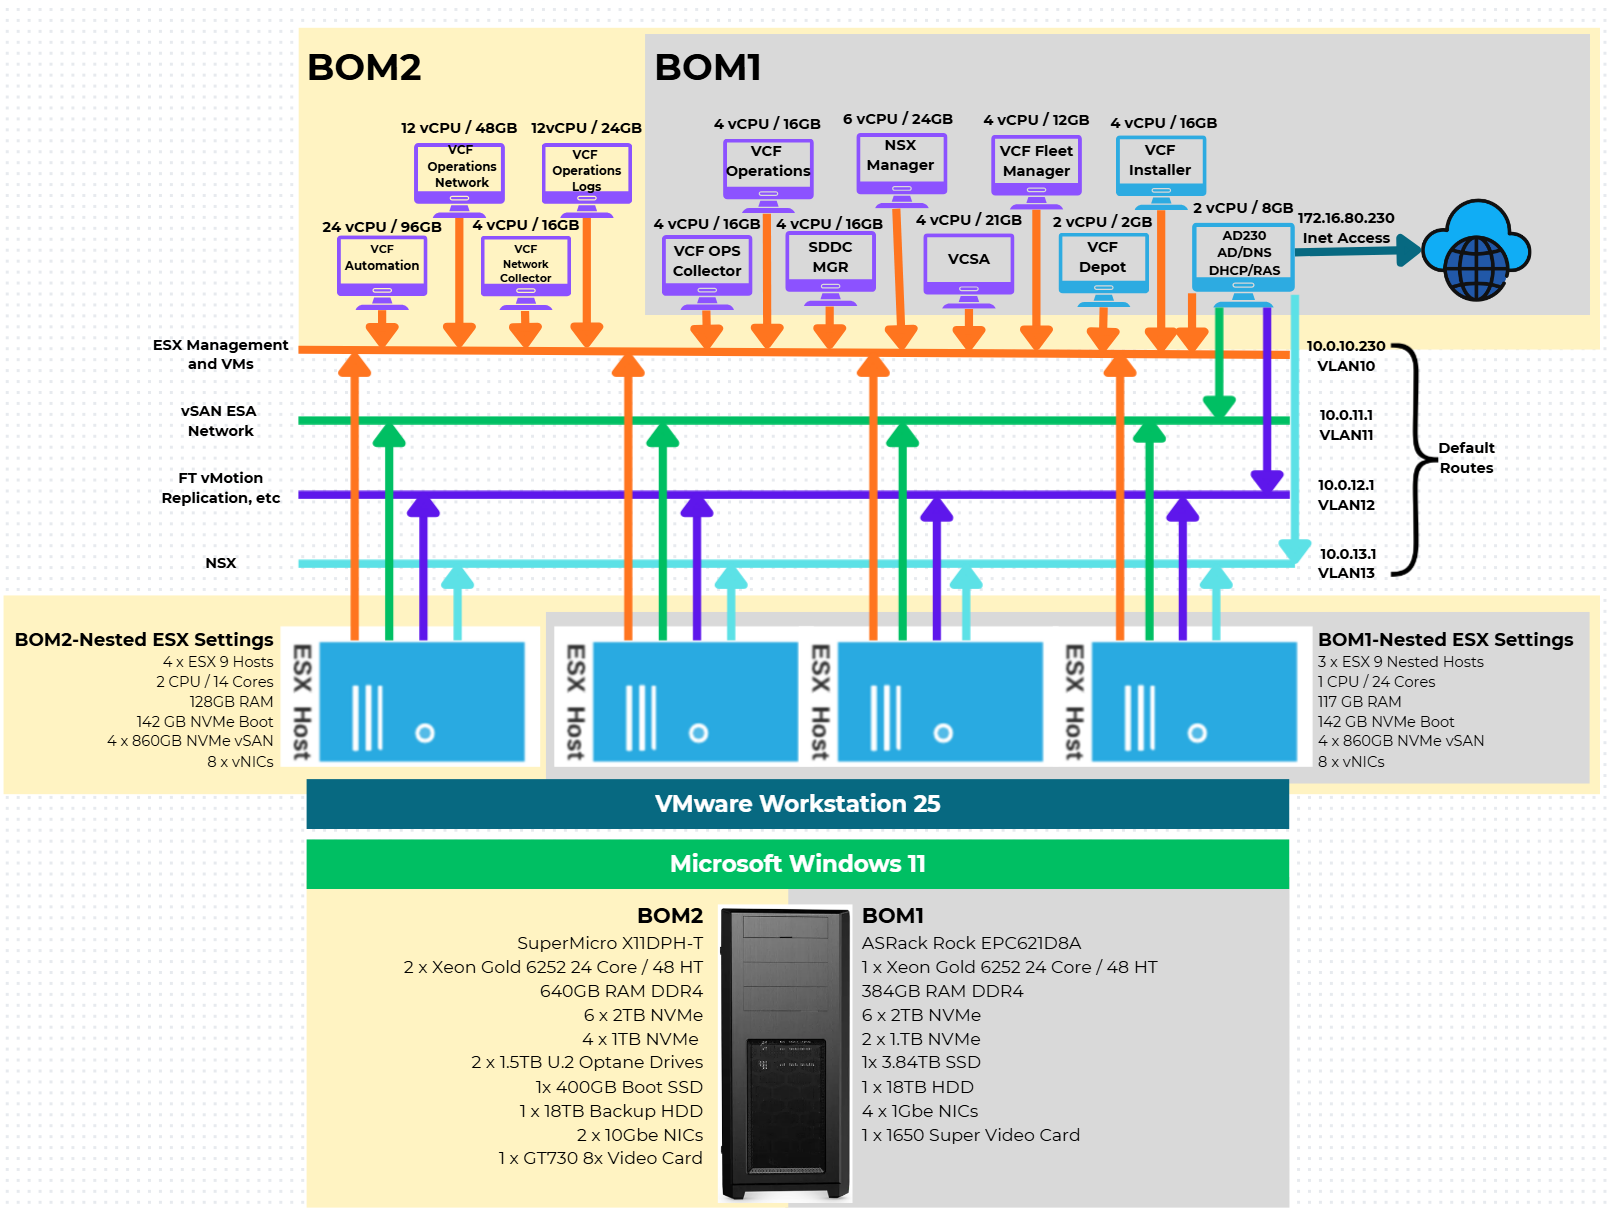
| BOM2 | UNUSED From BOM1 |
| Mobo: SuperMicro X11DPH-T | Mobo: ASRack Rock EPC621D8A |
| CPU: 2 x Xeon Gold ES 6252 New net total 48 pCores | CPU: 1 x Xeon Gold ES 6252 (ES means Engineering Samples) |
| Cooler: 2 x Noctua NH-D9 DX-3647 4U | 10Gbe NIC: ASUS XG-C100C 10G Network Adapter |
| RAM: New net total 640GB 4 x 64GB Samsung M393A8G40MB2-CVFBY 12 x 32GB Micron MTA36ASF4G72PZ-2G9E2 | Video Card: GIGABYTE GeForce GTX 1650 SUPER |
| NVMe: 6 x Sabrent 2TB ROCKET NVMe PCIe (Workstation VMs) | |
| NVMe Adapter: 3 x Supermicro PCI-E Add-On Card for up to two NVMe SSDs | |
| NVMe: 4 x 1TB NVMe | |
| NVMe Adapter: 1 x ENLabs 4 Slot x16 | |
| Video Card: PNY GeForce GT 730 | |
| HDD: 1 x Seagate IronWolf Pro 18TB | |
| Disk Cables: 2 x Mini SAS to 4 SATA Cable, 36 Pin SFF 8087 | |
| Boot/Extra Disk: 2 x Optane 4800x 1.5GB Disk | |
| 2 x PCIe 4x to U.2 NVMe Adapter | |
| Case: Phanteks Enthoo Pro series PH-ES614PC_BK Black Steel | |
| Power Supply: MAG A1000GL 1000 Watt |
Nosie and Power
I commonly get asked “How is the noise and power consumption on this build?”. Fan noise is whisper quiet. It’s one of the reasons I choose to do a DIY build over buying a server. The Phanteck Enthoo case fans and the Noctua fans do a great job keeping the noise levels down. They may spin up from time to time but its nothing compared to the noise a server chassis might make. For power I’m seeing it nominally at ~135 Watts. However, I haven’t spun up my workloads so this may increase.
Uniqueness with the SuperMicro X11DPH-T
Issue 1 – Xeon Gold 6252 Engineering Samples (ES) issues with RAM
I had to switch from ES CPUs to GA released CPUs. The good news was the Xeon Gold 6252 is at an all time low. The ES CPUs had issues with memory timing. When using an ES CPU it’s sometimes hard to pinpoint why they were failing but once I replaced them the following errors went away. At this point with the cost being so low for an actual GA CPUs I will avoid using ES CPUs for this build.
- Memory training failure. – Assertion
- Failing DIMM: DIMM location (Uncorrectable memory component found). (P2-DIMME1) – Assertion
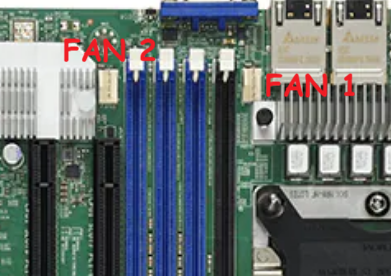
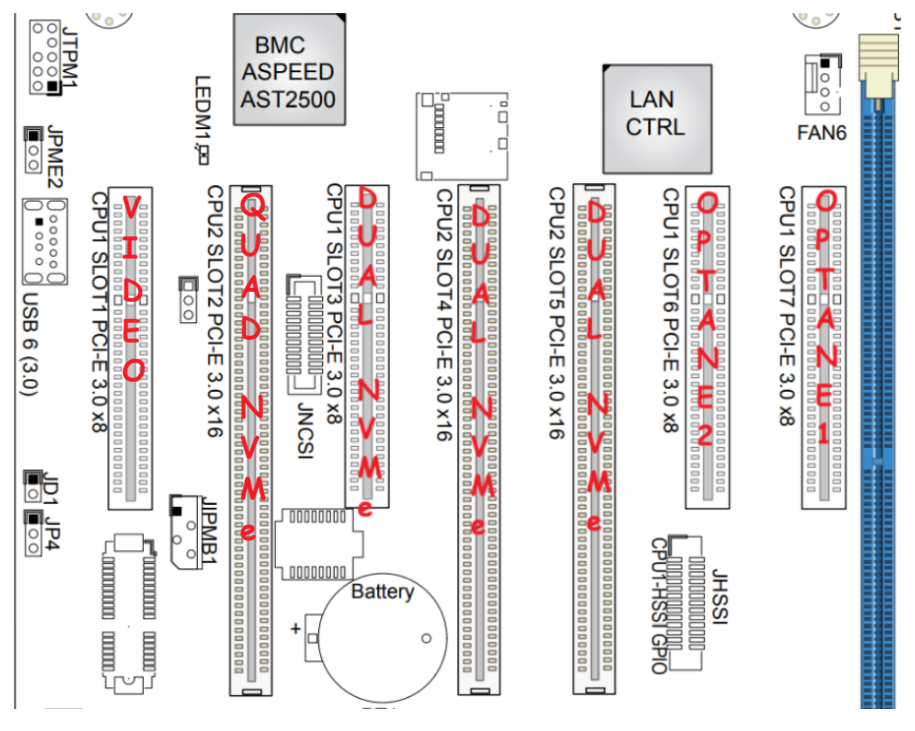
Issue 2 – Fan header blocked by PCIe slot.
The 2nd CPU fan header is blocked if a PCIe Card is in this slot. I can only assume they had no other choice, but putting it here?
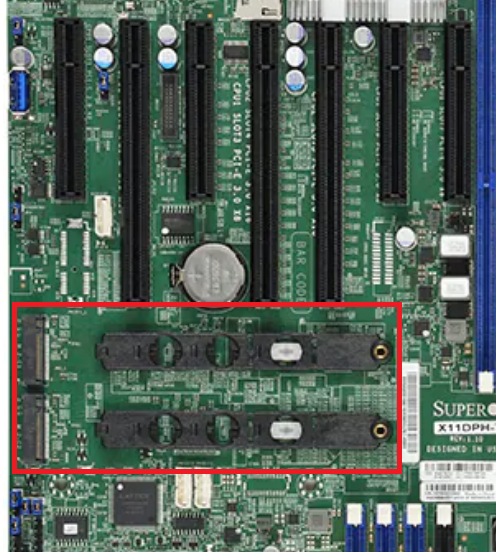
Issue 3 – NVMe placement
The NVMe slots are placed directly behind most of the PCIe slots, and they are at the same level as the PCIe slot. This blocks the insertion of any long PCIe cards. So if you want to put in a long GPU/Video card you’ll need to not use the onboard NVMe.
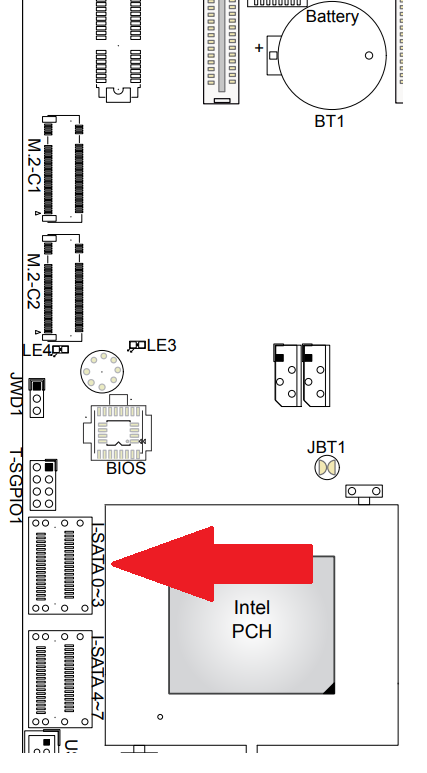
Issue 4 – Blocked I-SATA Ports
The edge connectors for the I-SATA ports can become blocked if you are using a long (225mm or greater) PCIe card.
PCIe Slot Placement:
For the best disk performance, PCIe Slot placement is really important. The best way to layout your PCIe devices is to look at a System Block Diagram (Fig-1). A good diagram will give you all types of information that you can use to optimize your deployment. Things I look for are the PCIe slots, how fast they are, which CPU are they attached to, are they shared with other devices and how the data will flow. I didn’t want all of my NVMe disks on the same CPU but I didn’t have much choice as I had to fully populate all PCIe slots.
Fig-1
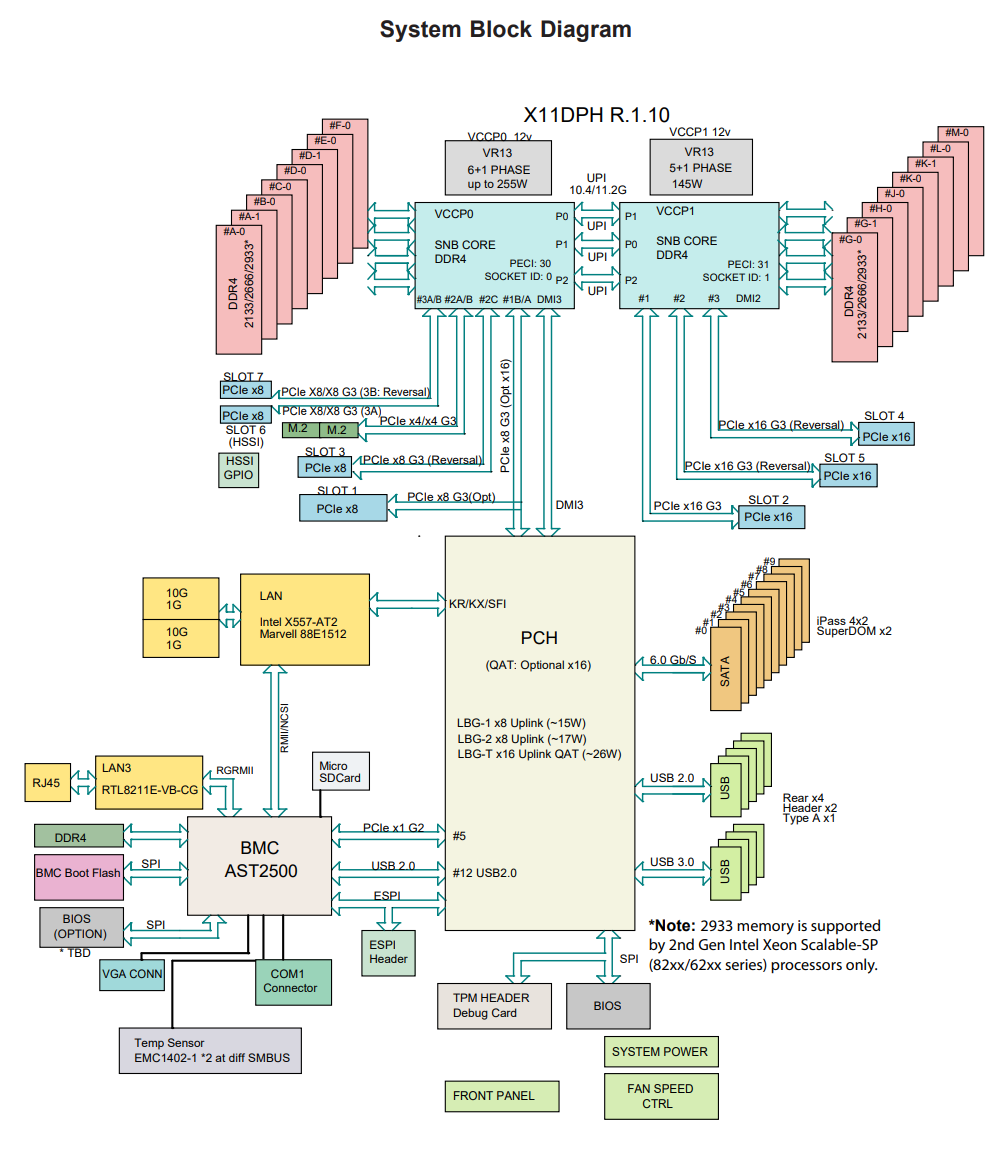
Using Fig-1, here is how I laid out my devices.
- Slot 7-6 Optane 1.5Gb Disk, used for boot and VMs
- Slot 5, 4, and 3 Dual NVMe adapter with 2 NVMe disks each
- Slot 2 Quad NVMe adapter with 4 NVMe disks
- Slot 1 Video Card
- I-SATA ports for SATA drives (18TB HDD Backup, 400 GB SSD Boot disk)
Other Thoughts:
- I did look for other mobos, workstations, and servers but most were really expensive. The upgrades I had to choose from were a bit constrained due to the products I had on hand (DDR4 RAM and the Xeon 6252 LGA-3647 CPUs). This narrowed what I could select from.
- The SuperMicro motherboard requires 2 CPUs if you want to use all the PCIe slots.
Now starts the fun, in the next posts I’ll finalize the install of Windows 11/Workstation, tune its performance, and get my VCF 9 Workstation VMs operational.

March 2, 2026 at 10:19 am
[…] and speed are aligned to the device specifications. I use the System Block Diagram from my last post to ID the CPU, then the CPU port number, which leads me to the PCIe slot number. From there I can […]
LikeLike